Bambu Lab X1C/P1P/P1S Auto Ejection Hardware Installation Guide
-
Set Printer to Automated Mode: Please follow the instructions here to set your printer to automated mode.
-
Set to Developer Mode: Ensure your printer is set to Developer Mode. Instructions.
1.0 What You’ll Need
- Bambu Lab X1 or P1 series 3D printer.
- Auto Ejection Ramp (Included in Bambu Lab Auto Ejection Kit).
- 3DQue Tape.
- A Print Farm Hub or Raspberry Pi 4 (2GB+) with AutoFarm3D installed.
2.0 Bambu Lab Auto Ejection Guidelines
2.1 Slicing Requirements
Slicer Version
Please use Bambu Studio version 1.9.0.17 or newer.
Alternatively, you can use OrcaSlicer version 2.0.0 or newer.
Model Placement
Auto ejection is designed to work best with one part at a time in the center-front of the bed. If you print multiple parts in a batch, they may fail to exit the print area properly. The first ejection sweep happens at the center of the bed, so if your part is off-center, it may not be ejected properly. When doing part layouts, consider if it will get caught somewhere before exiting the front of the printer.
Settings and Profiles
As a general rule of thumb, printing on VAAPR requires a ~10°C hotter bed and nozzle temperature than you would normally use for a Smooth PEI Sheet.
The VAAPR bed requires no adhesives, and no cleaning between prints.
- Make sure you are slicing all models with the “Smooth PEI Plate / High Temp Plate” setting in Bambu Studio.
- Disable the layer fan for the first 3 layers.
- Make sure the AMS slots in your slicer correspond correctly to the order in which colours are loaded on the Bambu.
- Keep the start and end gcode as it is. AutoFarm3D is built to work with the default bambu gcode and will automatically process your files for automated removal.
Removing Purge Lines
The P1 and X1 series purge lines at the front of the bed are too thin to be ejected. If you would like to remove them, please import the provided profiles below. Alternatively, you can intersect them with the part you’re printing so they get removed together.
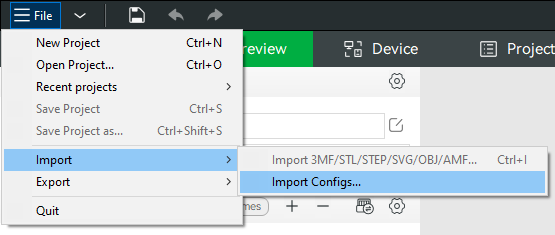
To import the profile in Bambu Studio or OrcaSlicer, go to File > Import > Import Configs...
Once you have imported the profile, make sure you have it selected before slicing new objects.

Exporting Files
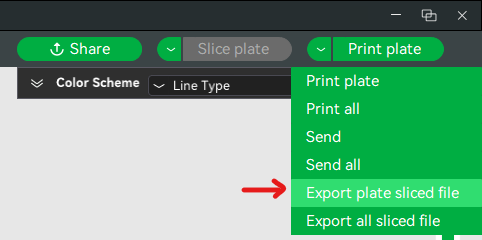
When exporting a file from OrcaSlicer or Bambu Studio, export the object as a “Plate Sliced File”. This will output a file with the extension .gcode.3mf. Bambu Printers reject all other types of file (regular .gcode, .3mf projects).
2.2 Dimensional Limits
Auto Ejection on the P1 and X1 series printers reduces the usable print volume. The following are the maximum dimensions for parts that can be auto ejected:
X Limits: 0-256mm (unchanged)
No dimensional restrictions on the X axis.
Y Limits: 0-200mm
The rear section of the bed needs about 50mm of clearance so that the hotend can move behind the part to eject it.
Z Limits: 5-200mm
For proper removal, parts cannot be too short or too tall. If you send a part outside of these dimensions, it must be printed in Manual mode.
2.3 Printing Environment
Make sure the area around the printer is clear, and there is nothing inside the printer blocking any motion components.
2.4 Initial Testing
Watch the first ejection (set an alarm, etc.) and be prepared to turn the printer off if anything goes wrong during the removal process.
3.0 Install Auto Ejection Hardware
Please ensure you have installed the VAAPR print surface prior to following these steps.
3.1 Remove the Doors
Please skip this step if you have a P1P with no doors.
We do not recommend leaving the doors on if you are using auto part ejection. If you need to leave them on, please ensure they remain open during printing and be aware that there is always the risk they may get in the way during part ejection.
The doors your printer will need to be removed for auto ejection to work properly, as there is no way to open the doors automatically.
To remove the doors, unscrew the 4 screws holding the door onto the hinges, then lift the door off the hinges and set it aside.
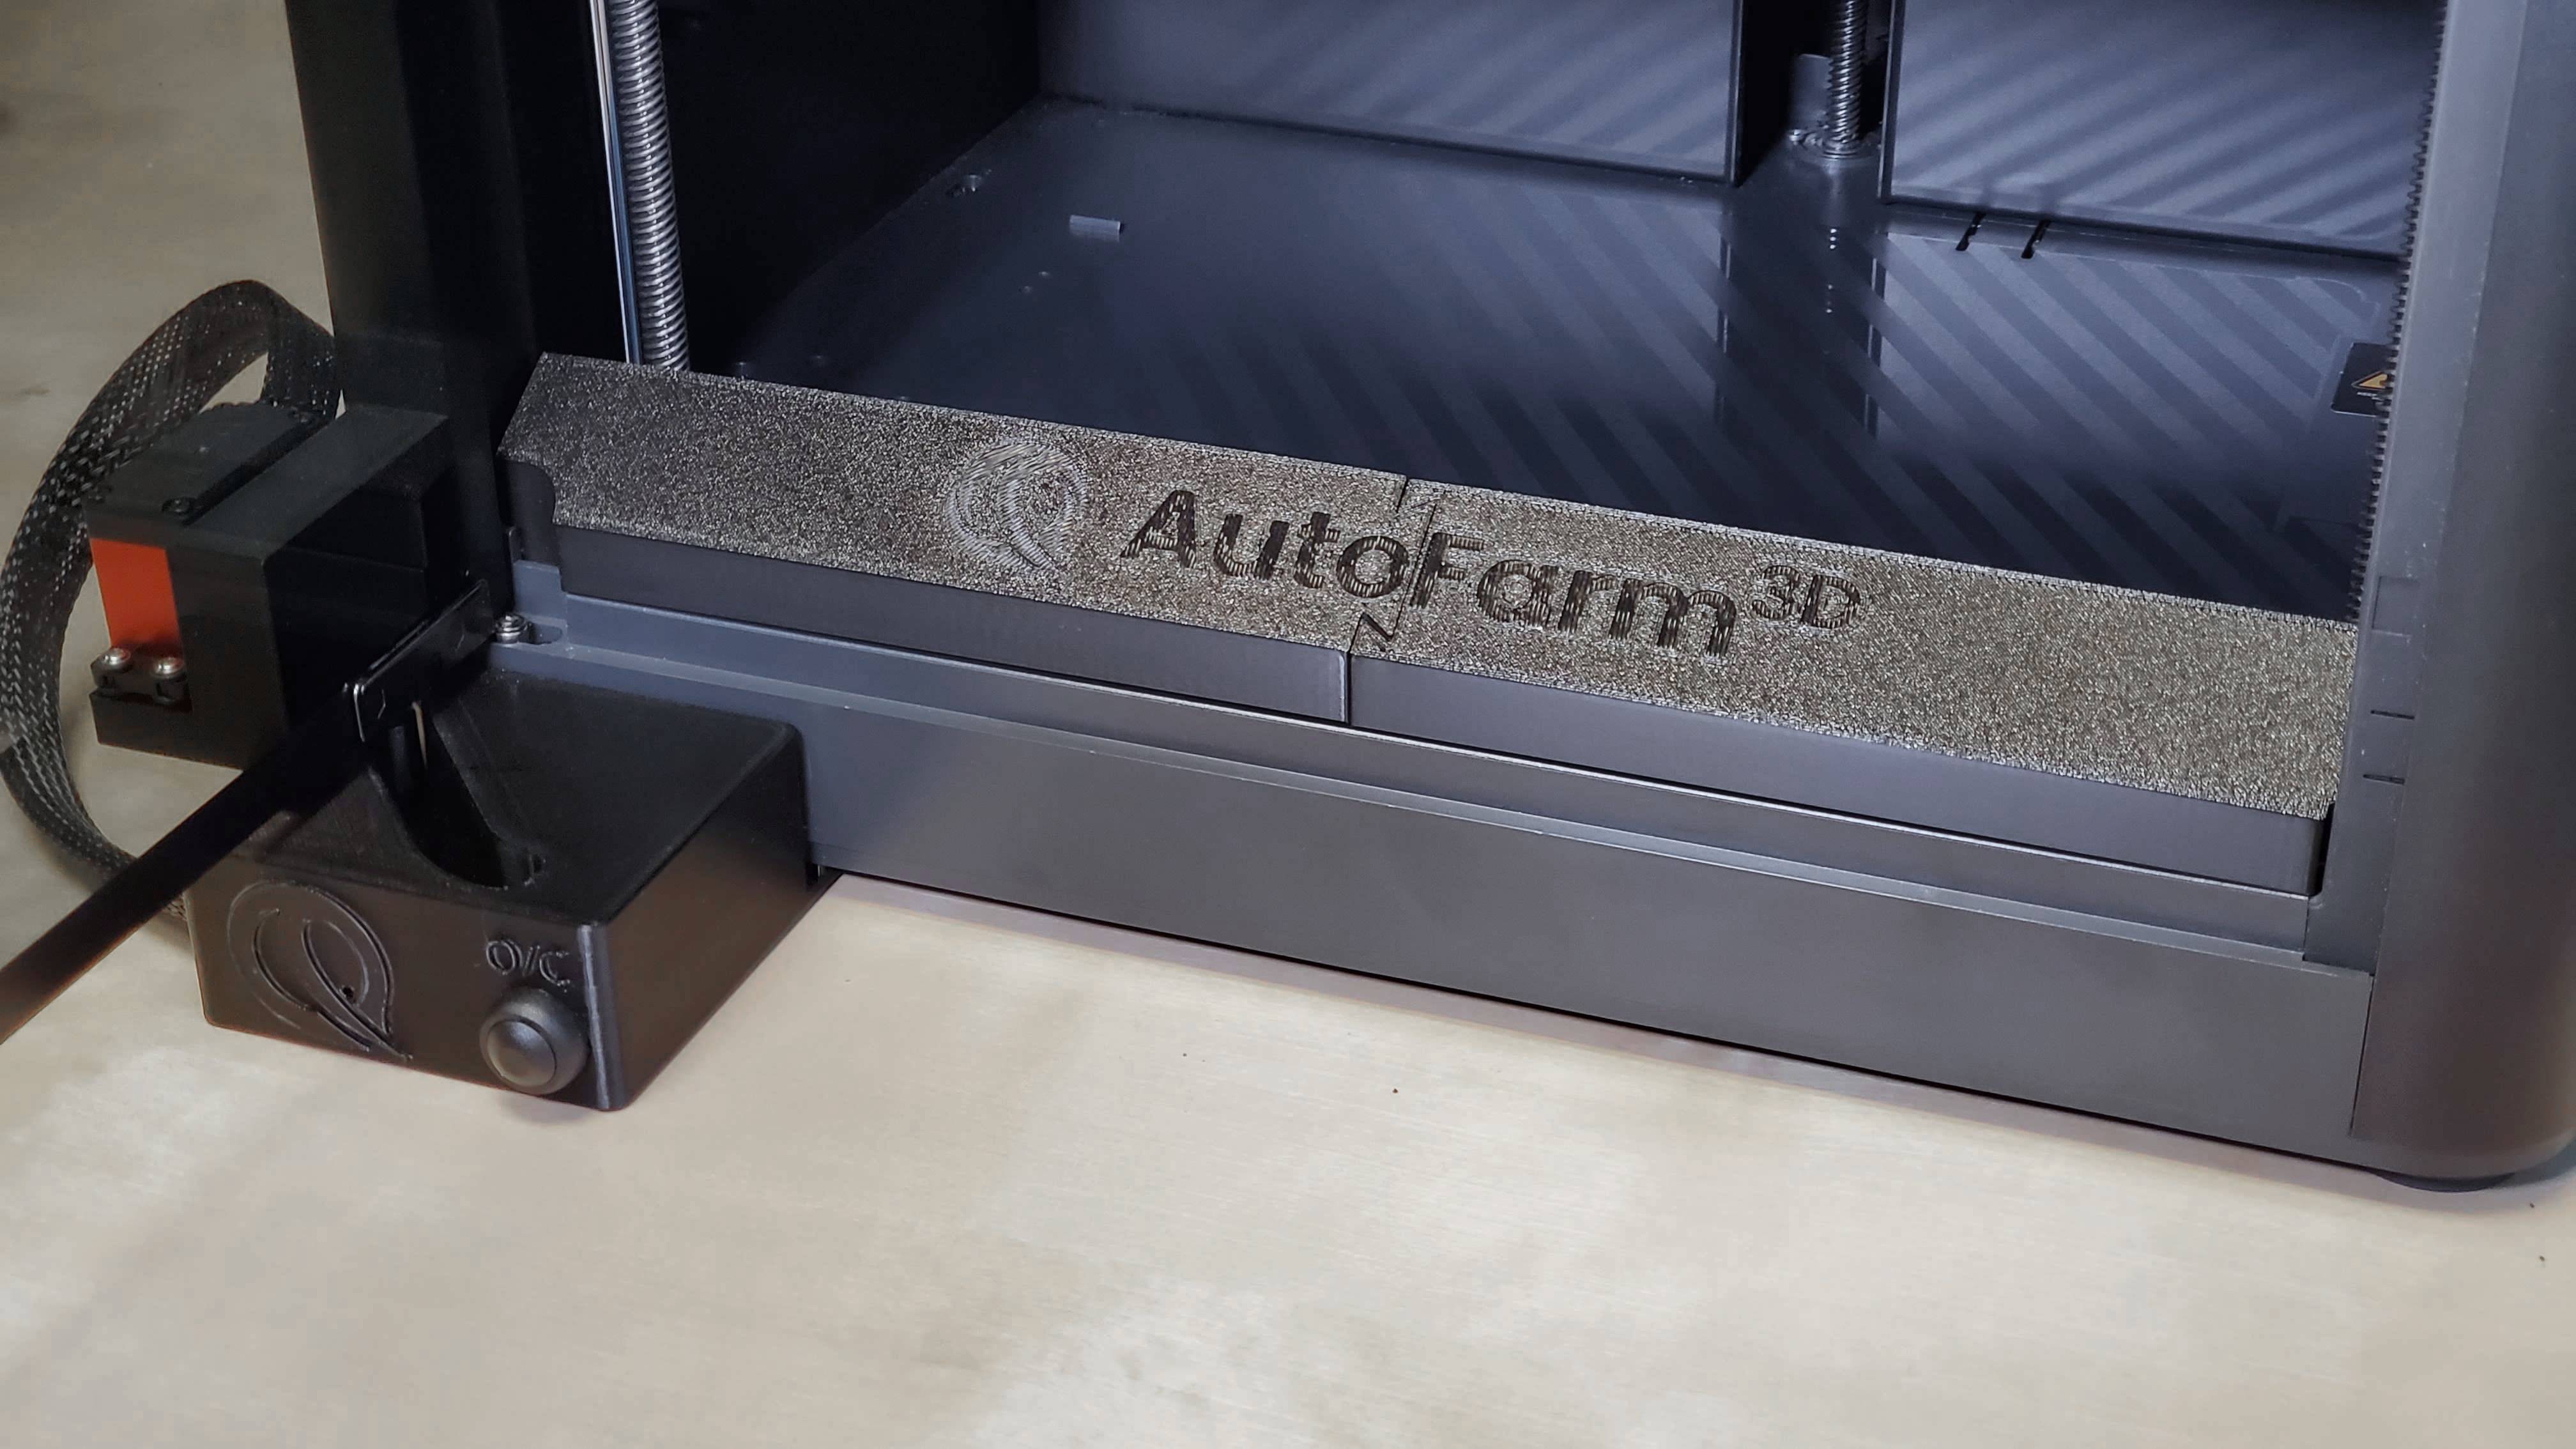
3.2 Install the Ejection Ramp
The ejection ramp comes in two pieces and is included in the Bambu Lab Auto Ejection kit. It attaches to the front of your printer to deflect parts as they are ejected, guiding them away from the printer. It is mandatory that you use the ejection ramp when auto ejecting from Bambu Lab X1/P1 series printers using AutoFarm3D.
-
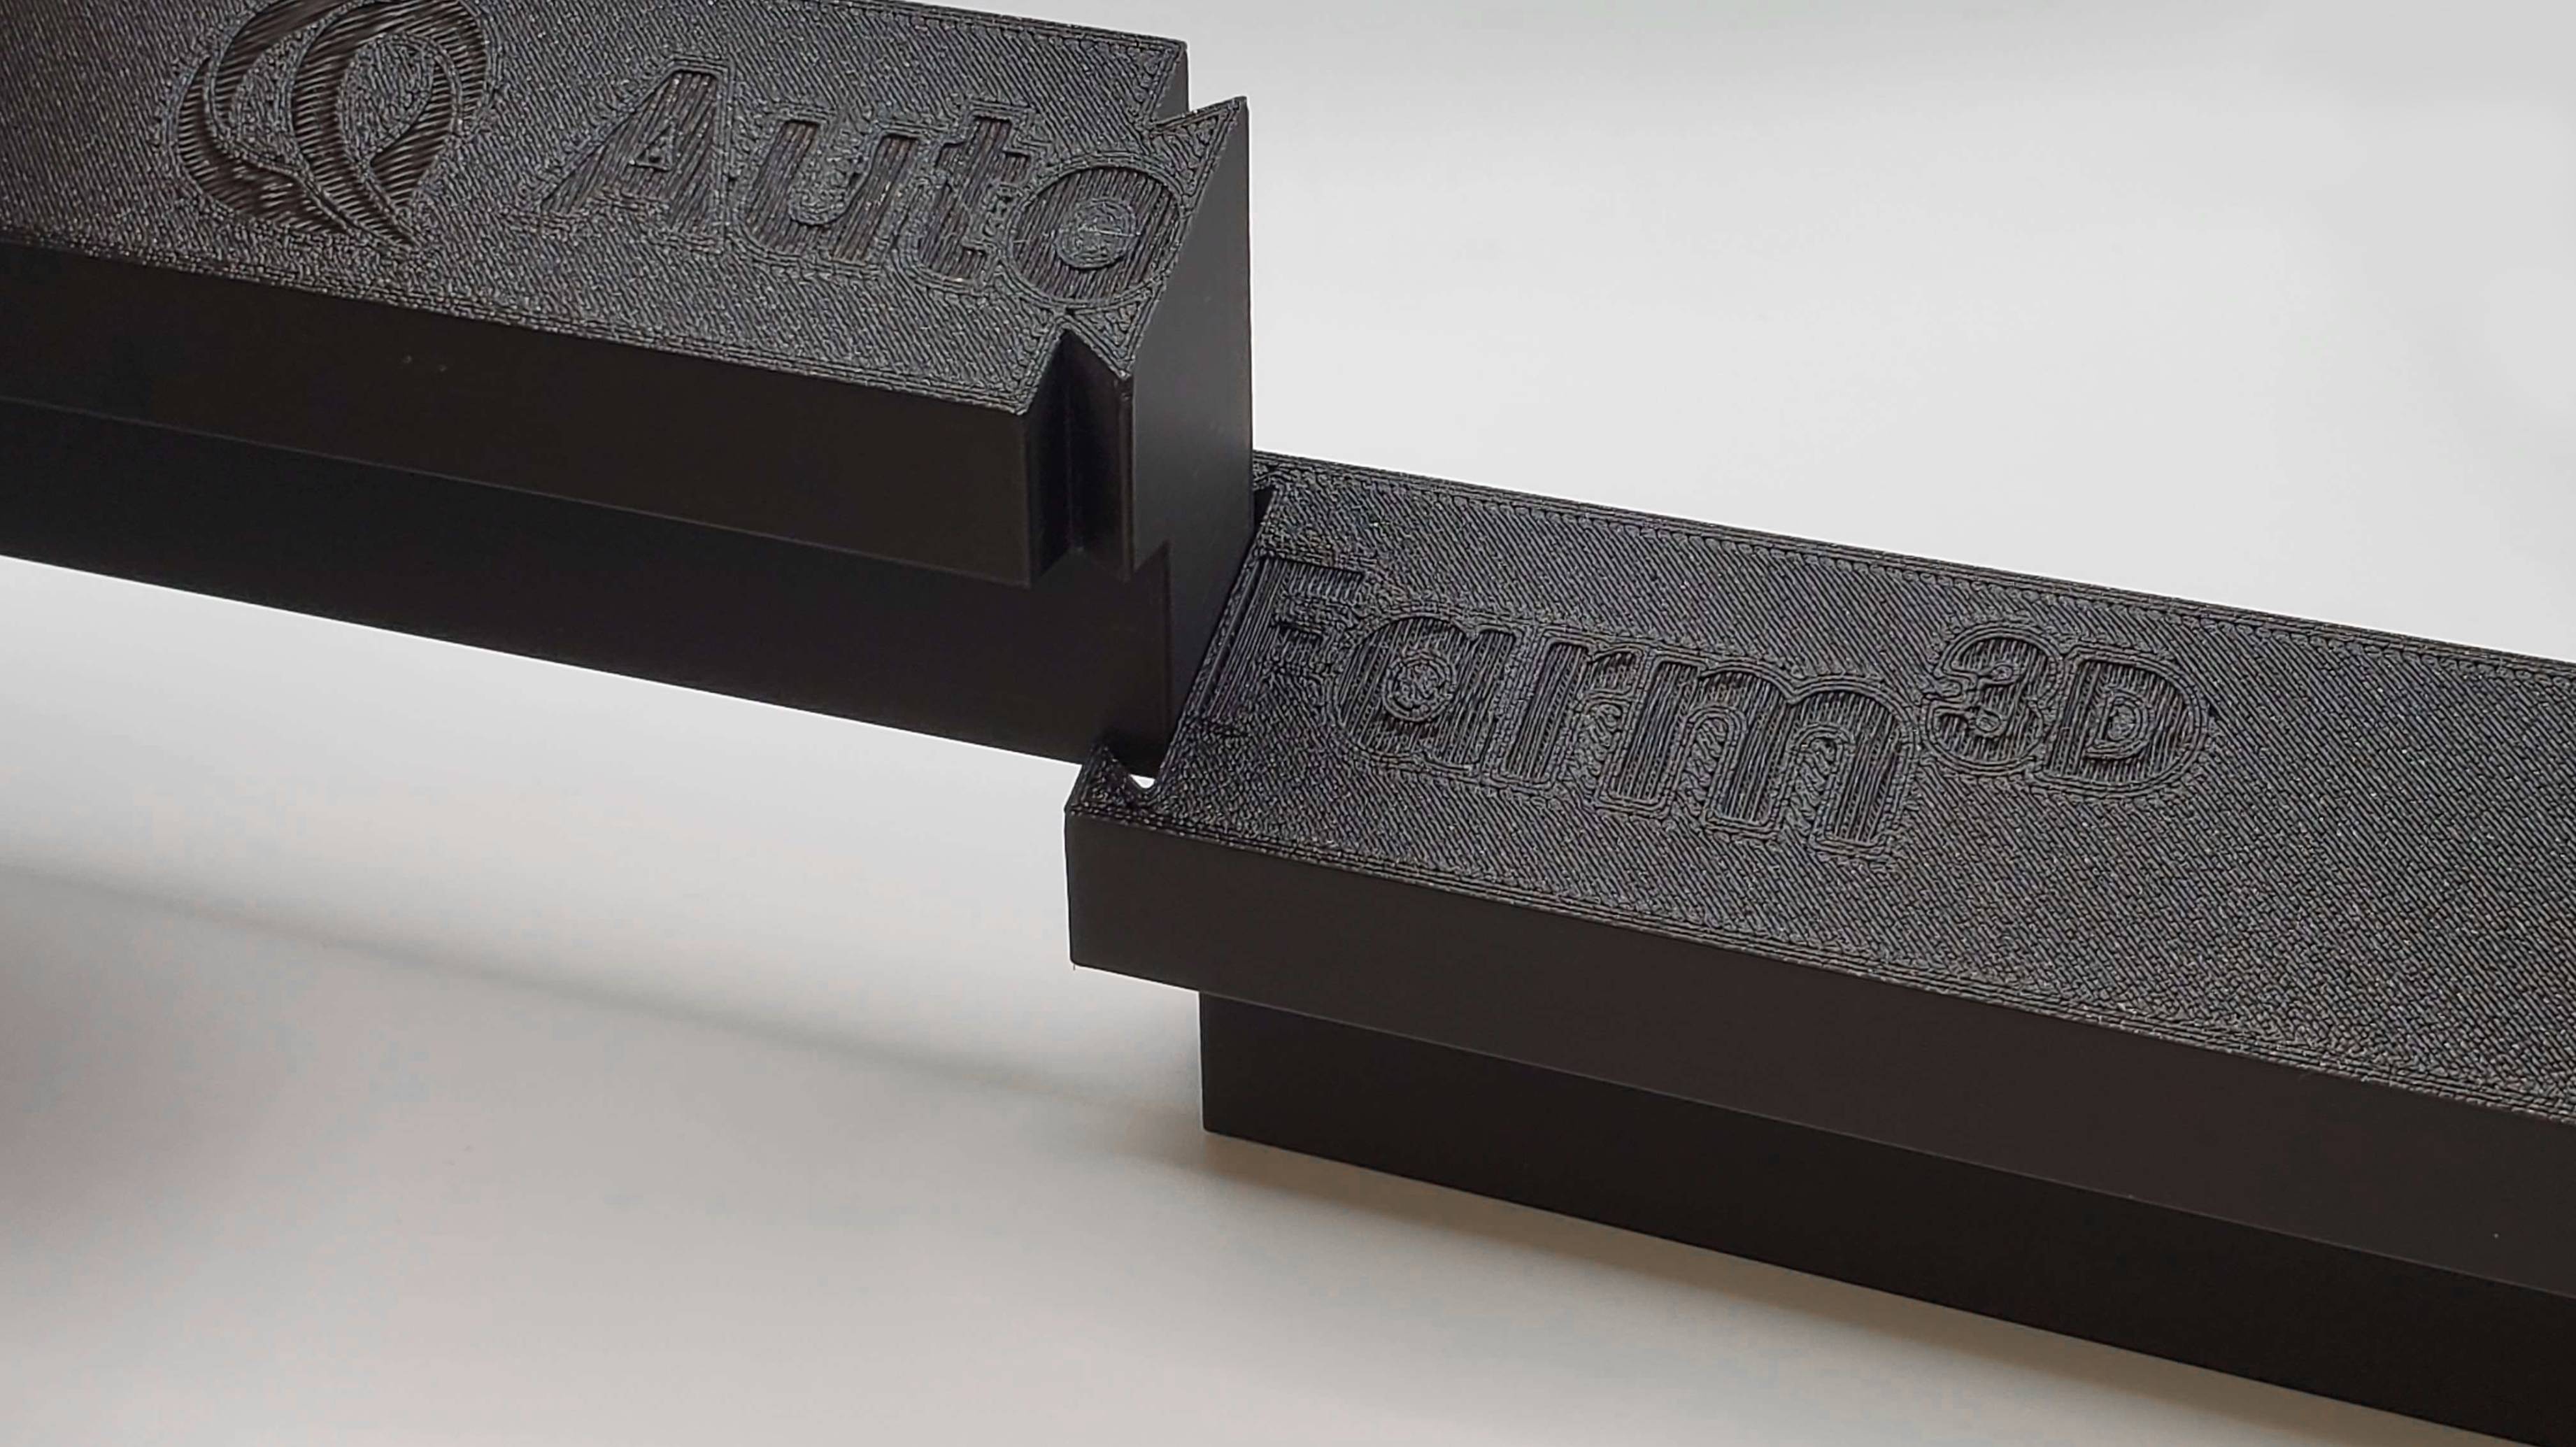
Slot the two pieces together as pictured below.
-
Install the attached pieces by slotting them over the front lip of your printer.
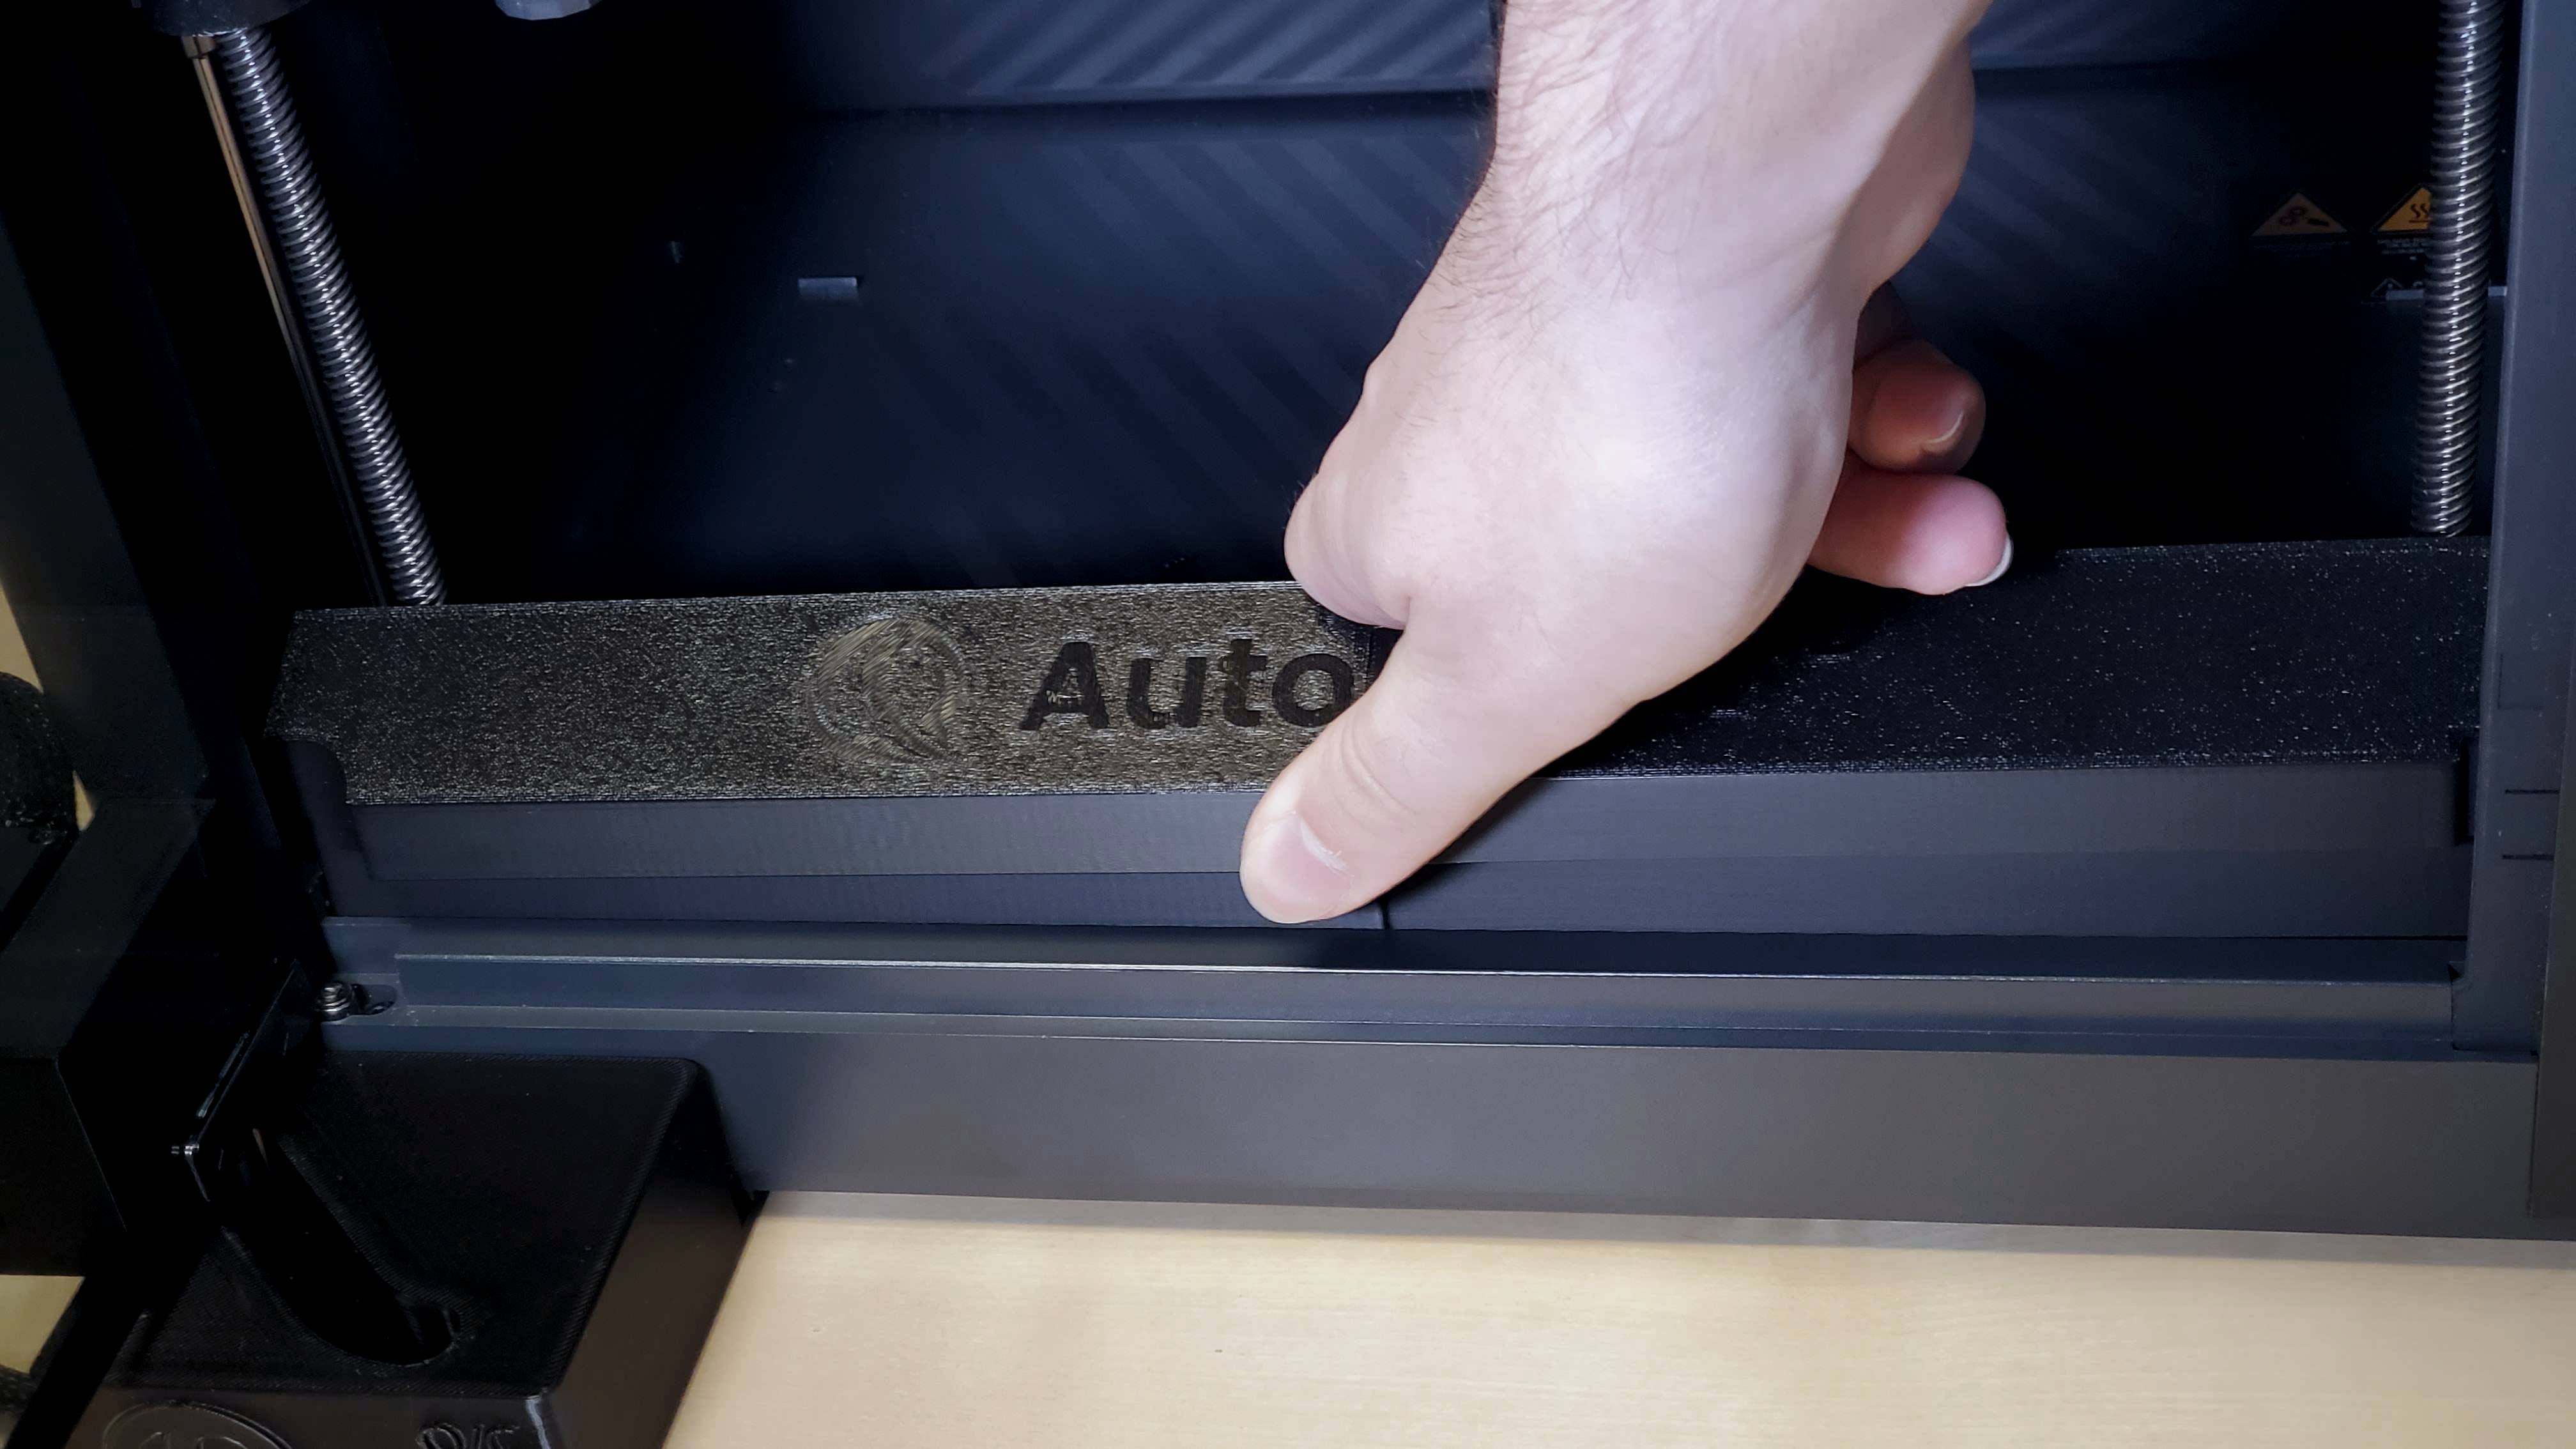
Once installed, it should look like this:
The ejection ramp is compatible with both the X1 and P1 series printers.
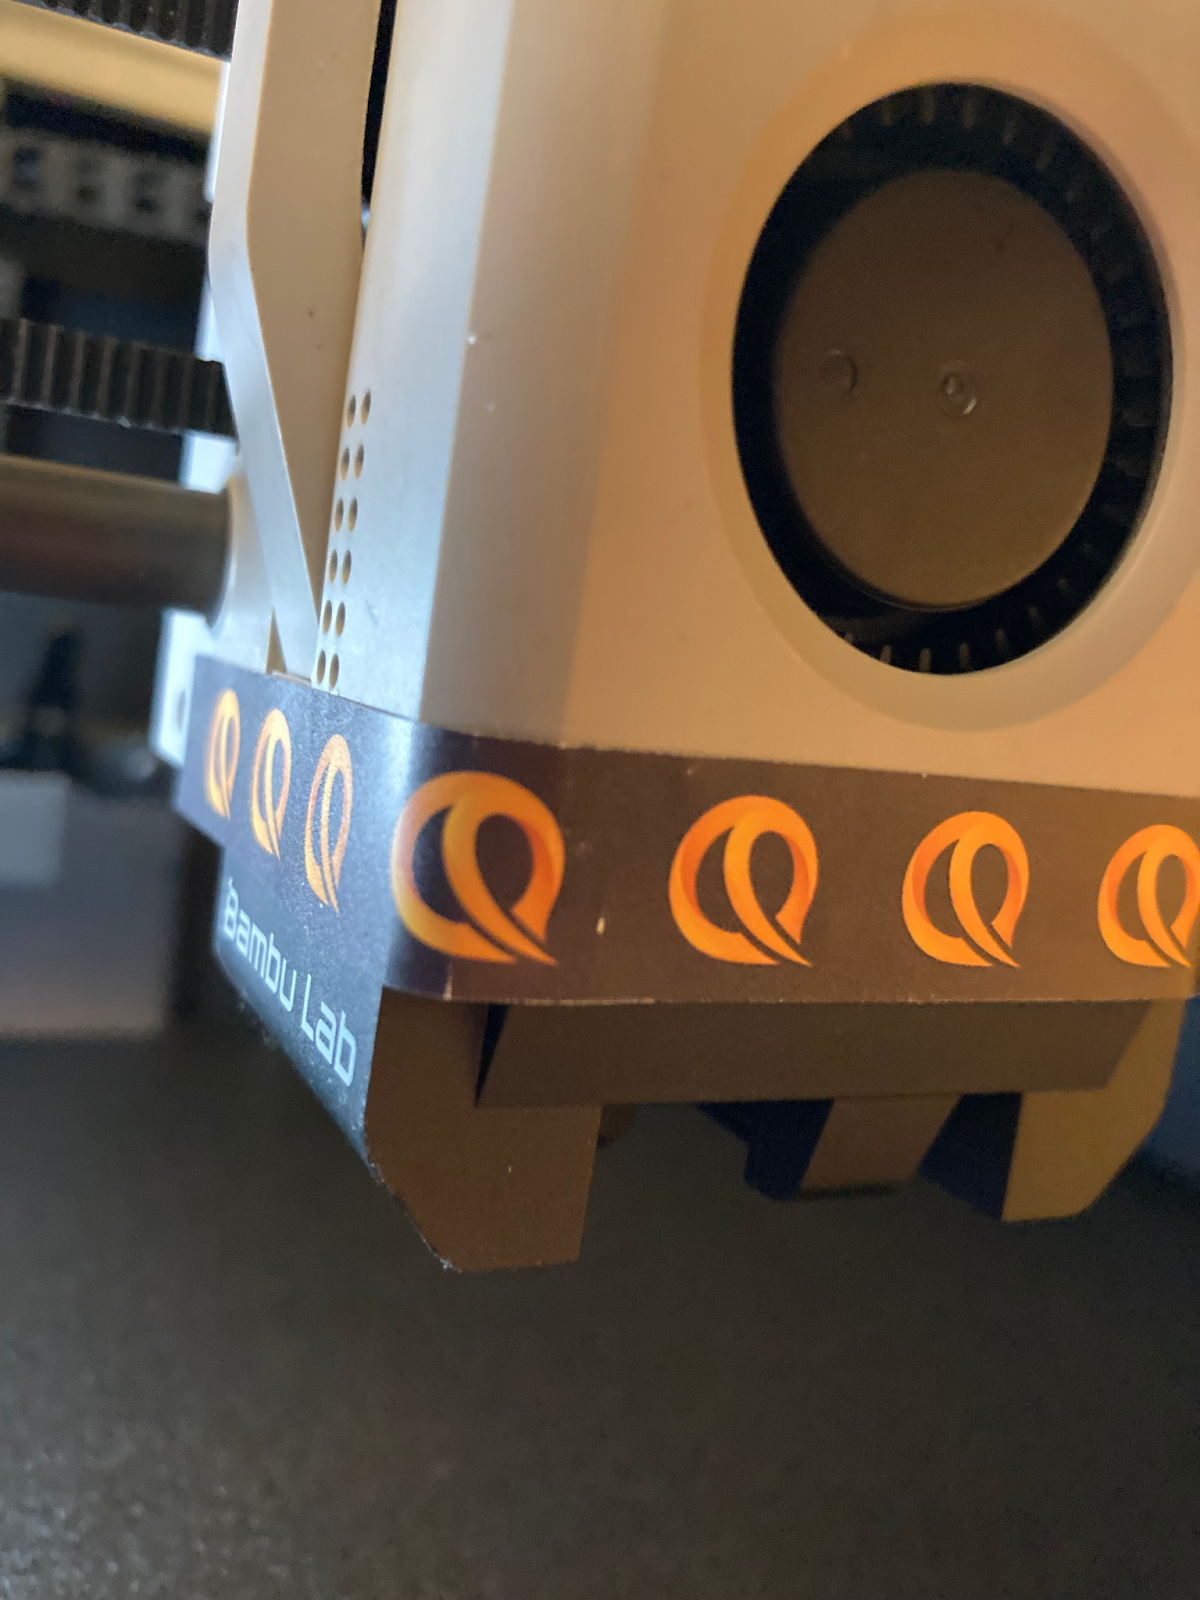
3.3 Tape Down the Print Fan
The print fan is secured to the hotend assembly using fairly weak magnets, so it may fall off during auto-ejection. To avoid this issue, use the tape provided in your auto ejection kit to secure the print fan to the hotend assembly. Once taped, it should look like this:
You’re Done!
You may now begin slicing files following the guidelines outlined above.
4.0 Connecting to AutoFarm3D
4.1 Prepare the Printer
1. Confirm there is a functional SD card inserted to the SD card slot on your Bambu.
We recommend upgrading to a name-brand card as the factory cards are known to experience issues over time.
2. If you desire to print offline, set the printer to LAN mode.
4.2 Adding a New Bambu Lab Printer
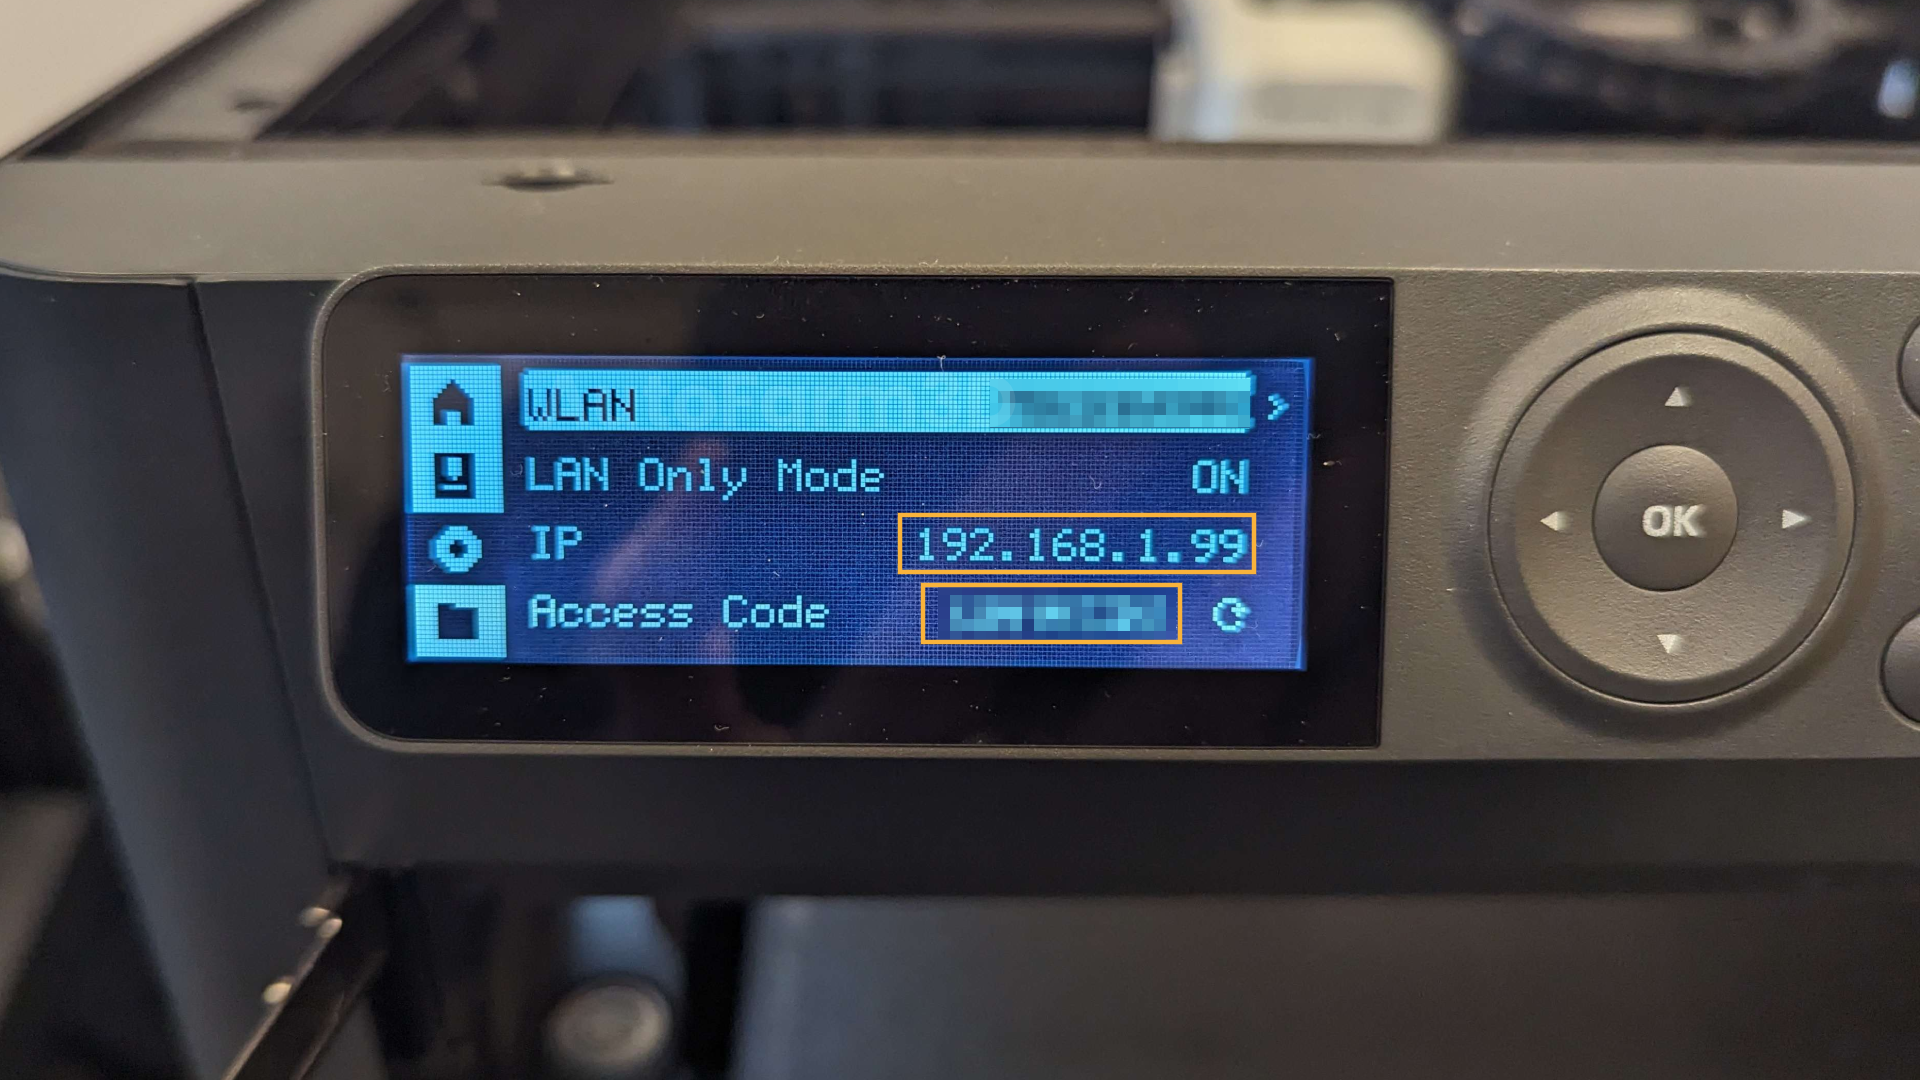
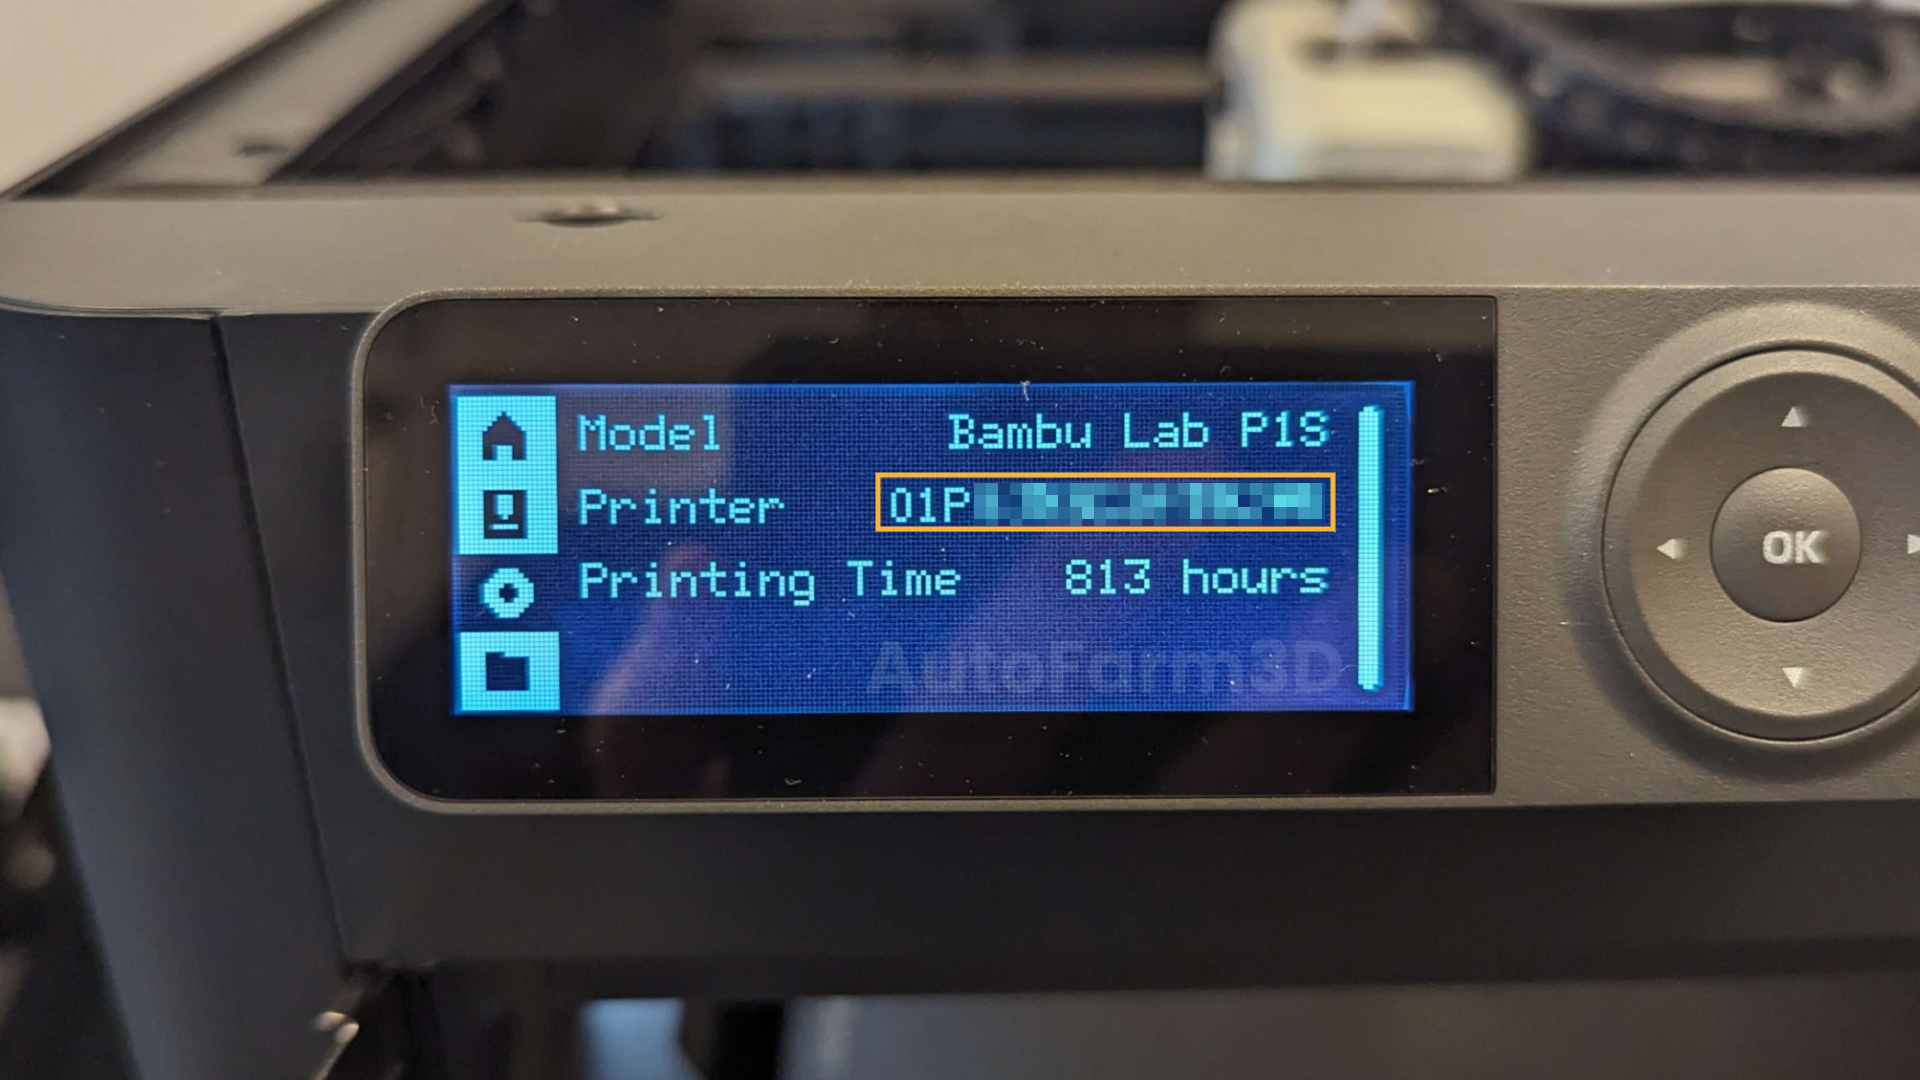
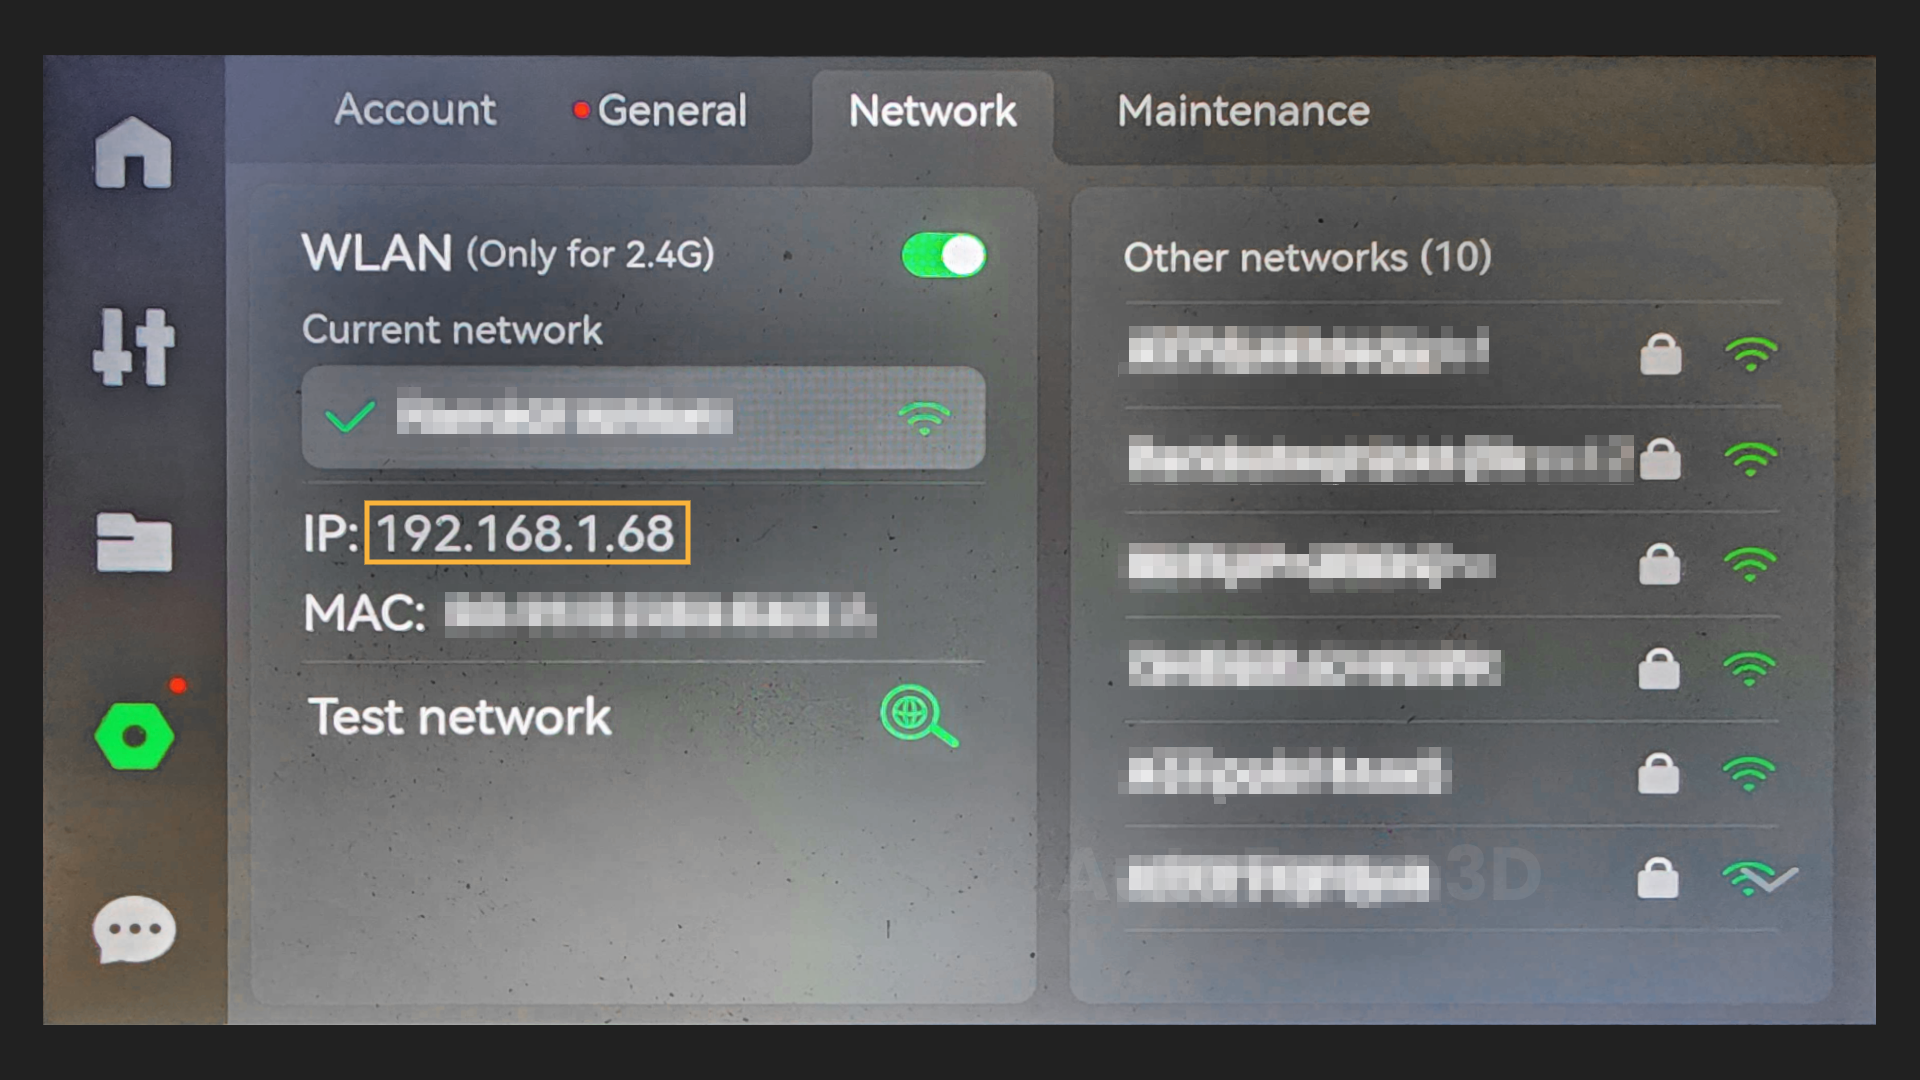
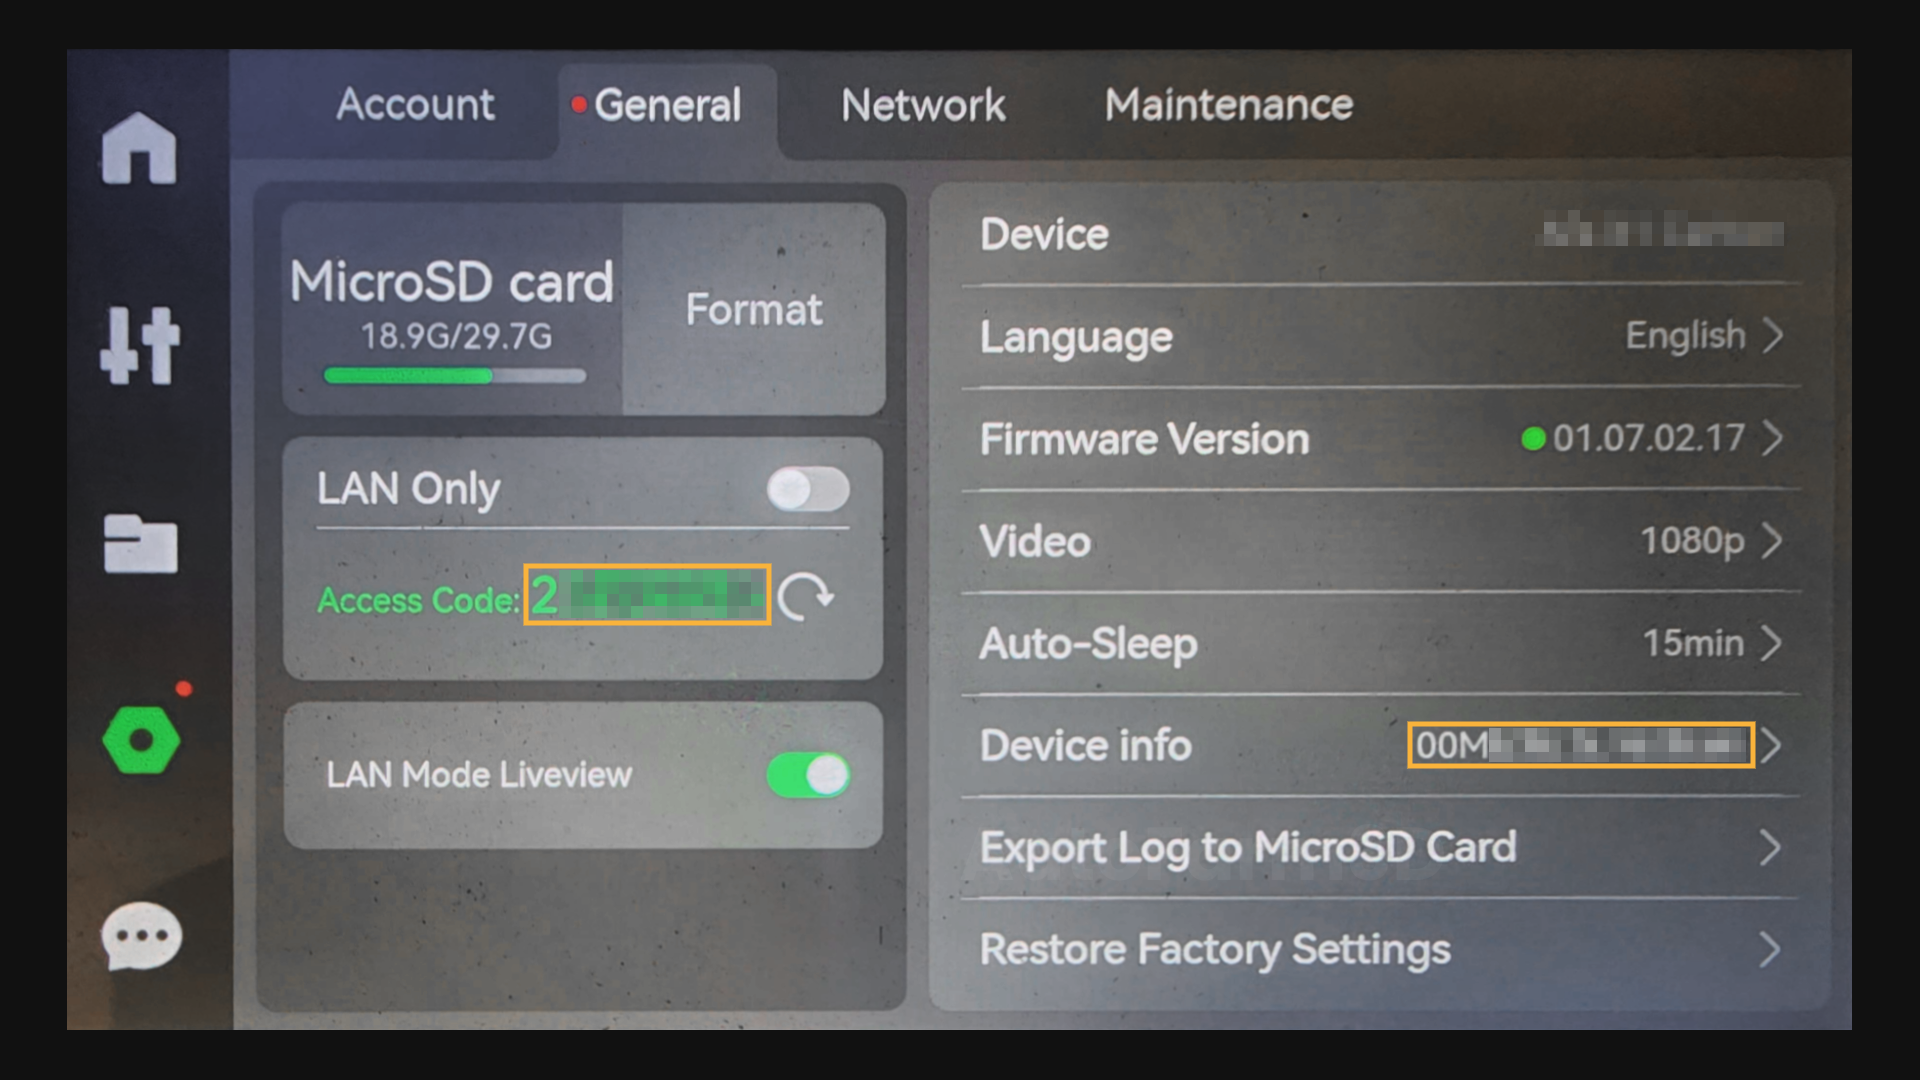
1. Find Your Printer's IP, Serial Number, and Access Code
It is strongly recommended to reset your Access Code at least one time after receiving your printer from Bambu Lab. Now would be a good time to do it.
- P1 Series
- X1 Series
2. Open AutoFarm3D in your browser and navigate to Overview > Add Bambu Labs Printers

3. Enter your Printer's IP, Serial Number and Access Code
Once you are done, click "Connect Printer to AutoFarm3D"
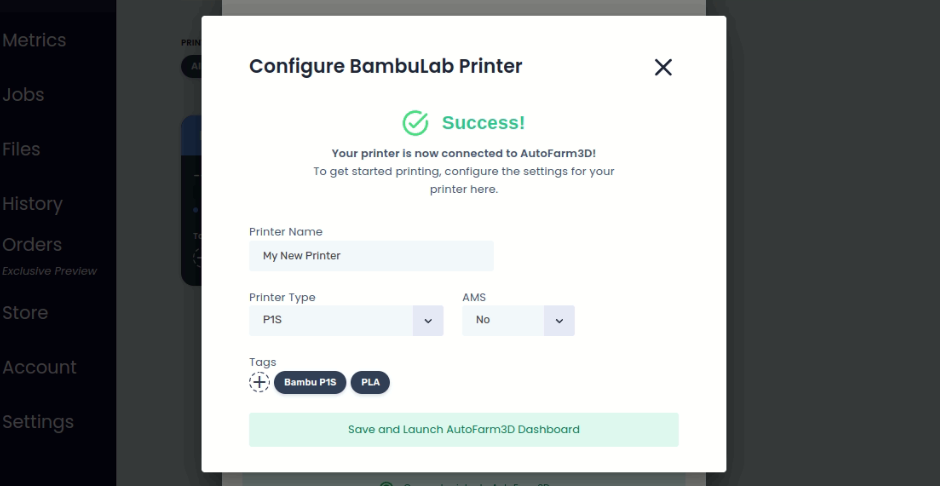
4. Configure your Printer
AutoFarm3D will automatically tag your printer with the correct type. Choose a name for your printer, select whether it has an AMS, and add any custom tags you want.
4.3 Set Printer to Automated Mode
-
Click on the printer in your AutoFarm dashboard
-
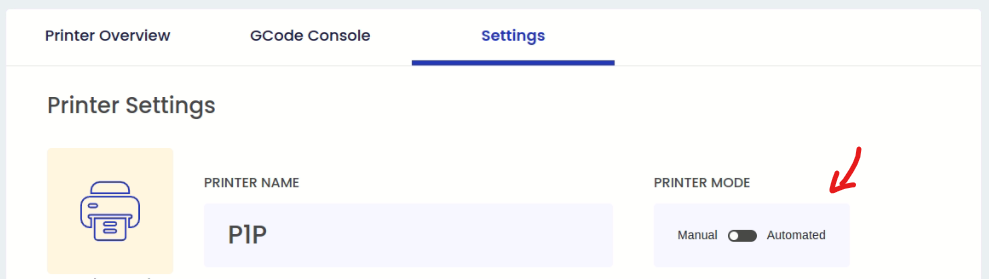
In the sidebar go to Printer Settings > Settings > Printer Mode, and flip the switch to Automated
4.4 Ready for Printing!
You may now start uploading .gcode.3mf files to AutoFarm3D and sending them to your printers.
Full-scale production is exciting!!! But it's important to follow best practices to ensure reliable operation of your machines and your part quality is as expected.
Before you do anything, it's highly recommended to run a test print (like a calibration cube or benchy) to confirm everything is properly installed.
Any time you introduce a new part, monitor its progress, watch the first ejection (set an alarm, etc.) to confirm model placement, part removal, and slicing settings. Be prepared to turn the printer off if anything goes wrong during the ejection process. Once a model has been proven, it's ready for production!
4.5 Other Notes
Maximum Printer Limits
Each Print Farm Hub or Raspberry Pi 4 can handle a maximum of 10 printers. This doesn't mean you can't have more in your dashboard, it just means you will need to add additional Worker Hubs to your network. Every Worker Hub can support an additional 10 printers, and AutoFarm will automatically distribute printers among the hubs to balance load and ensure stability.
Network Stability
It is very important to ensure your printers have a good Wifi connection, AutoFarm3D will attempt to handle network disconnects and recover job progress. But for best results, check your printers have full bars and a stable connection.
It is also recommended to set a static IP in your router's settings for the printer. That being said, if the IP changes, AutoFarm will automatically detect the new one.
Access Code Changes
If your printer is suddenly appearing as Offline in AutoFarm3D, but the printer displays an active wifi connection, it's possible the access code has changed. If you need to update your access code, you can do so by clicking on the offline printer on your dashboard and selecting "Change Access Code" in the sidebar.
Starting Prints from Bambu Studio, SD card, or Bambu Handy (External Prints)
AutoFarm3D will automatically detect and display progress for prints started from other sources. You'll see them marked in your dashboard as an external print. If you start an external print, it will interrupt the print queue for that printer, and AutoFarm will ask you to confirm the external part has been removed before it begins automatically sending jobs again.
Special Thanks
Thank you to everyone who participated in the Bambu Lab Auto Eject Early Access and Beta programs! A special thanks to Al for helping develop the printer profiles :)