Door Opener Installation
Mechanical Installation
1. Mount Base
1.1 Find Pocket
Place your printer at the edge of the table or on its side so you can view the underside. Find the rib structure - one of the pockets between the ribs is where the bottom rail part will be installed.
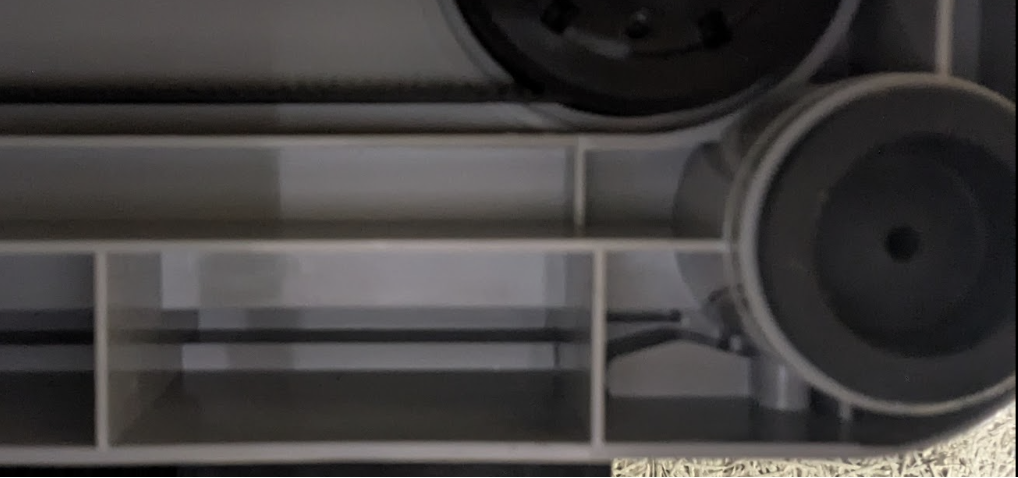
1.2 Clip in Rail
From below, push the rail part into the selected pocket between the ribs until it is firmly in place.
2. Mount Servo
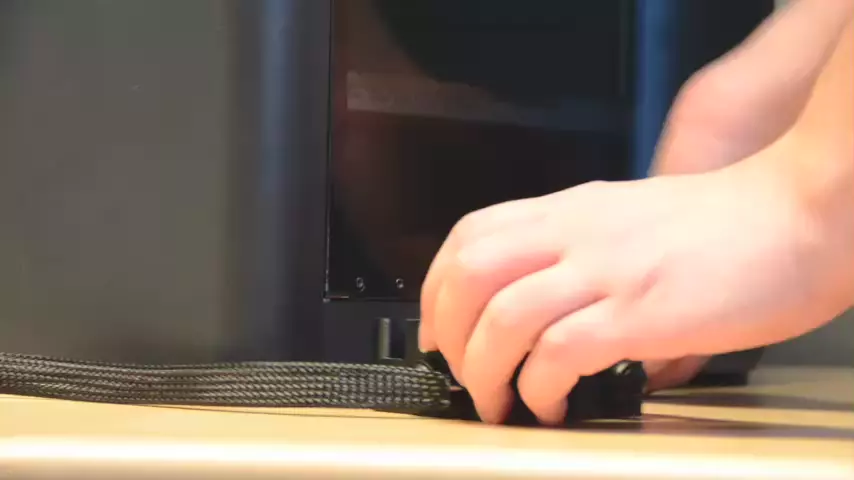
2.1 Remove Hinge Bolts
Remove these two bolts at the lower hinge of the door. This is where the upper servo holder will be mounted.
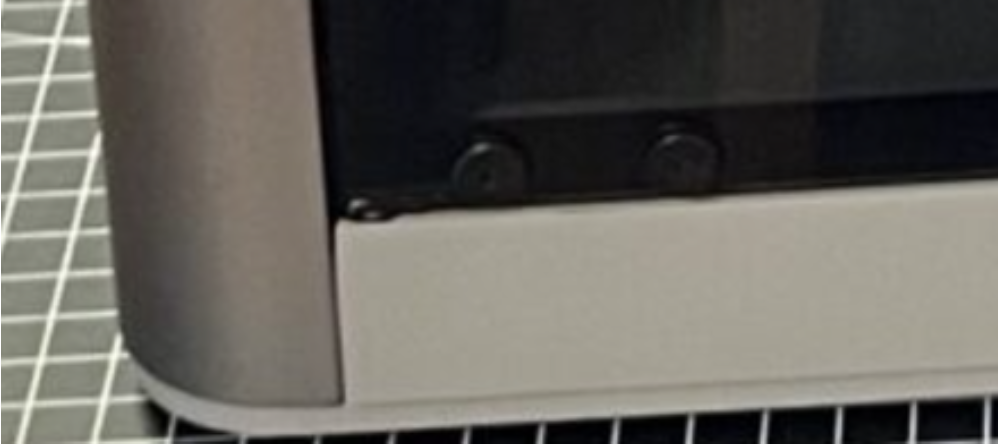
2.2 Attach the Servo Holder
Attach the servo holder with the two provided M3 bolts so it is positioned as shown below. Be careful not to overtighten the bolts.
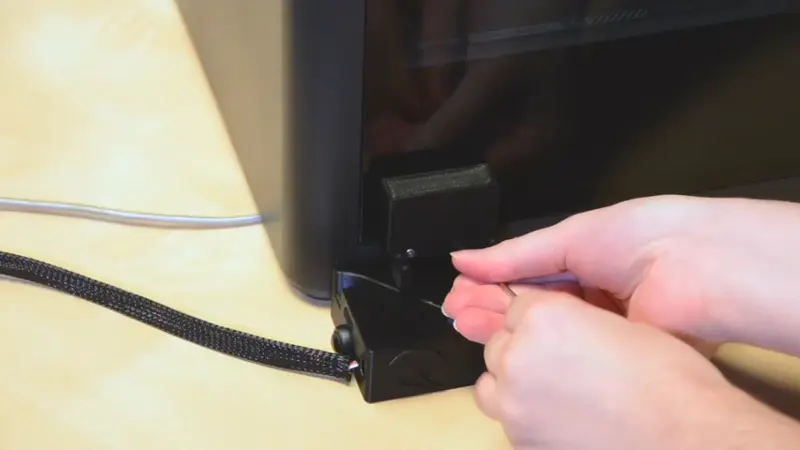
2.3 Install the Servo
Place the servo into the holder and secure it with the provided pointy screws. Ensure the servo is firmly held but not overtightened.
The servo should be closed by default. If you can’t assemble it due to the servo position, refer to the following section on calibration.
Powering Up and Calibration
1. Power On and Connect
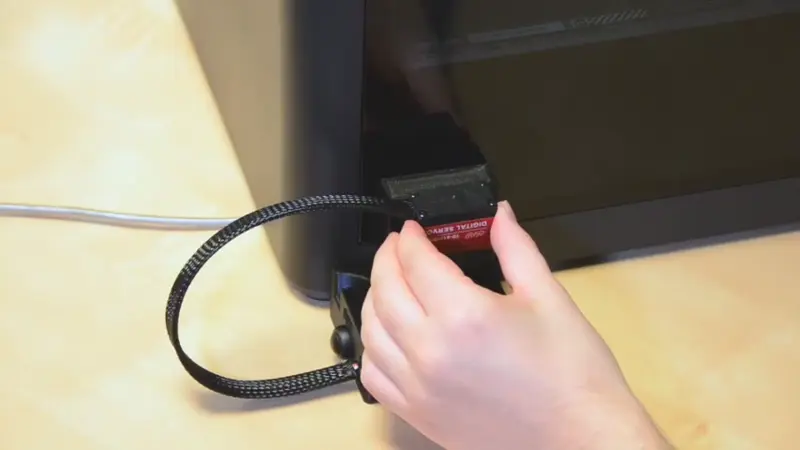
Connect the door opener to a USB-C cable. It will power up automatically and create its own Wi-Fi hotspot named DoorOpener. Connect your device (laptop, tablet, or smartphone) to that network.
Network Name: DoorOpener Password: DoorOpener
Once connected, open a browser and go to: http://10.0.0.1
2. Initial Configuration
On the configuration page, you can set:
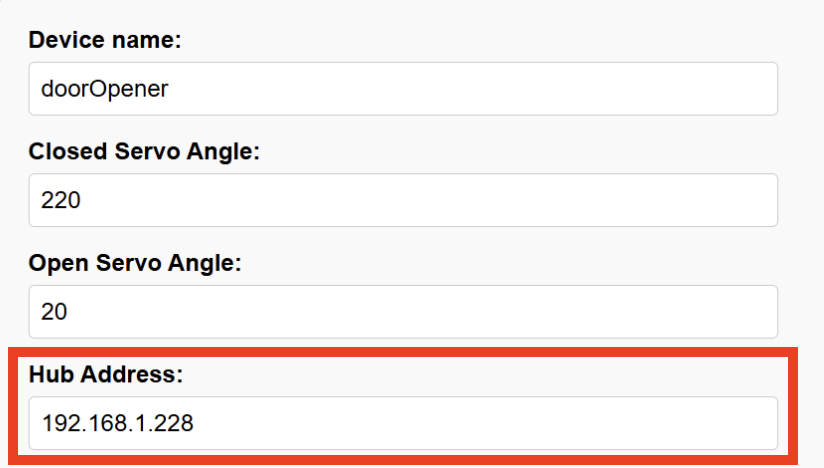
- Device Name: which you will need later to find the device in your WiFi.
- Closed Servo Angle: This angle sets how far the servo moves to close the door. A higher number means a door closed further.
- Open Servo Angle: This angle sets how far the servo moves to open the door. A smaller number means a door opened further.
- Hub Address: Is the IP Address of your 3DQue hub controlling the printer you added the door opener to.
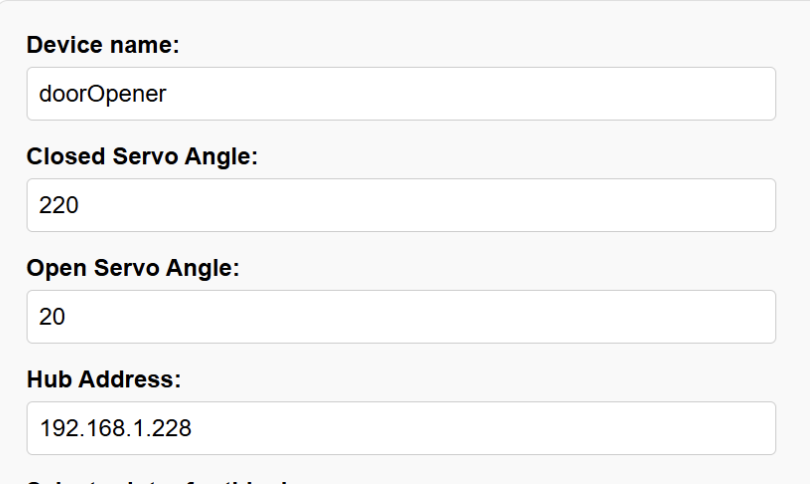
Leave the other settings for later steps.
3. Calibrate Door Movement
The servo is programmed to move slightly back after each motion to reduce wear and save energy. When properly calibrated, the small wheel at the end of the arm should spin freely (not under constant load).
Step-by-step calibration procedure:
- Click open, see if the door opens far enough. It should be perpendicular to the printer but not further, to not overstretch it. The little wheel at the end of the arm should spin freely.
- If not, adjust the open angle accordingly and press save settings. You can press the open button again to move to that position.
- Do the same for the closed position.
- Test again for open and closed, just to be sure. If needed, start again at point 1.
3. Connect to 3DQue Hub
3.1 Set Device Details
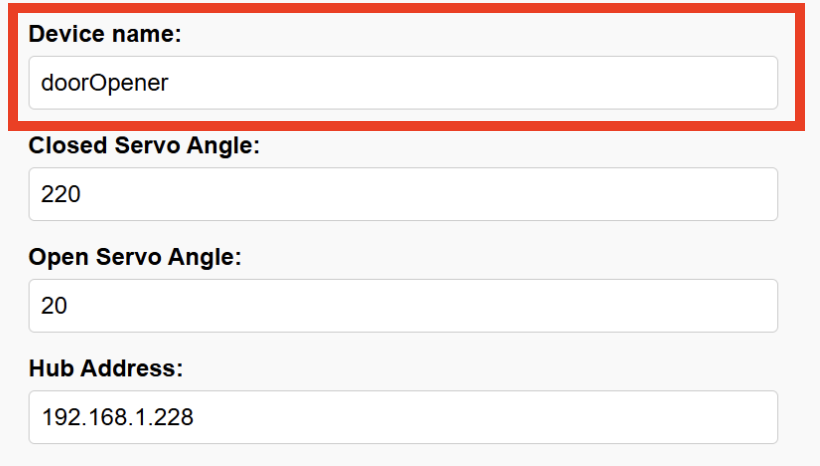
In the configuration dialog, set:
Device Name: Remember this for later.
Hub Address: You only need the numeric IP. You can copy/paste the hub URL - extra text will be trimmed automatically.
3.2 Connect to Wifi
Go to to Network Settings and set the device wifi mode to client. Enter your Wi-Fi network credentials and click Save.
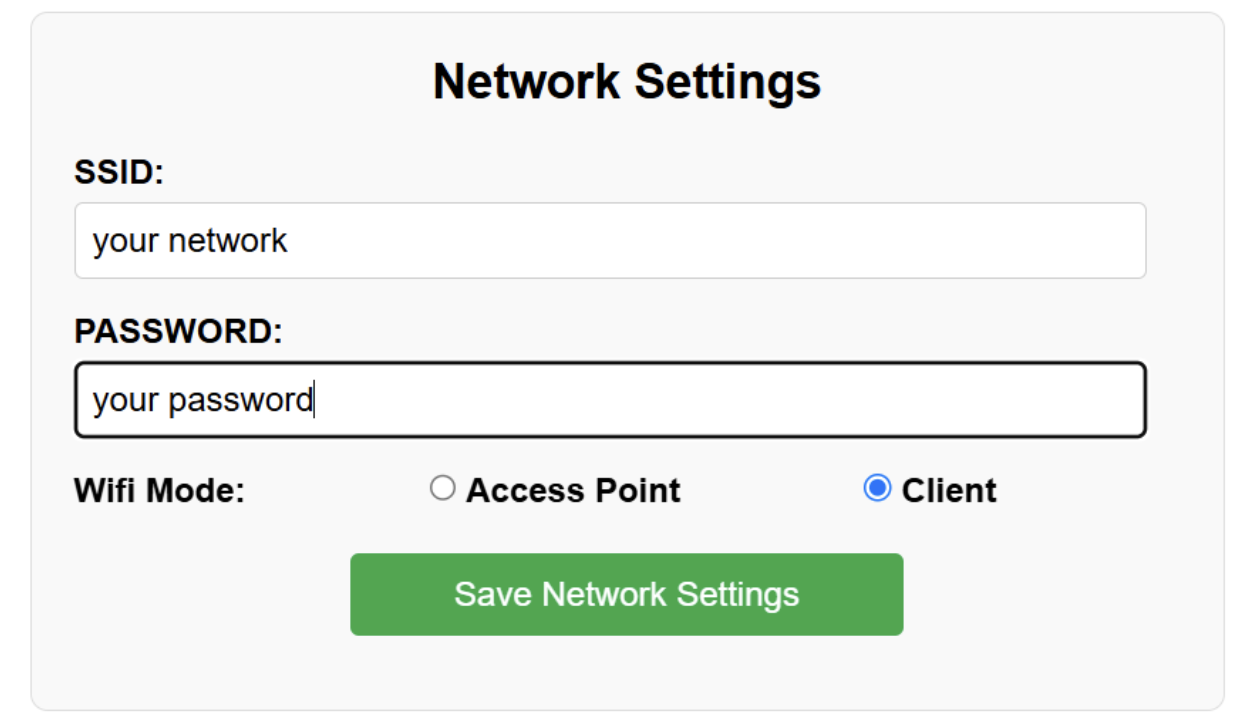
Wait about 1 minute, then access the device from your browser by entering: devicename.local (replace with the name you set earlier).
4. Final Settings and Printer Integration
Now that your door opener is connected to the WiFi, you can adjust the last details.
4.1 Select Printer
Ensure the hub address is correct. Then, click on Get Printers - the pulldown menu next to it should fill with all the printers connected to your hub.
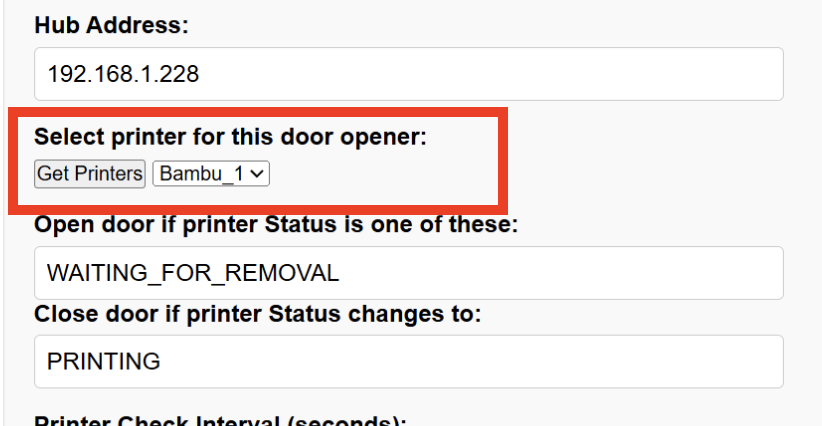
Choose the one you have installed the door opener to. Then click save settings.
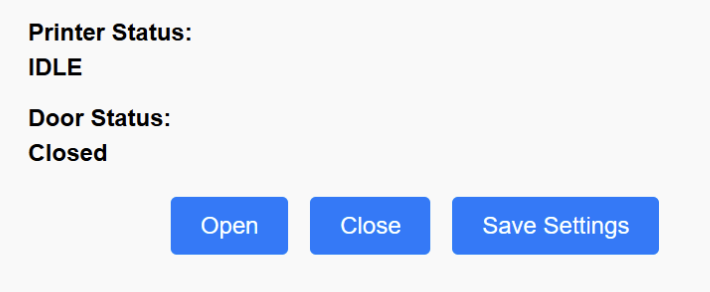
Within a few seconds you should see the printer status below.
4.2 Troubleshooting Printer Status
The printer status should be IDLE. There are two error statuses you may encounter.
UNKNOWN response, check your settings
You may not have chosen a printer. Make sure you have selected your printer and clicked save.
UNKNOWN invalid IP address
You have not set a valid IP address for your hub. Check that you have input the correct address.
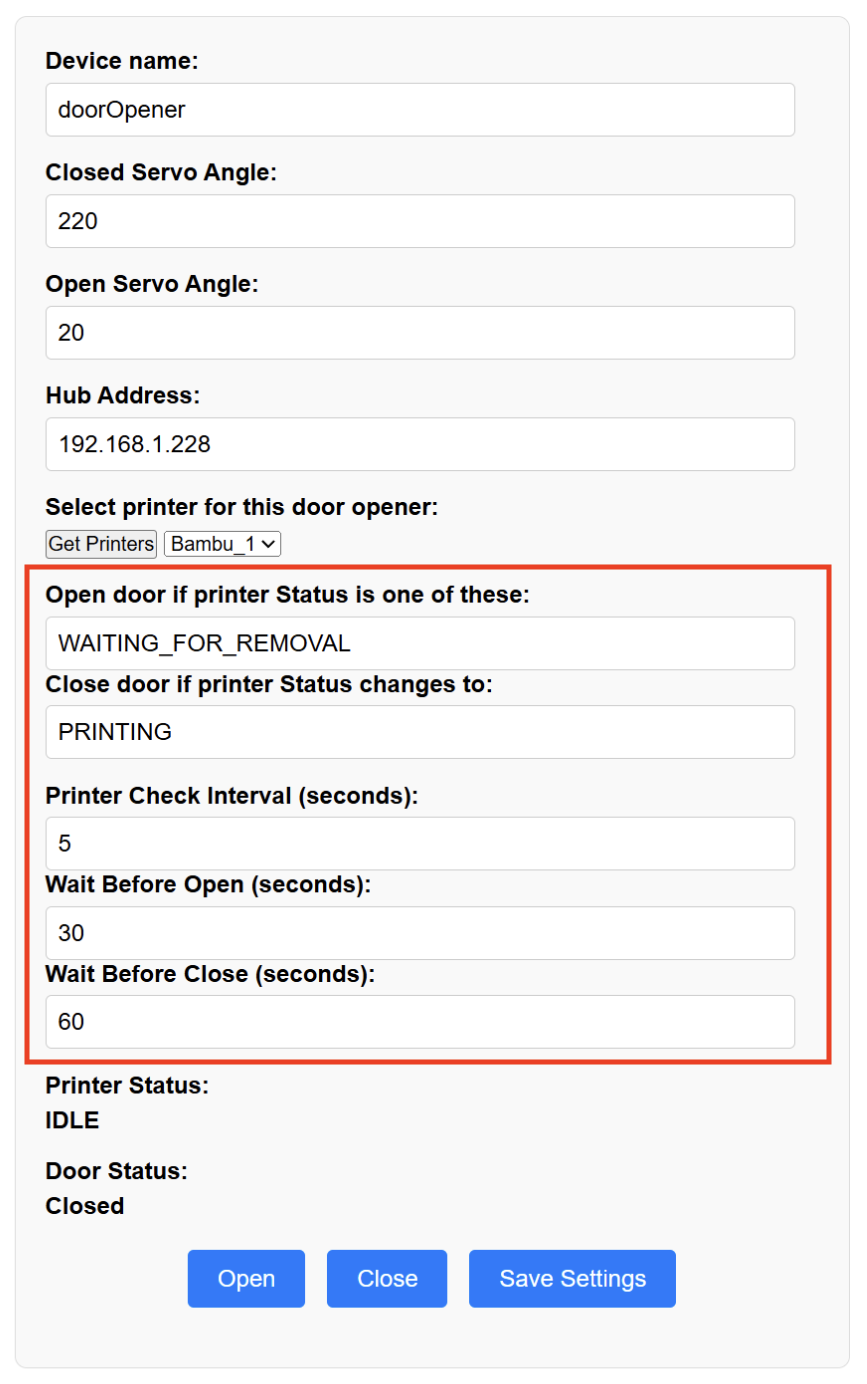
4.3 Additional Settings
- Open door if printer status changes to: When the hub switches from any state to this state, the door will open.
- Close door if printer status changes to: When the hub switches from any state to this state, the door will close.
- Printer Check Interval: Defines how often the door opener will query for the printer status. It’s preset to 5 seconds to avoid unnecessary network traffic.
- Wait Before Open: Determines how long the opener waits before opening after the hub reaches the defined state.
- Wait Before Closing: Determines how long the opener waits before closing after the hub reaches the defined state.
Buttons
The door opener has 2 buttons:
O/C Button
Opens and closes the door.
Only works when you are not connected to the hub yet to ensure proper operation when connected to the hub. If connected to the hub, the opener will do what the hub says each time it queries the status. So if you set that interval to a higher value like 60, you can manually open the door for 60 seconds before the hub interferes again.
RST Button
Resets device to factory settings.
It must be pressed and held for 10 seconds to reset the device.
Firmware Update
The firmware comes with two files.
- firmware.bin with the main firmware
- littlefs.bin with the filesystem that includes the web interface
Both can easily be updated by dragging and dropping them into the web interface.
Updating the littlefs.bin will overwrite your settings, so make sure you have backed up any custom settings before doing it and you’ll also have to reconnect the door opener to your wifi.