Anycubic Vyper
Compatibility information
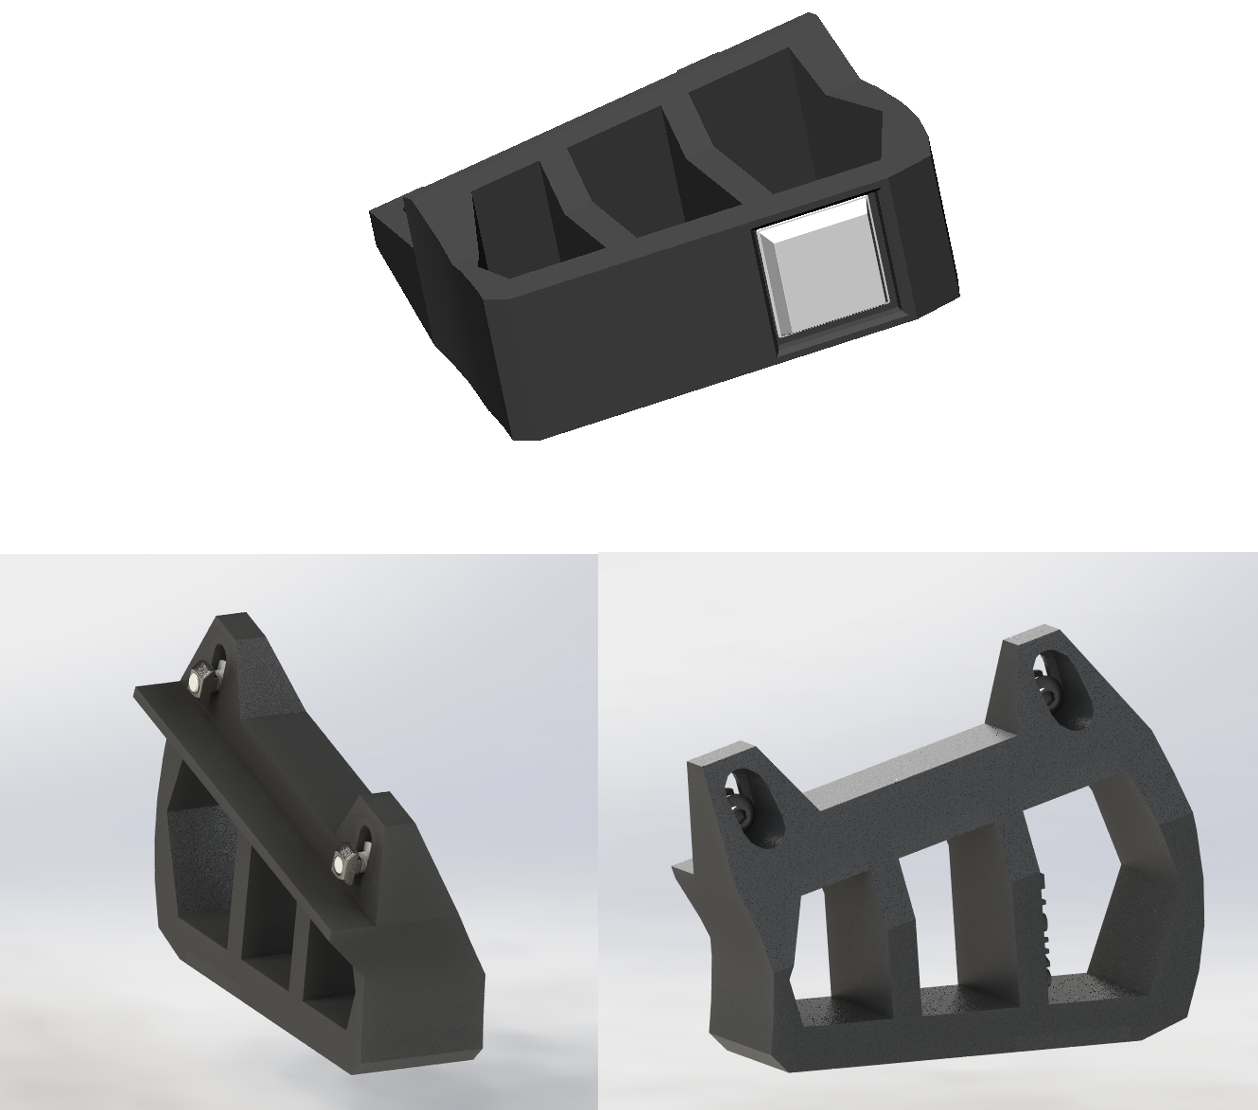
1.0 What's in the Kit
Anycubic Vyper
- 1 x Angle Bracket Left (E17)
- 1 x Angle Bracket Right (E18)
- 4 x M5 x 8 mm Screws
- 4 x M5 2020 t-nuts
2.0 What You'll Need
- Allen Keys
3.0 Install Tilt Kit
-
Prepare the E17 and E18 tilt brackets by installing the M5x8mm and 2020 T-nuts to prepare them for the printer.
-
Using the provided rubber feet, peel off and adhere to the bottom of the tilt brackets (E17/E18).
-
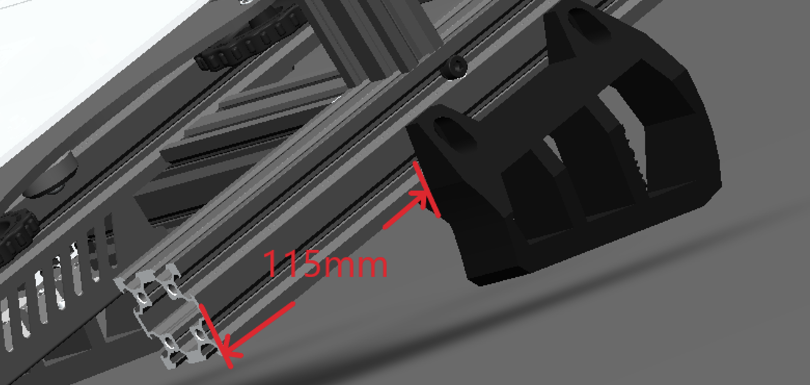
On a clean a table, gently rotate your Anycubic Vyper onto its left side.
-
Slide in the T-nuts of the E18 tilt brackets and slide the tilt brackets until the front of the tilt bracket is 115m from the front of the printer. Tighten the fasteners.
-
Rotate the printer on its right side and repeat step 5 for E17 tilt bracket.
-
Rotate your 3D printer and let it stand using the tilt brackets.