Rock64 Reflash Guide
Video Tutorial
1. Format SD Card
Formatting your card erases all data on the SD card. Make sure you have backed up any important files before proceeding.
- Power off your Hub by unplugging the power supply.
- Eject the SD card from the slot at the back of your Hub. The SD card is spring loaded, so gently press in on the card to release it, then pull it out. Do not force it out.
- Insert the micro SD card into your computer.
- Install and open SDCard.org SD card formatter (download here).
- Format your card using the "Quick Format" option.
Why we recommend using the SDcard.org formatter
Your computer likely has a built-in SD card formatter, but they can be unreliable, especially if the SD card previously contained a Linux file system. The SDcard.org SD Card Formatter produces identical results on Mac and Windows computers, and works on any SD card, regardless of what file system it contains.
2. Load Software Onto SD Card
2.1 Choose Software
- Download AutoFarm3D for Rock64 (download here).
- Unzip the file. You should now have a file ending in .img.
- Install and open Balena Etcher (download here).
- Click ‘Flash from file' and select the AutoFarm3D .img file.
Can't unzip the file?
Mac computers sometimes have issues unzipping large files. For a fix, please follow this guide
2.2 Write to SD card
- Click ‘Select target’ and select your SD card.
- Select 'Flash' and wait until it's finished. Writing to the SD card may take up to 15 minutes.
3. Reconnect to AutoFarm3D
3.1 Reconnect to Network
- Ethernet (Recommended)
- WiFi
If you're using an ethernet connection, all you need to do is plug in an ethernet cable connecting your Hub to your router or network switch. Ethernet is the most reliable way to connect your Hub to your network.
If your network is a 'corporate' network (E.g. not a standard home wifi system, your workplace has an IT team, you're a school/university, you work in a shared workplace, etc.), please contact 3DQue support for setup assistance.
First, we need to tell your Print Farm Hub how to connect to your WiFi network.
Once Balena Etcher has finished writing, some windows may appear saying "You need to format the disk in drive X: before you can use it. Format now?". Select Cancel and close them all.
- One of the new drives on your computer should be named "boot". Open this drive.
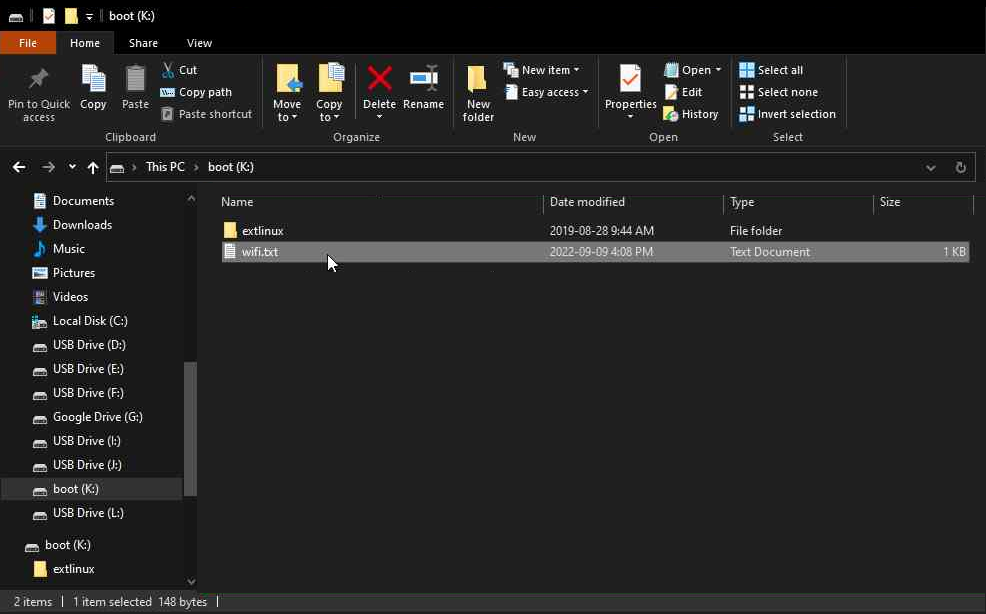
- Open the file named "wifi.txt" using a text editor like Notepad (Windows) or TextEdit (Mac).
- Fill in your WiFi name (SSID) and password.
Make sure there are no spaces after the colon or at the end of your SSID/password.
Example wifi.txt:
# Put your wifi information below, it is case sensitive. Type it directly after the colon:like this.
network-name:Example Network Name
password:Example-Password
- Save wifi.txt, then safely eject the SD card from your computer.
3.2 Plug Everything Back In
Make sure the Hub is turned off and unplugged.
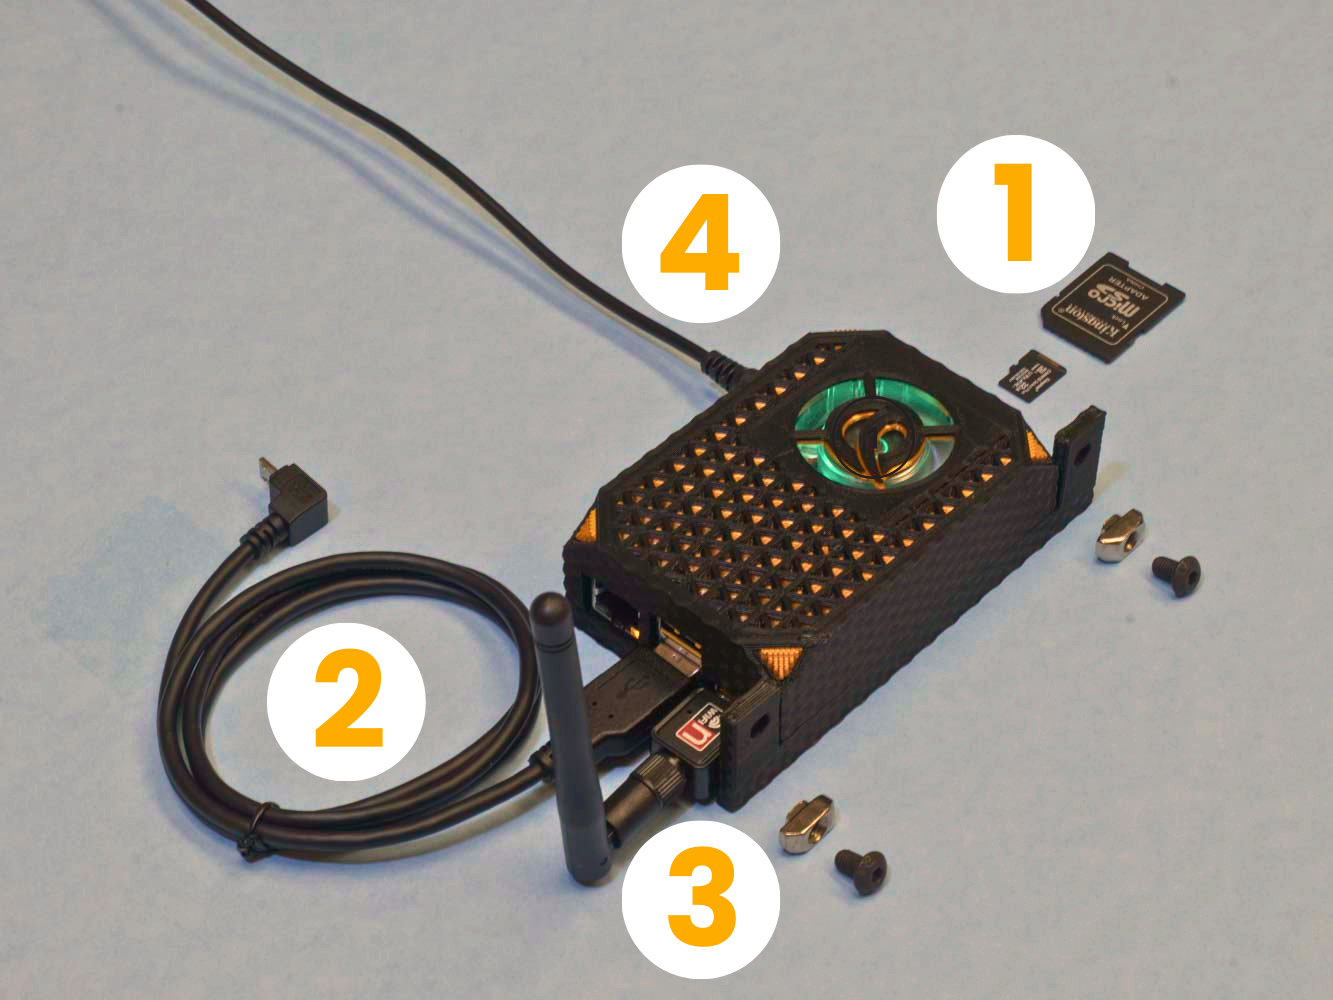
- Insert the SD card into the Hub.
- The SD slot is spring-loaded. Push in until the card clicks into place. Do not force it.
- Connect Ethernet/Wifi:
- Ethernet: Plug in an Ethernet cable from your Hub to your router or network switch.
- WiFi: Plug in a USB WiFi adapter.
- Connect the power supply. Your Hub should power on and begin booting up.
3.3 Log In To AutoFarm3D
- On your computer, open a browser and enter the IP address followed by “:8080”. You should now see the 3DQue login screen.
- Sign in to your 3DQue account.
All done!