Print Farm Hub Setup
If you've purchased a Print Farm Hub from the 3DQue online store, keep reading!
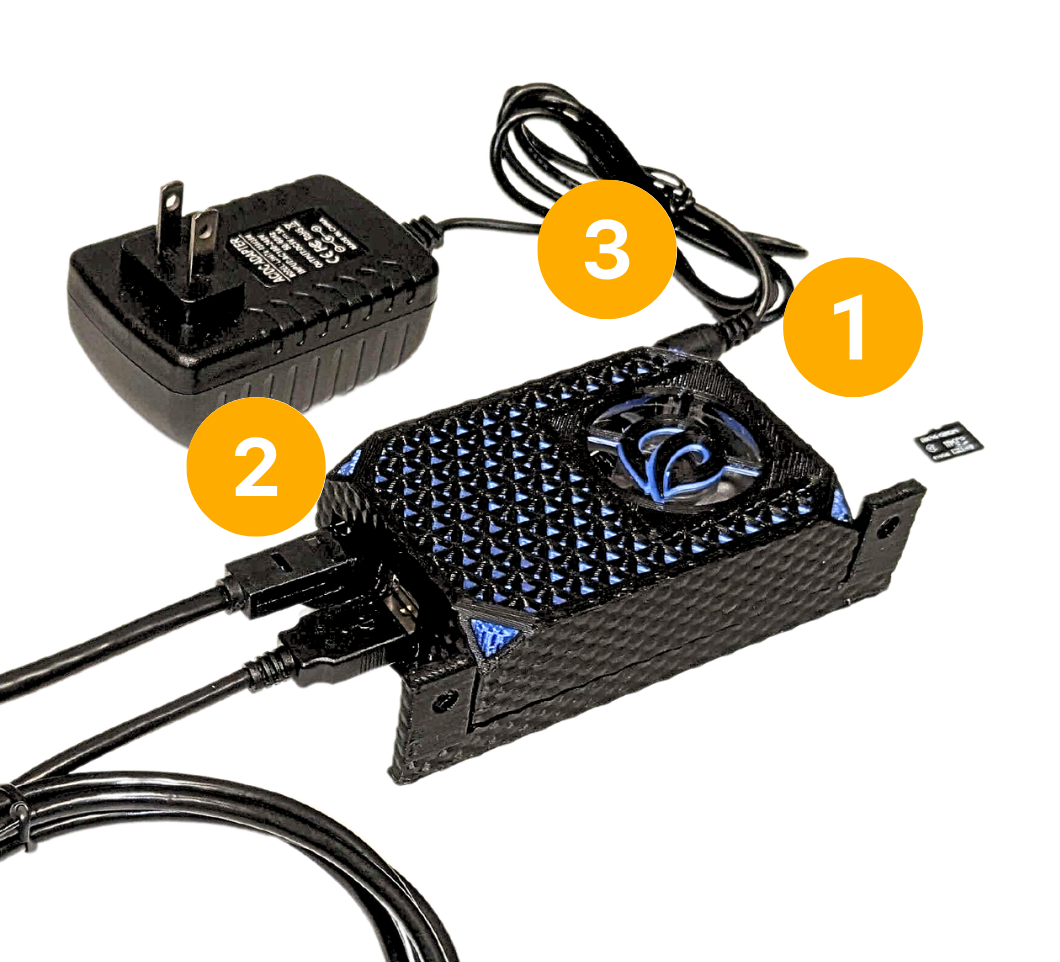
1. What's in the kit?
The Print Farm Hub kit includes:
- Raspberry Pi 4 with 2GB RAM
- 32 GB MicroSD card with AutoFarm3D pre-installed
- Raspberry Pi 4 5V power supply
- 10' Ethernet cable
- Enclosure + cooling fan
2. Network Connection
- Ethernet (Recommended)
- WiFi
If you're using an ethernet connection, all you need to do is plug in an ethernet cable connecting your Hub to your router or network switch. Ethernet is the most reliable way to connect your Hub to your network.
As of July 2023, Print Farm hubs no longer include a Wi-Fi module, they come with an Ethernet cable instead. Wi-Fi modules must be purchased separately. If ethernet is not an option, contact 3DQue support for assistance.
First, we need to tell your Print Farm Hub how to connect to your WiFi network.
-
Remove the SD card from your Print Farm Hub. It is springloaded. Gently push it in, and it'll pop out.
-
Plug in the SD card to your computer. Some windows may appear saying "You need to format the disk in drive X: before you can use it. Format now?". Select Cancel and close them all.
-
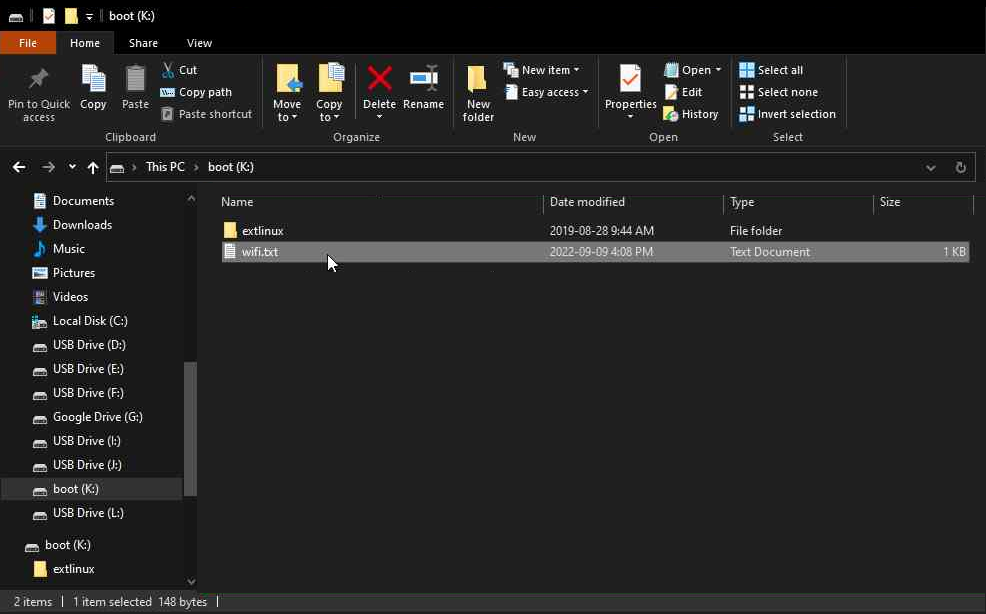
One of the new drives on your computer should be named "boot". Open this drive.
-
Open the file named "wifi.txt" using a text editor like Notepad (Windows) or TextEdit (Mac).
-
Fill in your WiFi name (SSID) and password.
Make sure there are no spaces after the colon or at the end of your SSID/password.
Example wifi.txt:
Put your wifi information below, it is case sensitive. Type it directly after the colon:like this.
network-name:Example Network Name password:Example-Password
-
Save wifi.txt, then safely eject the SD card from your computer.
If your network is a 'corporate' network (E.g. not a standard home network, your workplace has an IT team, you're a school/university, you work in a shared workplace, etc.), please contact 3DQue support for setup assistance.
3. Plug Everything in
Make sure the Hub is turned off and unplugged.
-
Make sure the SD card is fully inserted into the Hub.
- The SD slot is spring-loaded. Push in until the card clicks into place. Do not force it.
-
Connect the Ethernet cable from your Hub to your router or network switch.
-
Connect the power supply.
Your Hub should power on and begin booting up.
4. Log in to AutoFarm3D
On first powerup, please allow for up to 15 minutes for the Print Farm Hub to boot and connect to your network, and automatically install any updates. Please do not unplug the Hub during this process. Subsequent boot-ups will be much faster.
4.1 Finding Your IP Address
When the Print Farm Hub successfully boots and connects to the internet, you will need to find its IP address.
To find your IP address, we recommend using Angry IP Scanner. To begin, please download and run the appropriate installer.
Once installed, you should see this:
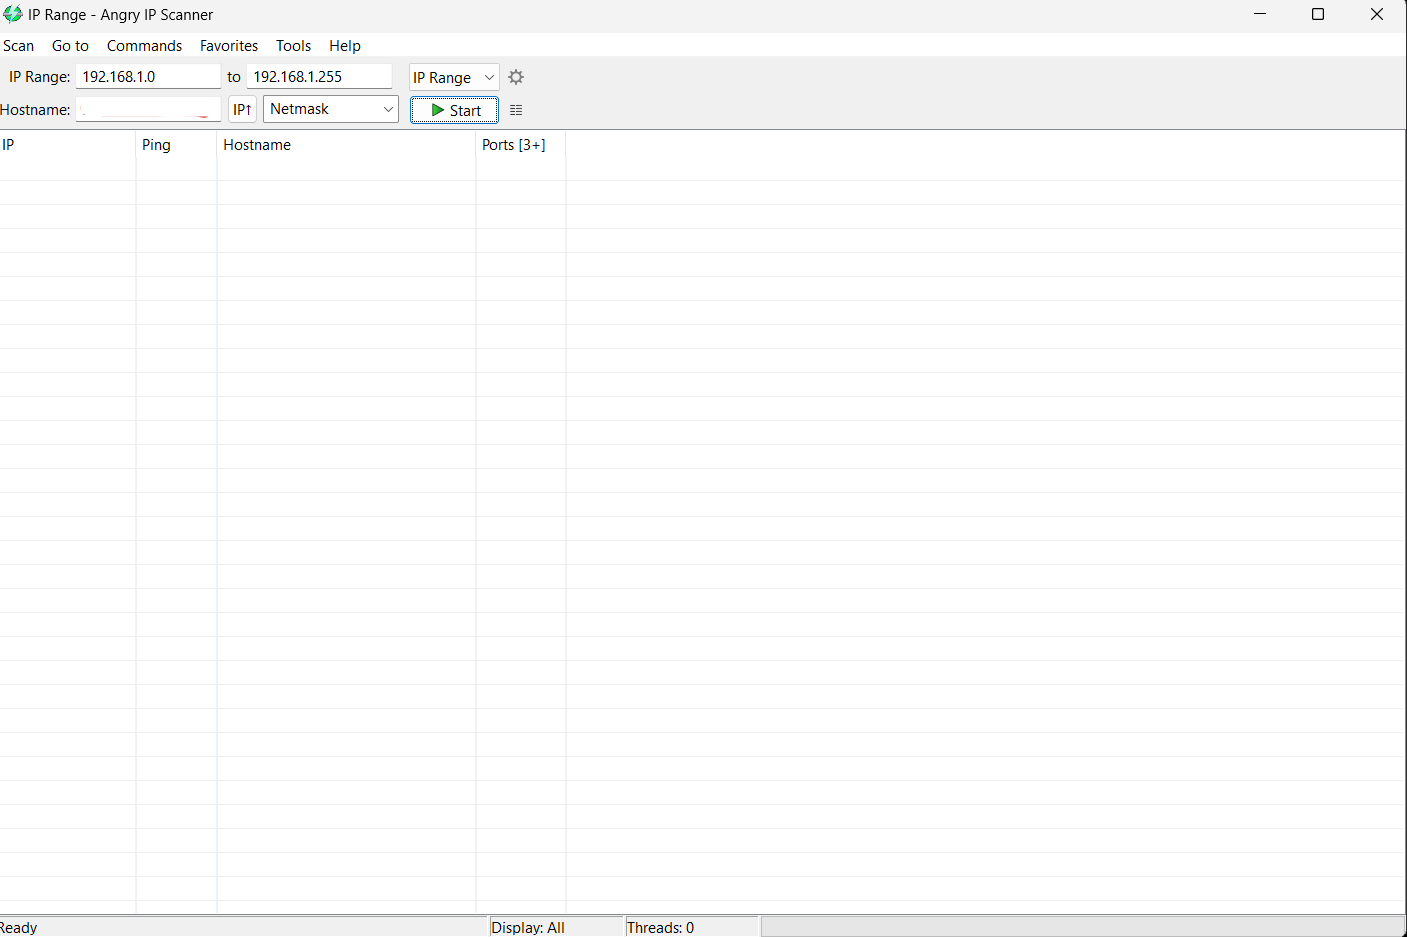
Simply click the “Start” button and wait until scanning is complete (approx. 60sec). Once it is complete, click close.
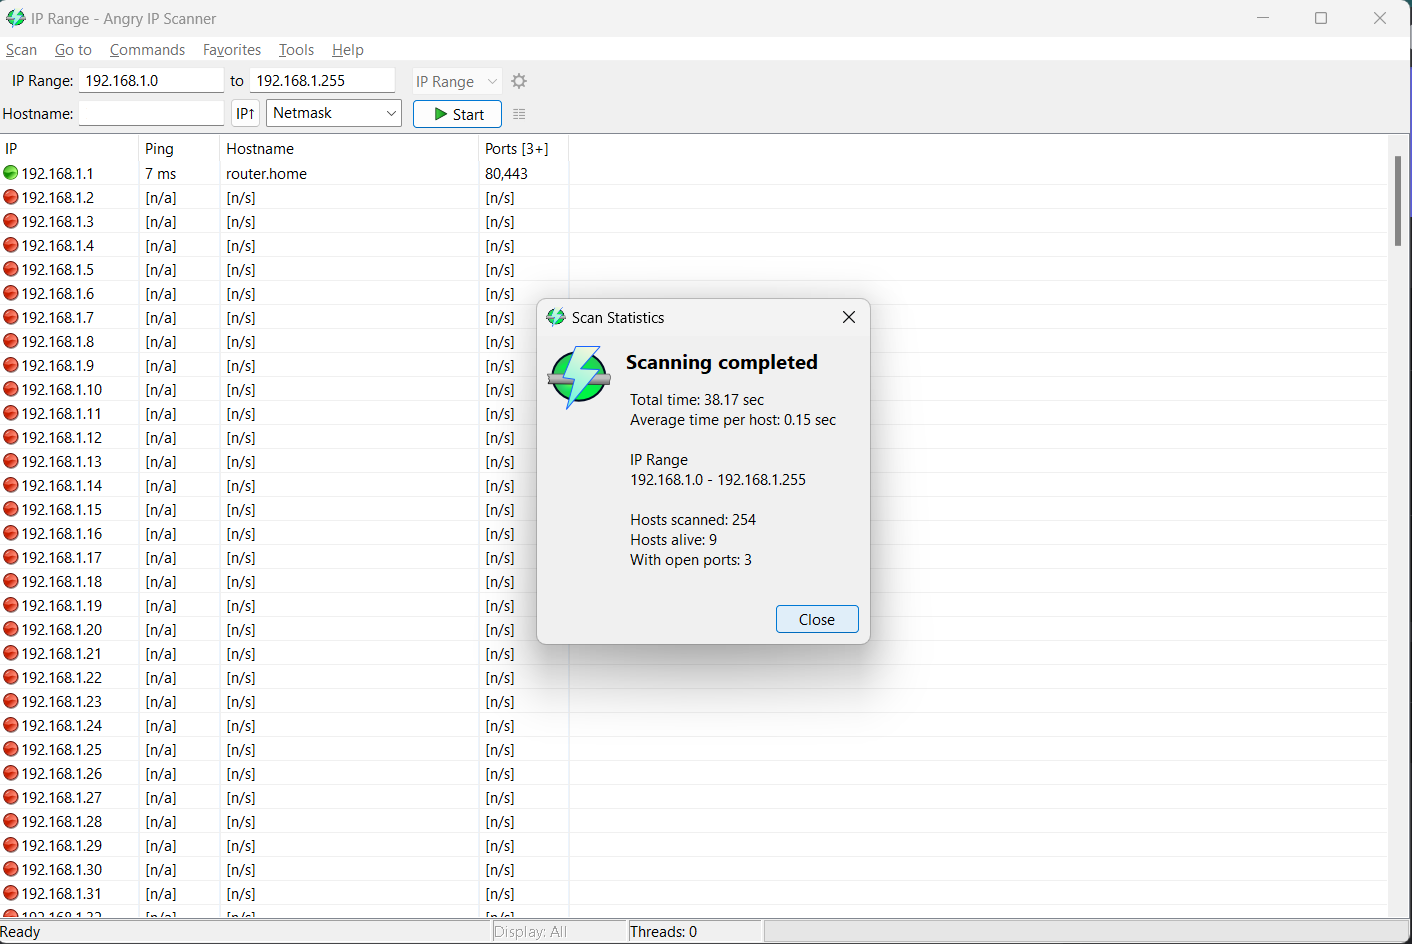
Look for "Raspberrypi.home" or "Rock64" in the Hostname column
You can search for the above by using ctrl+f on Windows or cmd+f on Mac, and can sort the column by clicking “Hostname” then “Sort by Hostname.”
Once you have found the IP address, you can proceed to 4.2!
If you are having issues finding the IP or unsure if your Print Farm Hub is functioning correctly, please see our Network Troubleshooting Page.
4.2 Log in From Your Browser
- On your computer, open a browser and enter the IP address followed by “:8080”. You should now see the AutoFarm3D login screen.
- Sign in to your AutoFarm3D account. If you don't have an account, please create one.
5.0 Next Steps
Check out our Tutorials to learn how to use AutoFarm3D!