Start a Timelapse
1. Physical Setup
1.1 Plug in Webcam
First of all, you'll need a webcam. Any USB webcam will work fine. Pi cams also work, if you have a Raspberry Pi. Plug the camera in, restart your Pi/Hub and you're ready to go.
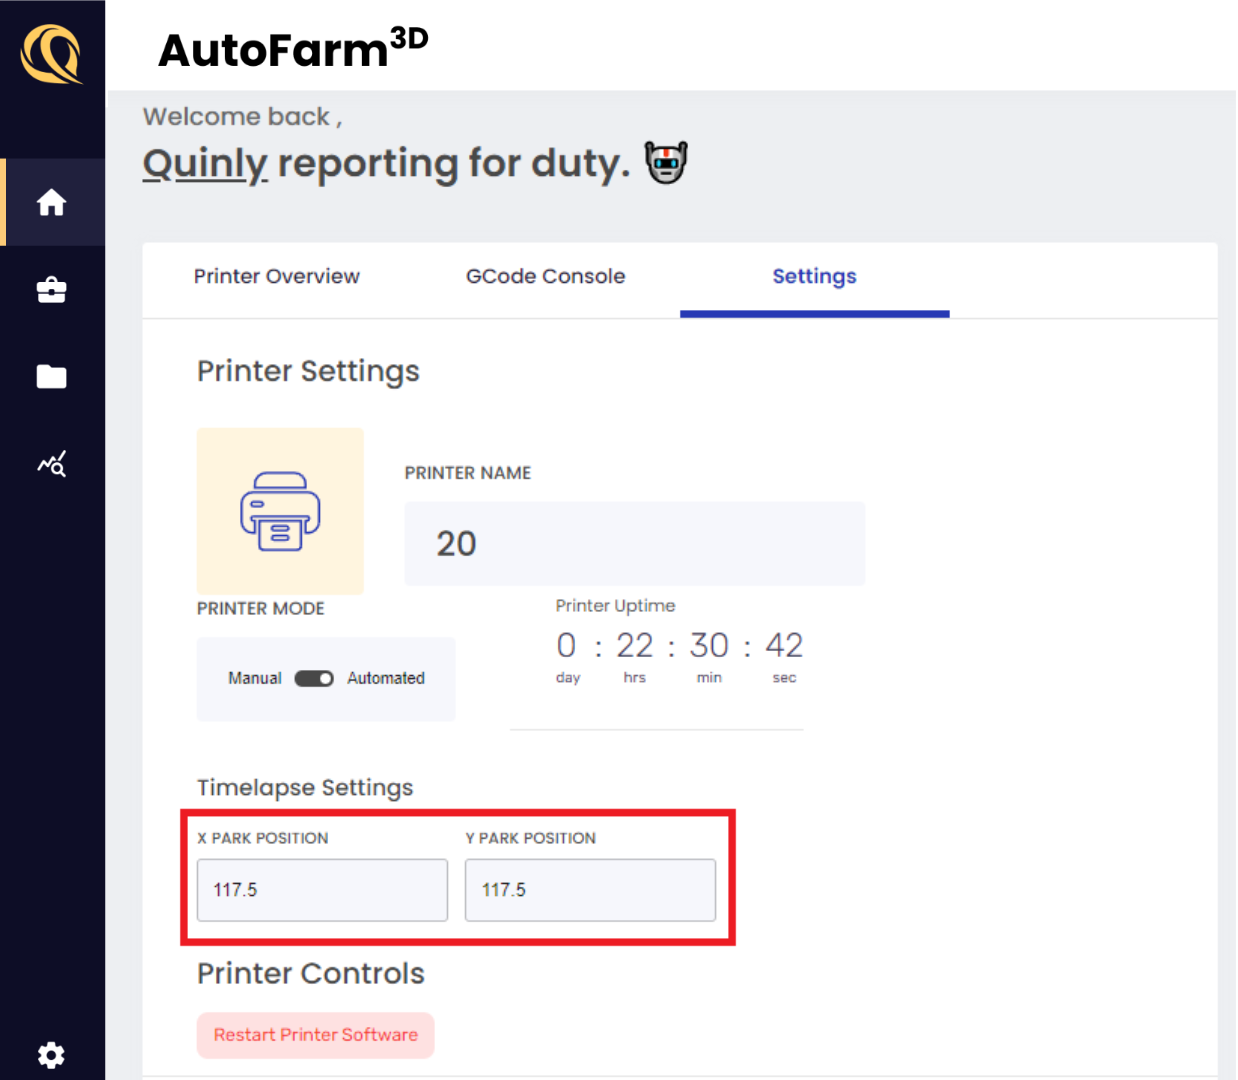
1.2 Set Nozzle Park Position
On the Overview page, go to the printer settings tab and set the X and Y coordinates of the park position.
2. Start a Timelapse
2.1 Create a Job
Create a print job as you usually would. You can select as many files as you want and set the timelapse settings individually.
2.2 Click Timelapse Settings
Add SmartTags, set the quantity for each print, and set the release temperature, if applicable. Then click the "Timelapse" button to see the timelapse settings.

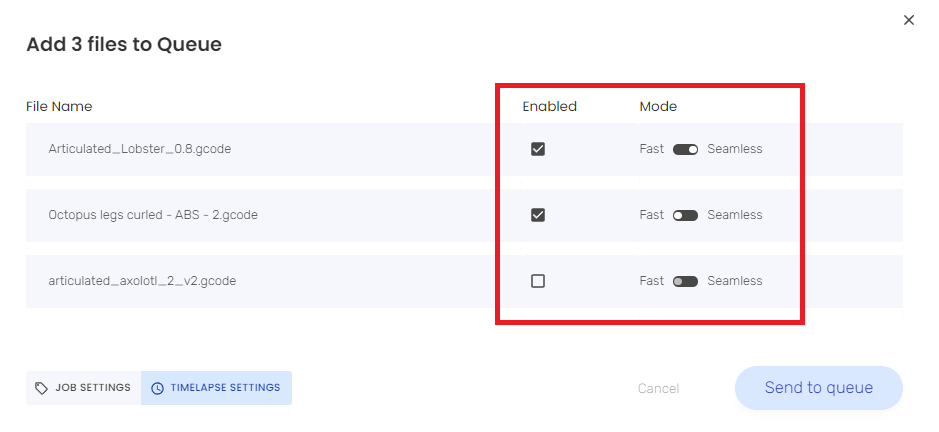
2.3 Adjust Timelapse Settings
For each print job, you can enable/disable timelapse, and you can choose fast/seamless.
2.4 Send Prints to Queue
Send your prints to the queue and they will print as usual while recording the selectced timelapse!
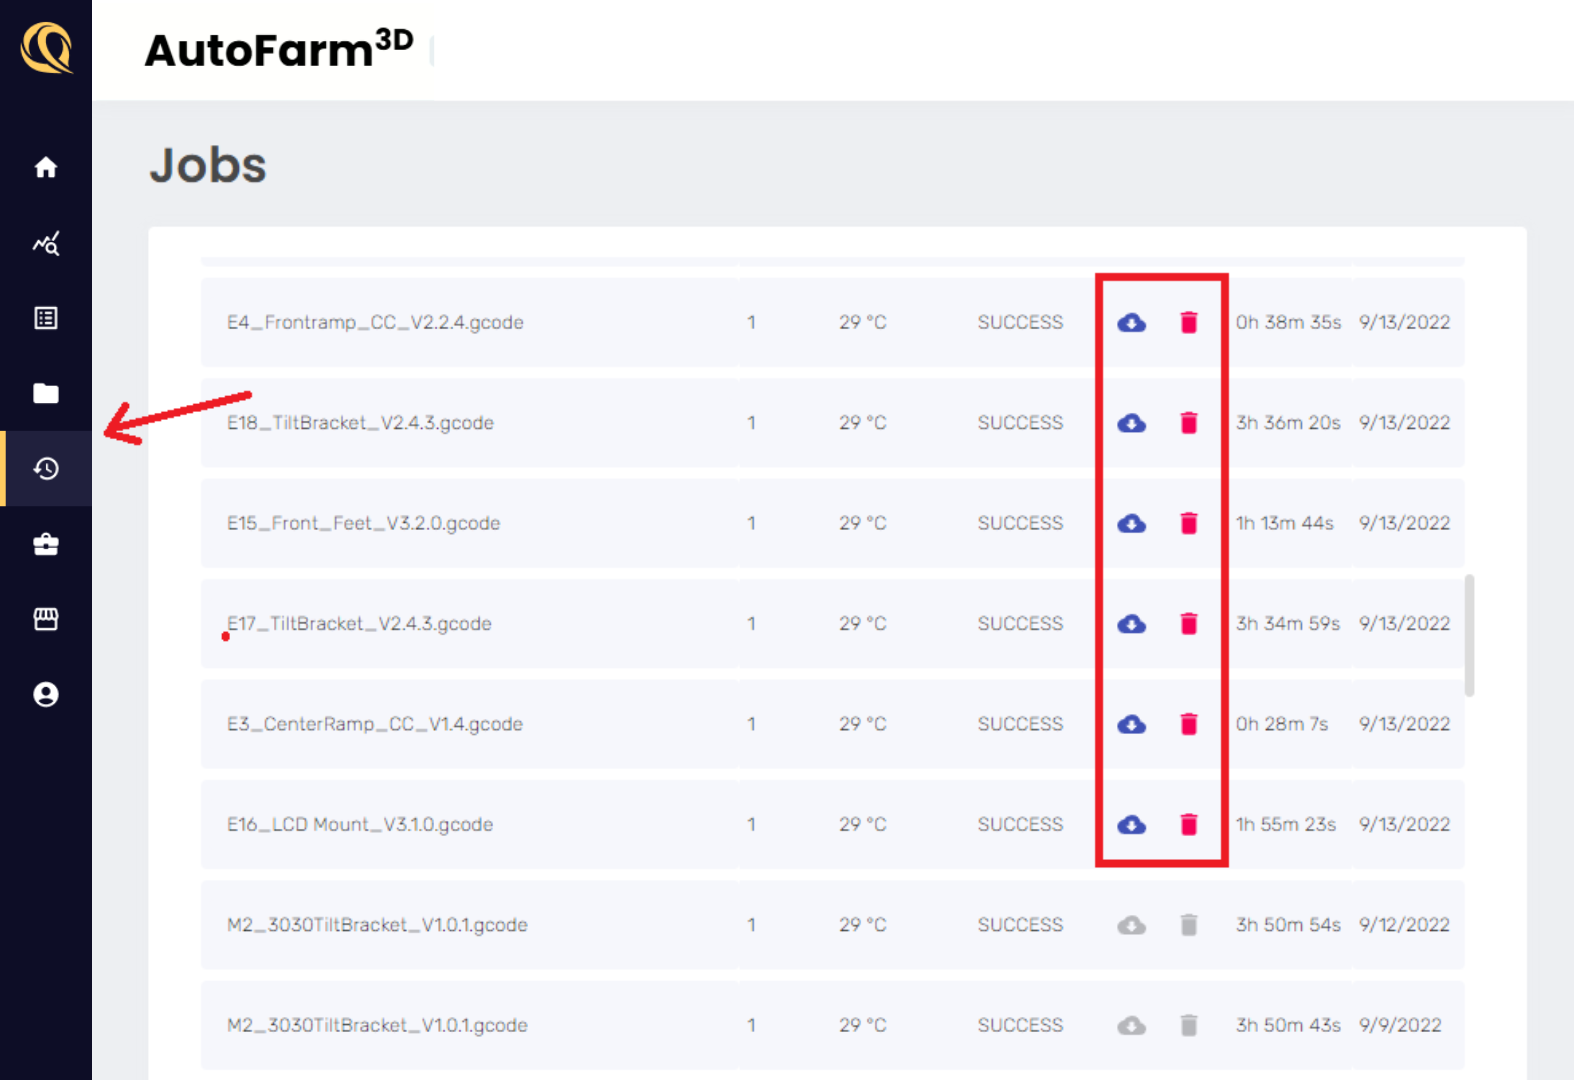
3. Download Timelapses
In the Job History page, you'll find a record of every print your printer has completed. If there is a timelapse associated with that print, you can download or delete the timelapse.