AMS Overview
1. Connecting AMS
AMS units that are connected to a printer will be automatically detected by AutoFarm3D. Simply connect your printer and the AMS information should appear.
If you are using non-RFID spools, you will need to manually update the filament on your Bambu LCD screen, and AutoFarm3D will automatically import that information. If you already have a filament in your AutoFarm3D library associated with the material/brand/colour being loaded, it will automatically match it to that filament.
2. AMS Preview
The AMS preview is located on the printer card on the “Overview” page of AutoFarm3D. It displays how many AMS units are connected to the printer and what colours are loaded in each slot.
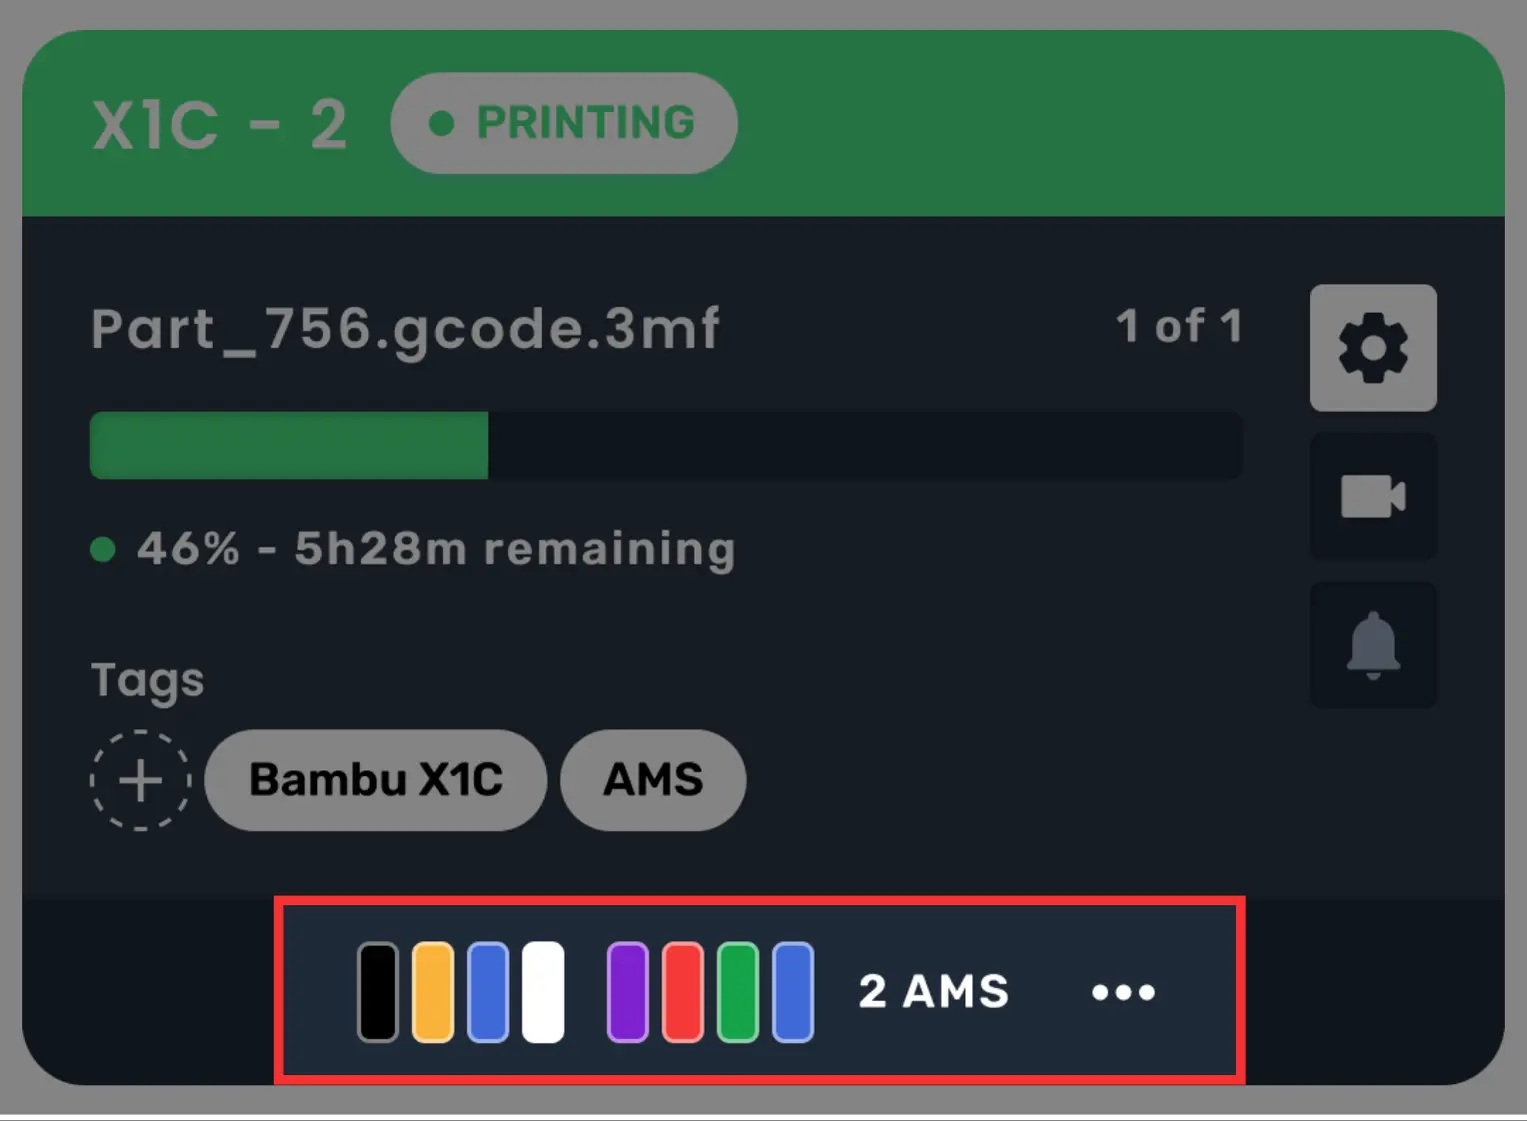
To see a more detailed view, click the three dots.
3. AMS Details
After clicking the dots on your printer card, you will see a more detailed display of AMS information. This popup shows filament colour as well as level and material.
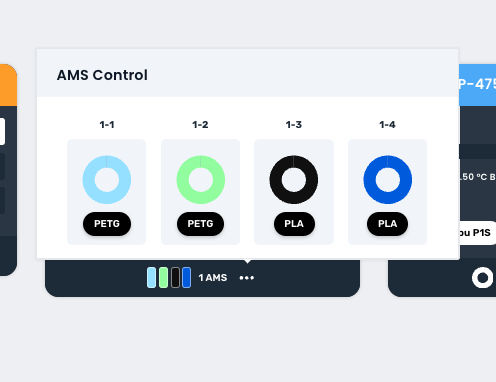
To edit the filament in a slot, simply click on the spool.
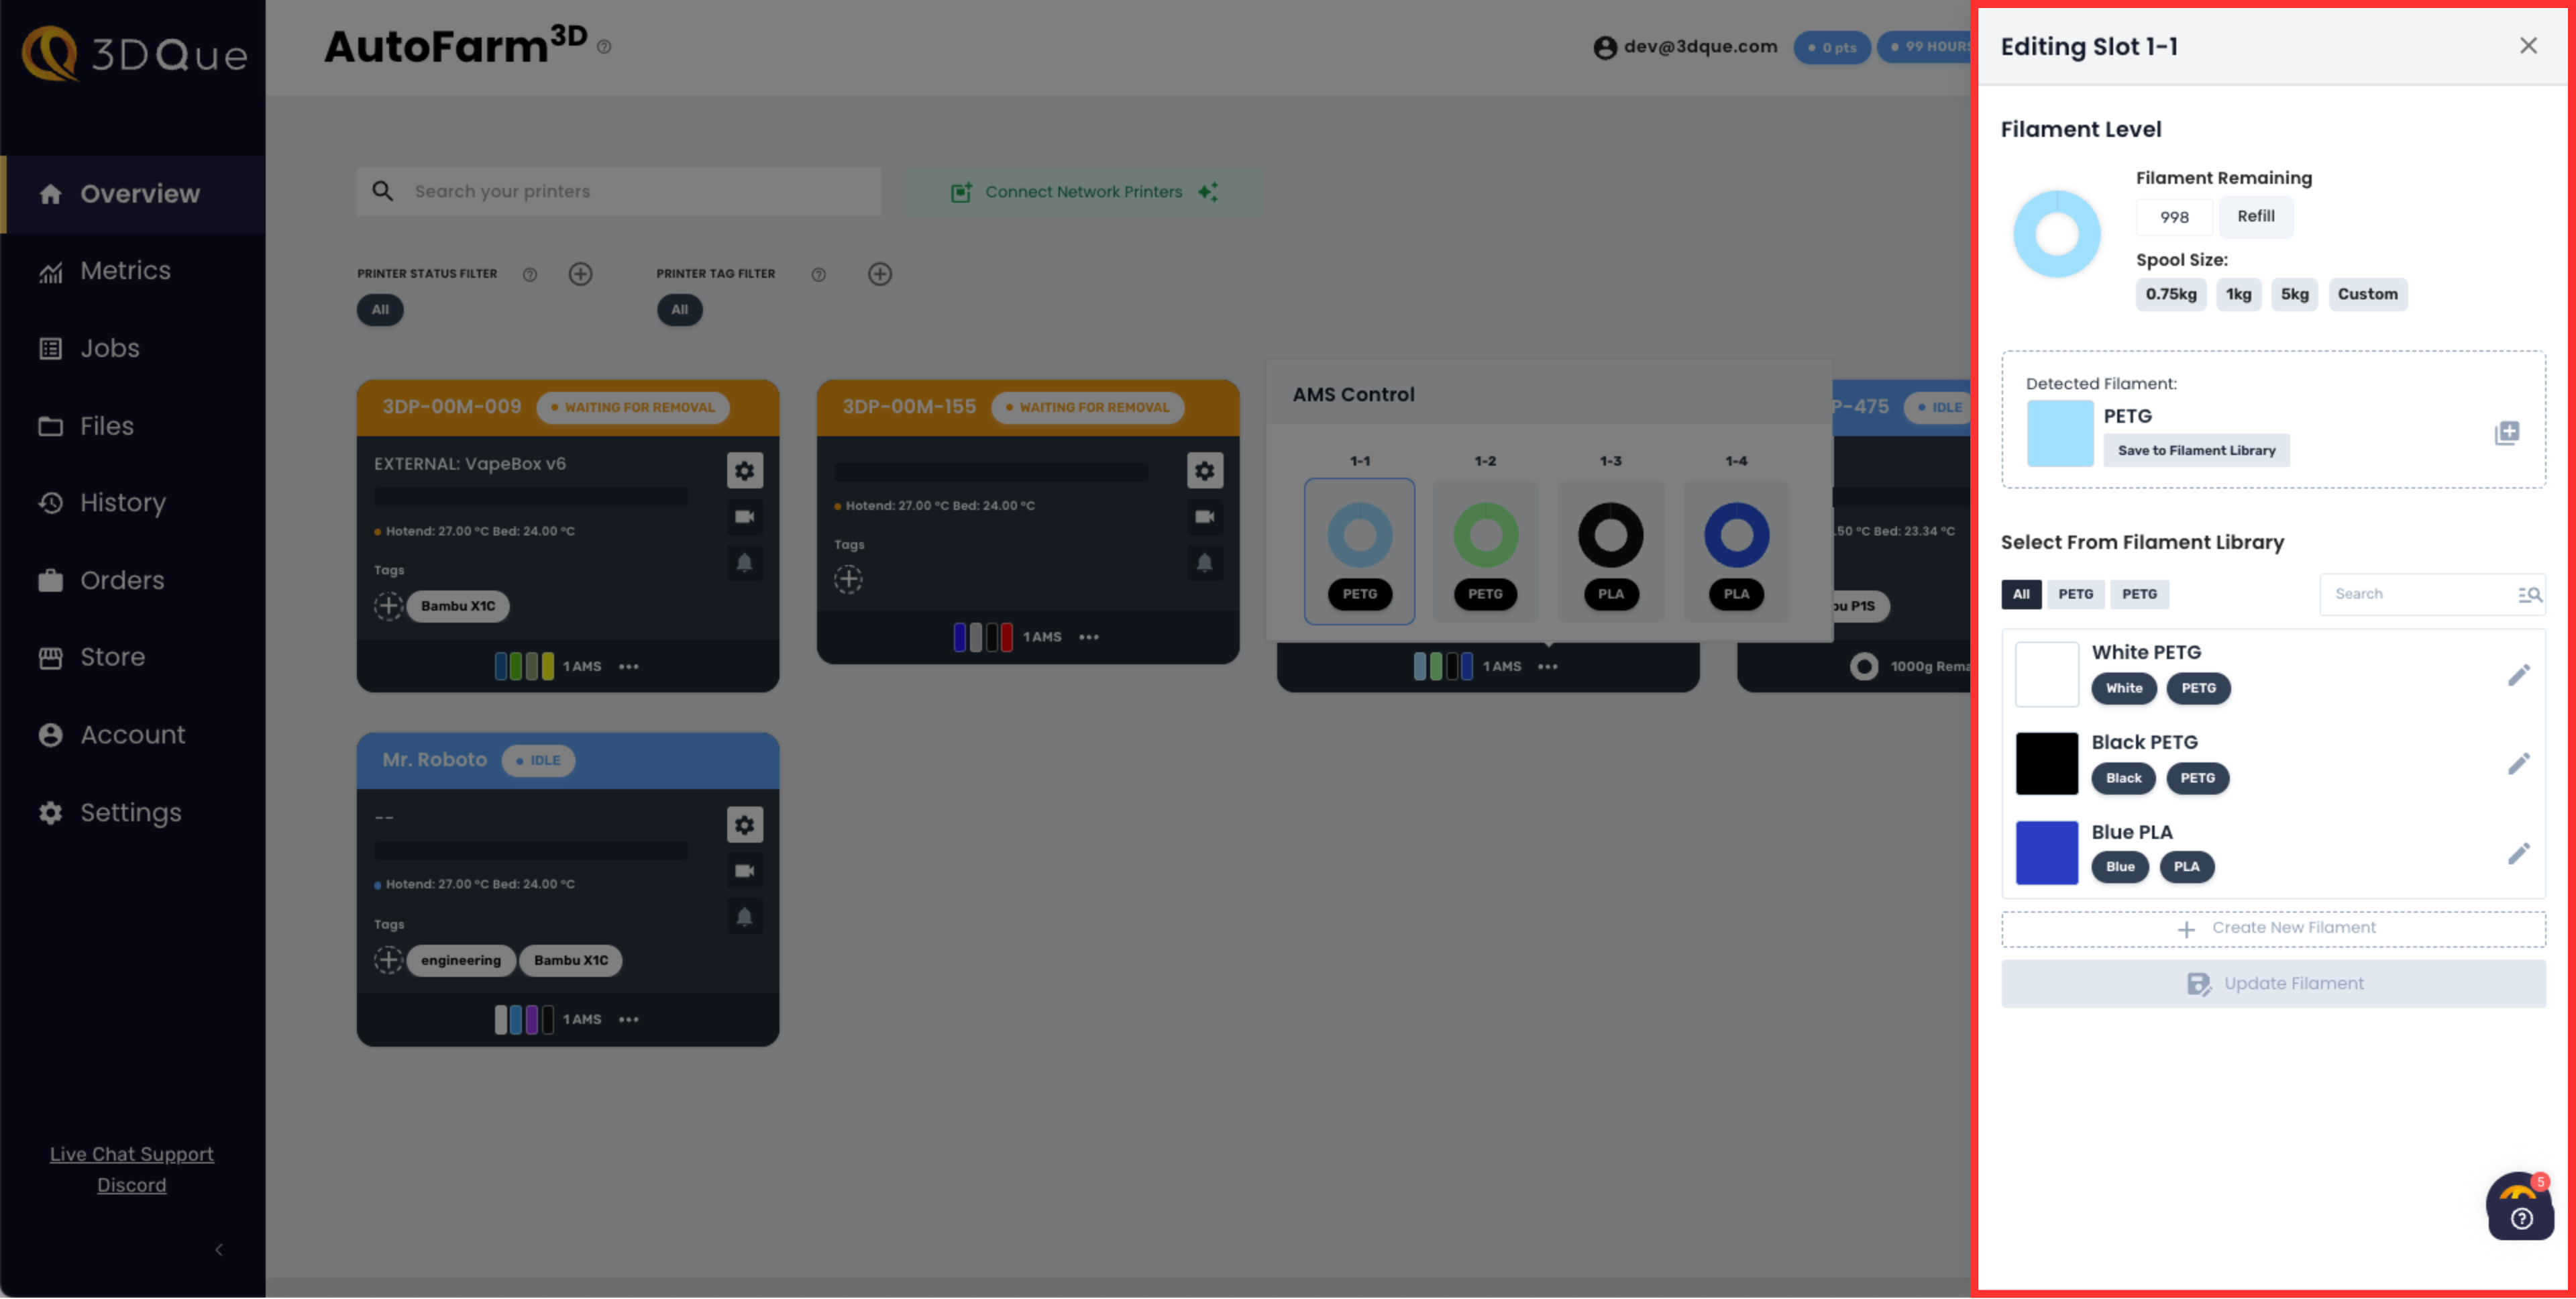
4. Spool Details & Editing
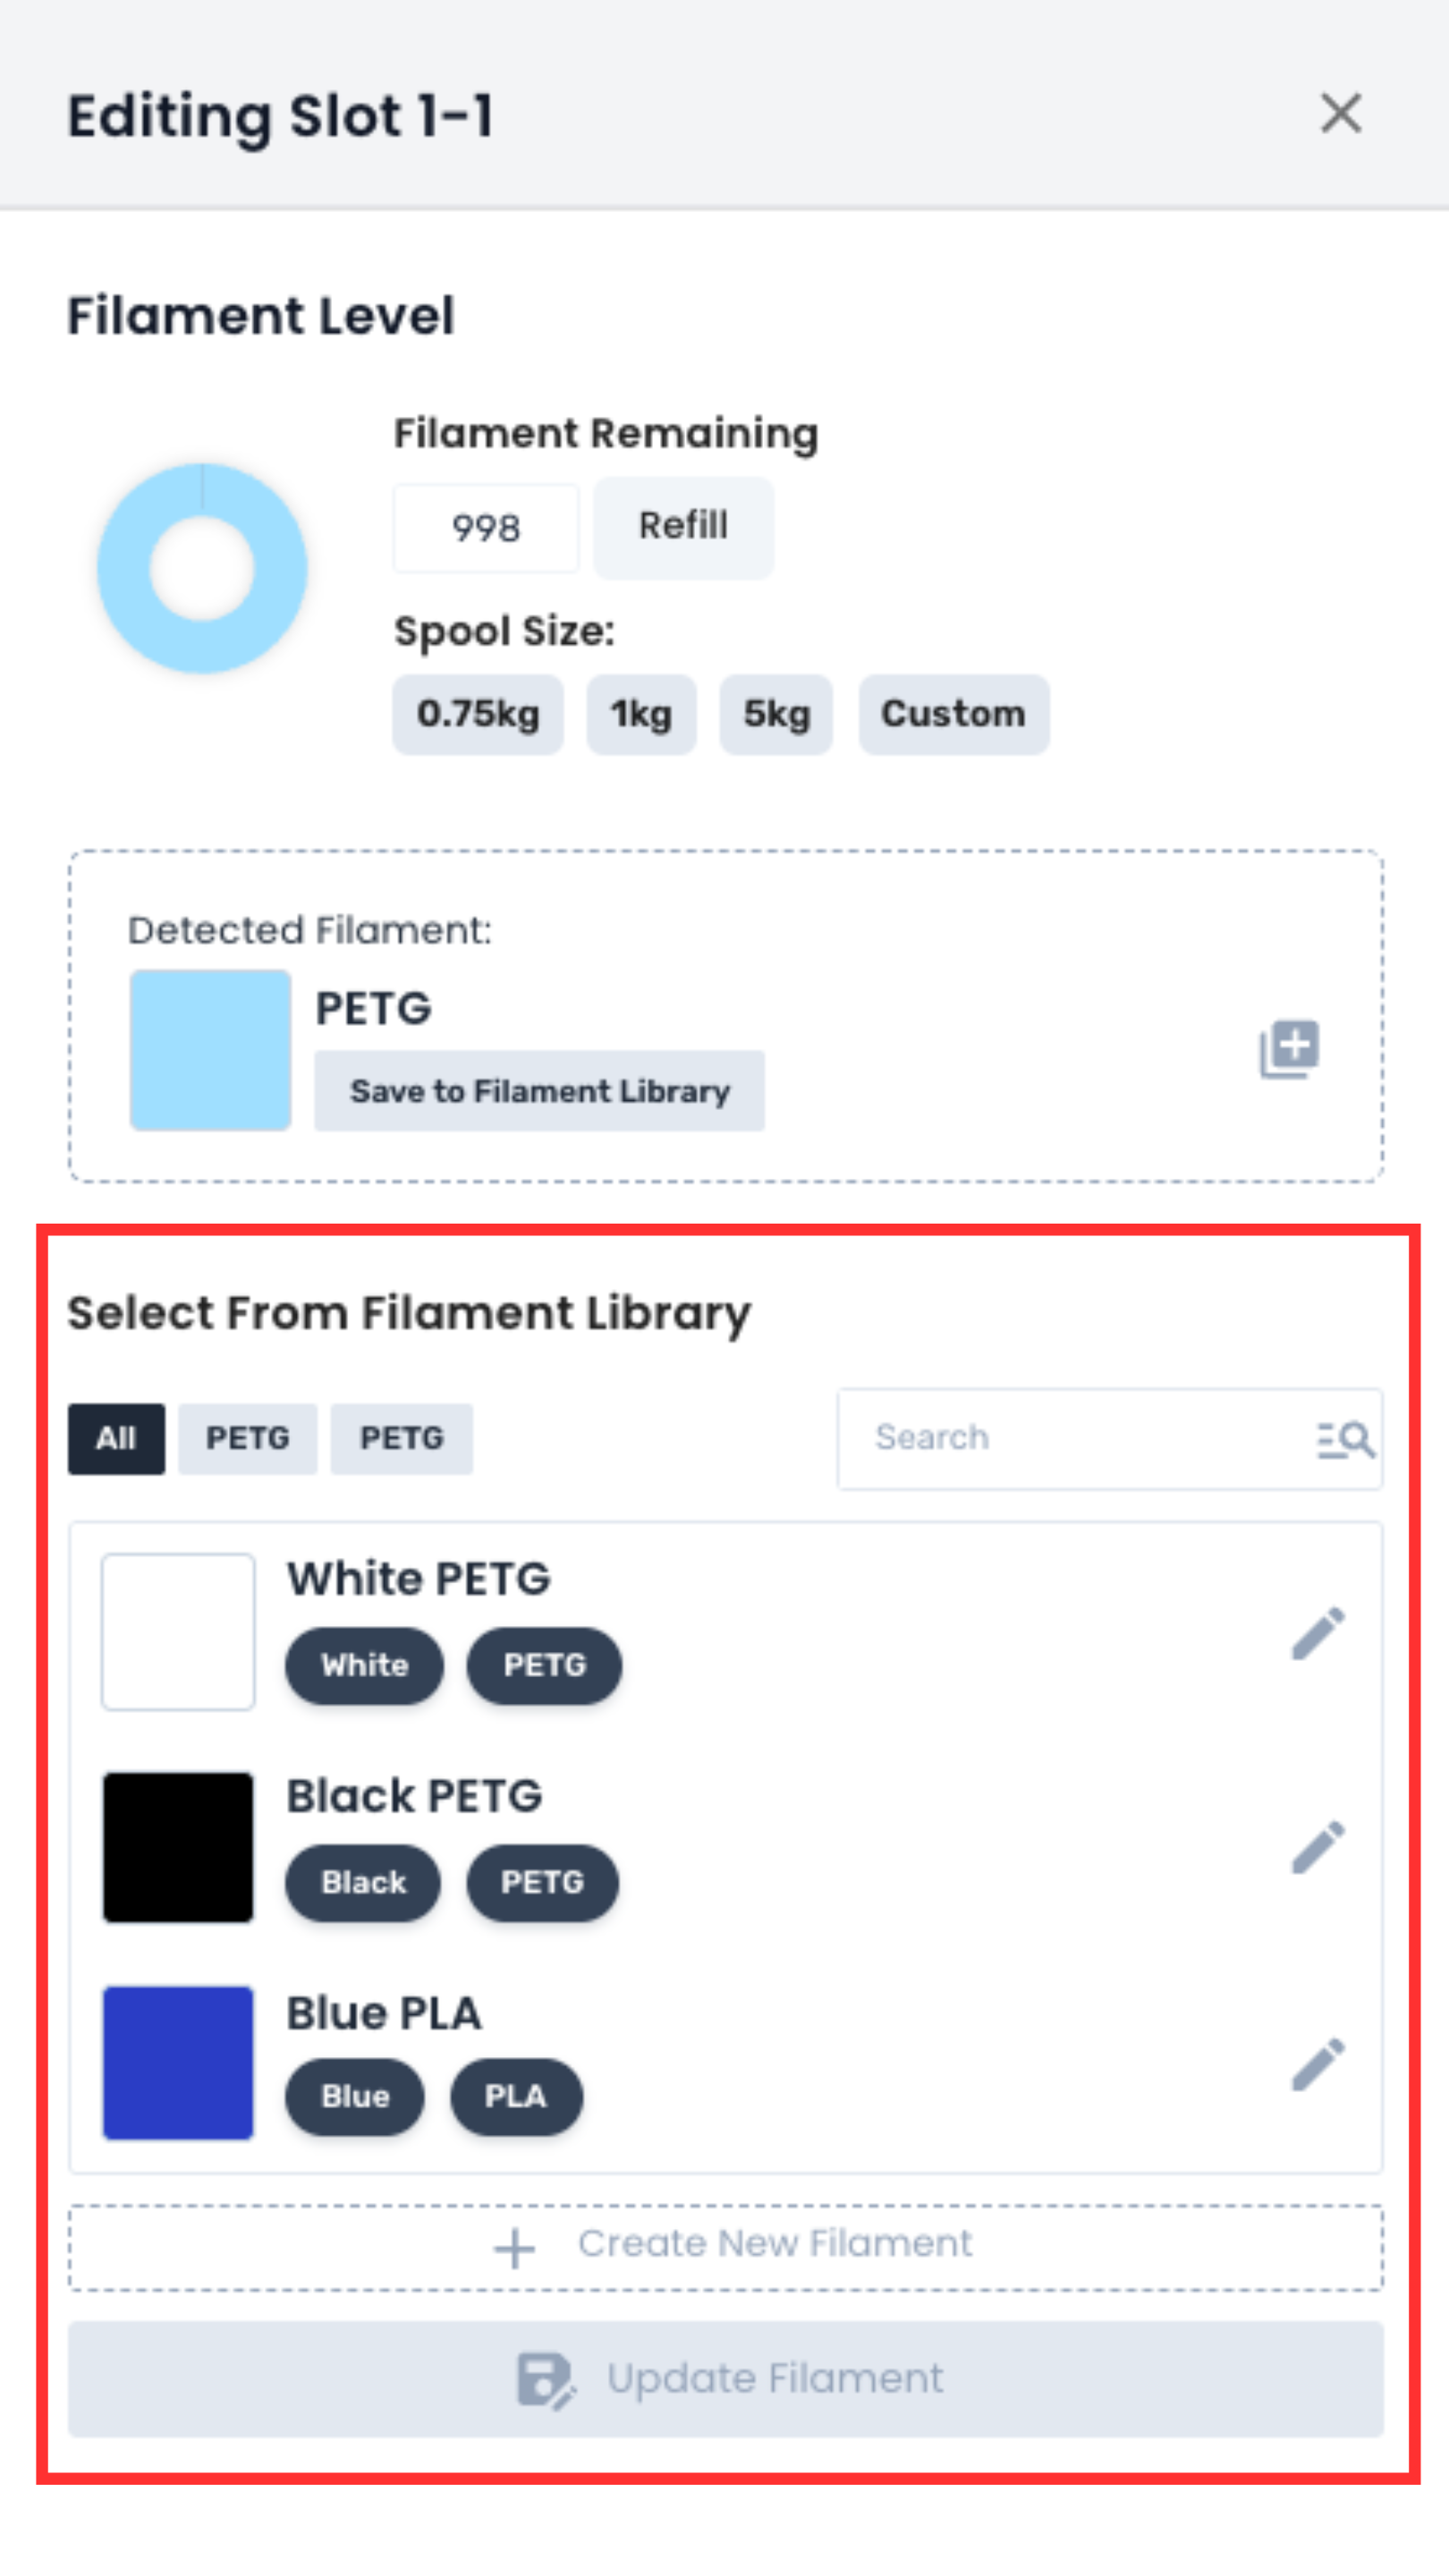
When you click on a spool, a side menu will appear where you can view and edit information associated with that AMS slot.
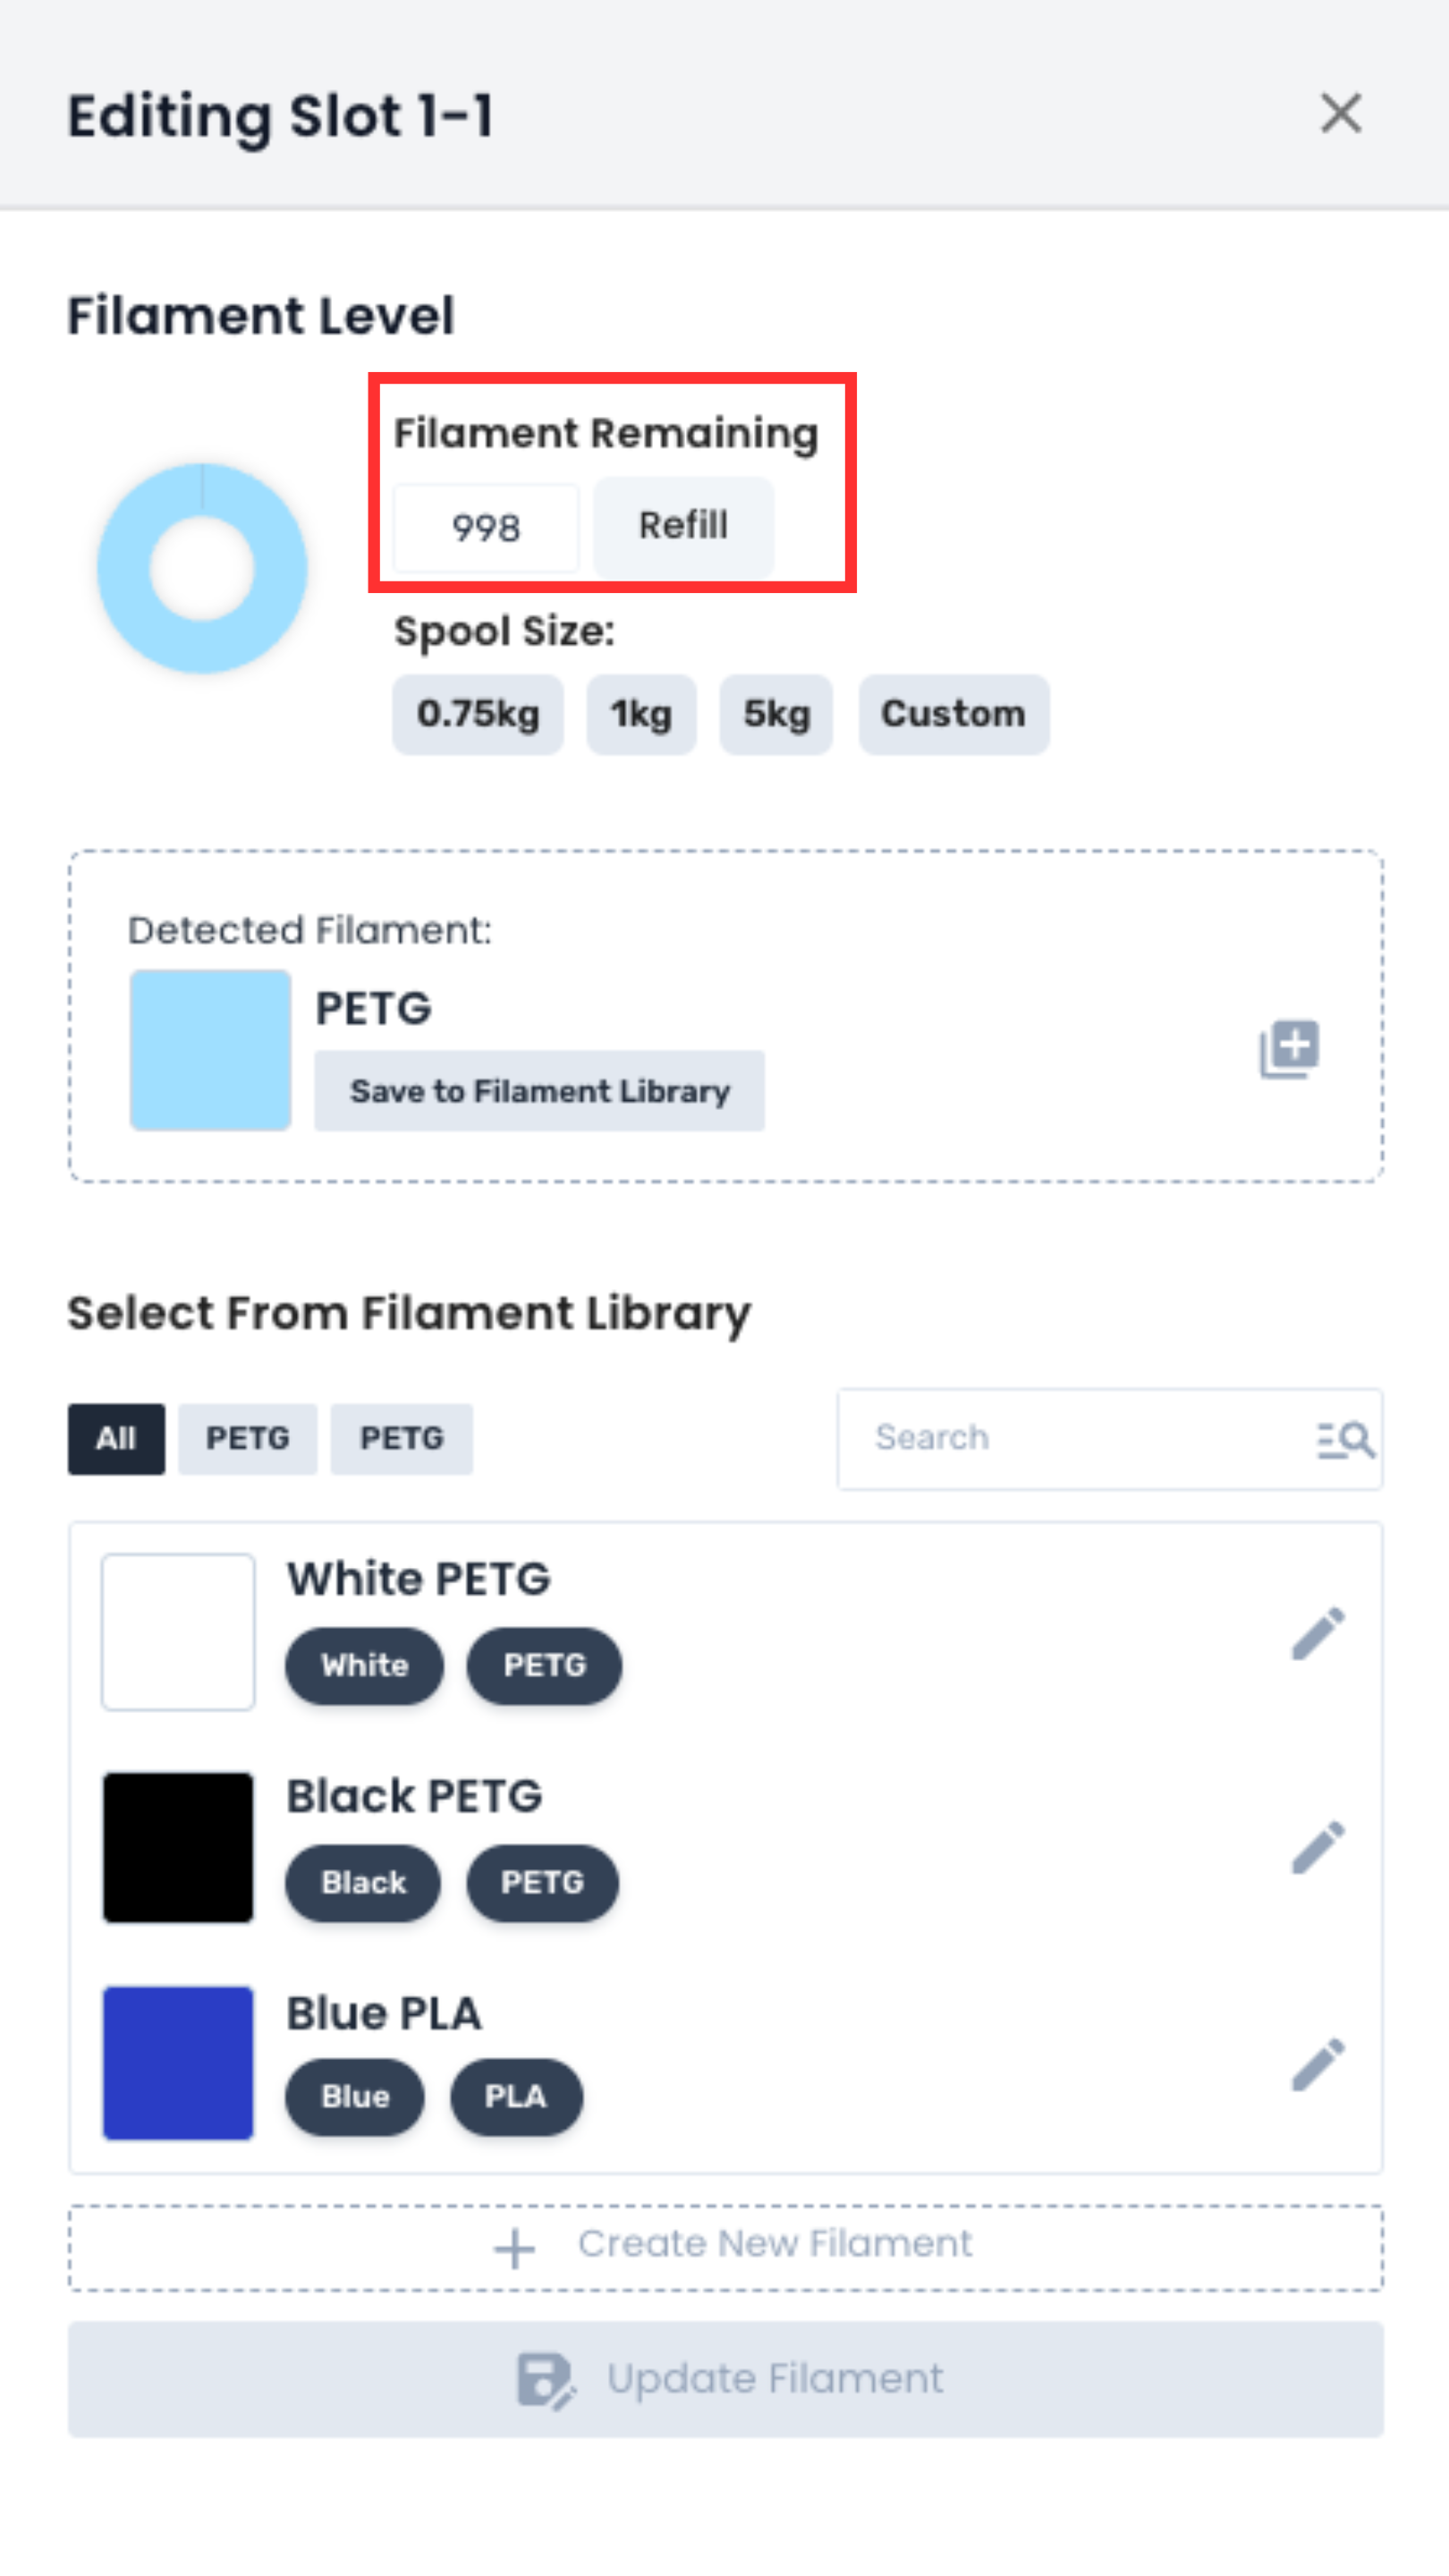
4.1 Filament Remaining
As you print, AutoFarm3D draws down filament real-time. It detects how much of each colour/material is used in each file and uses this information to keep track of levels. To edit how much is left, simply type in the new number (grams) and click Refill.
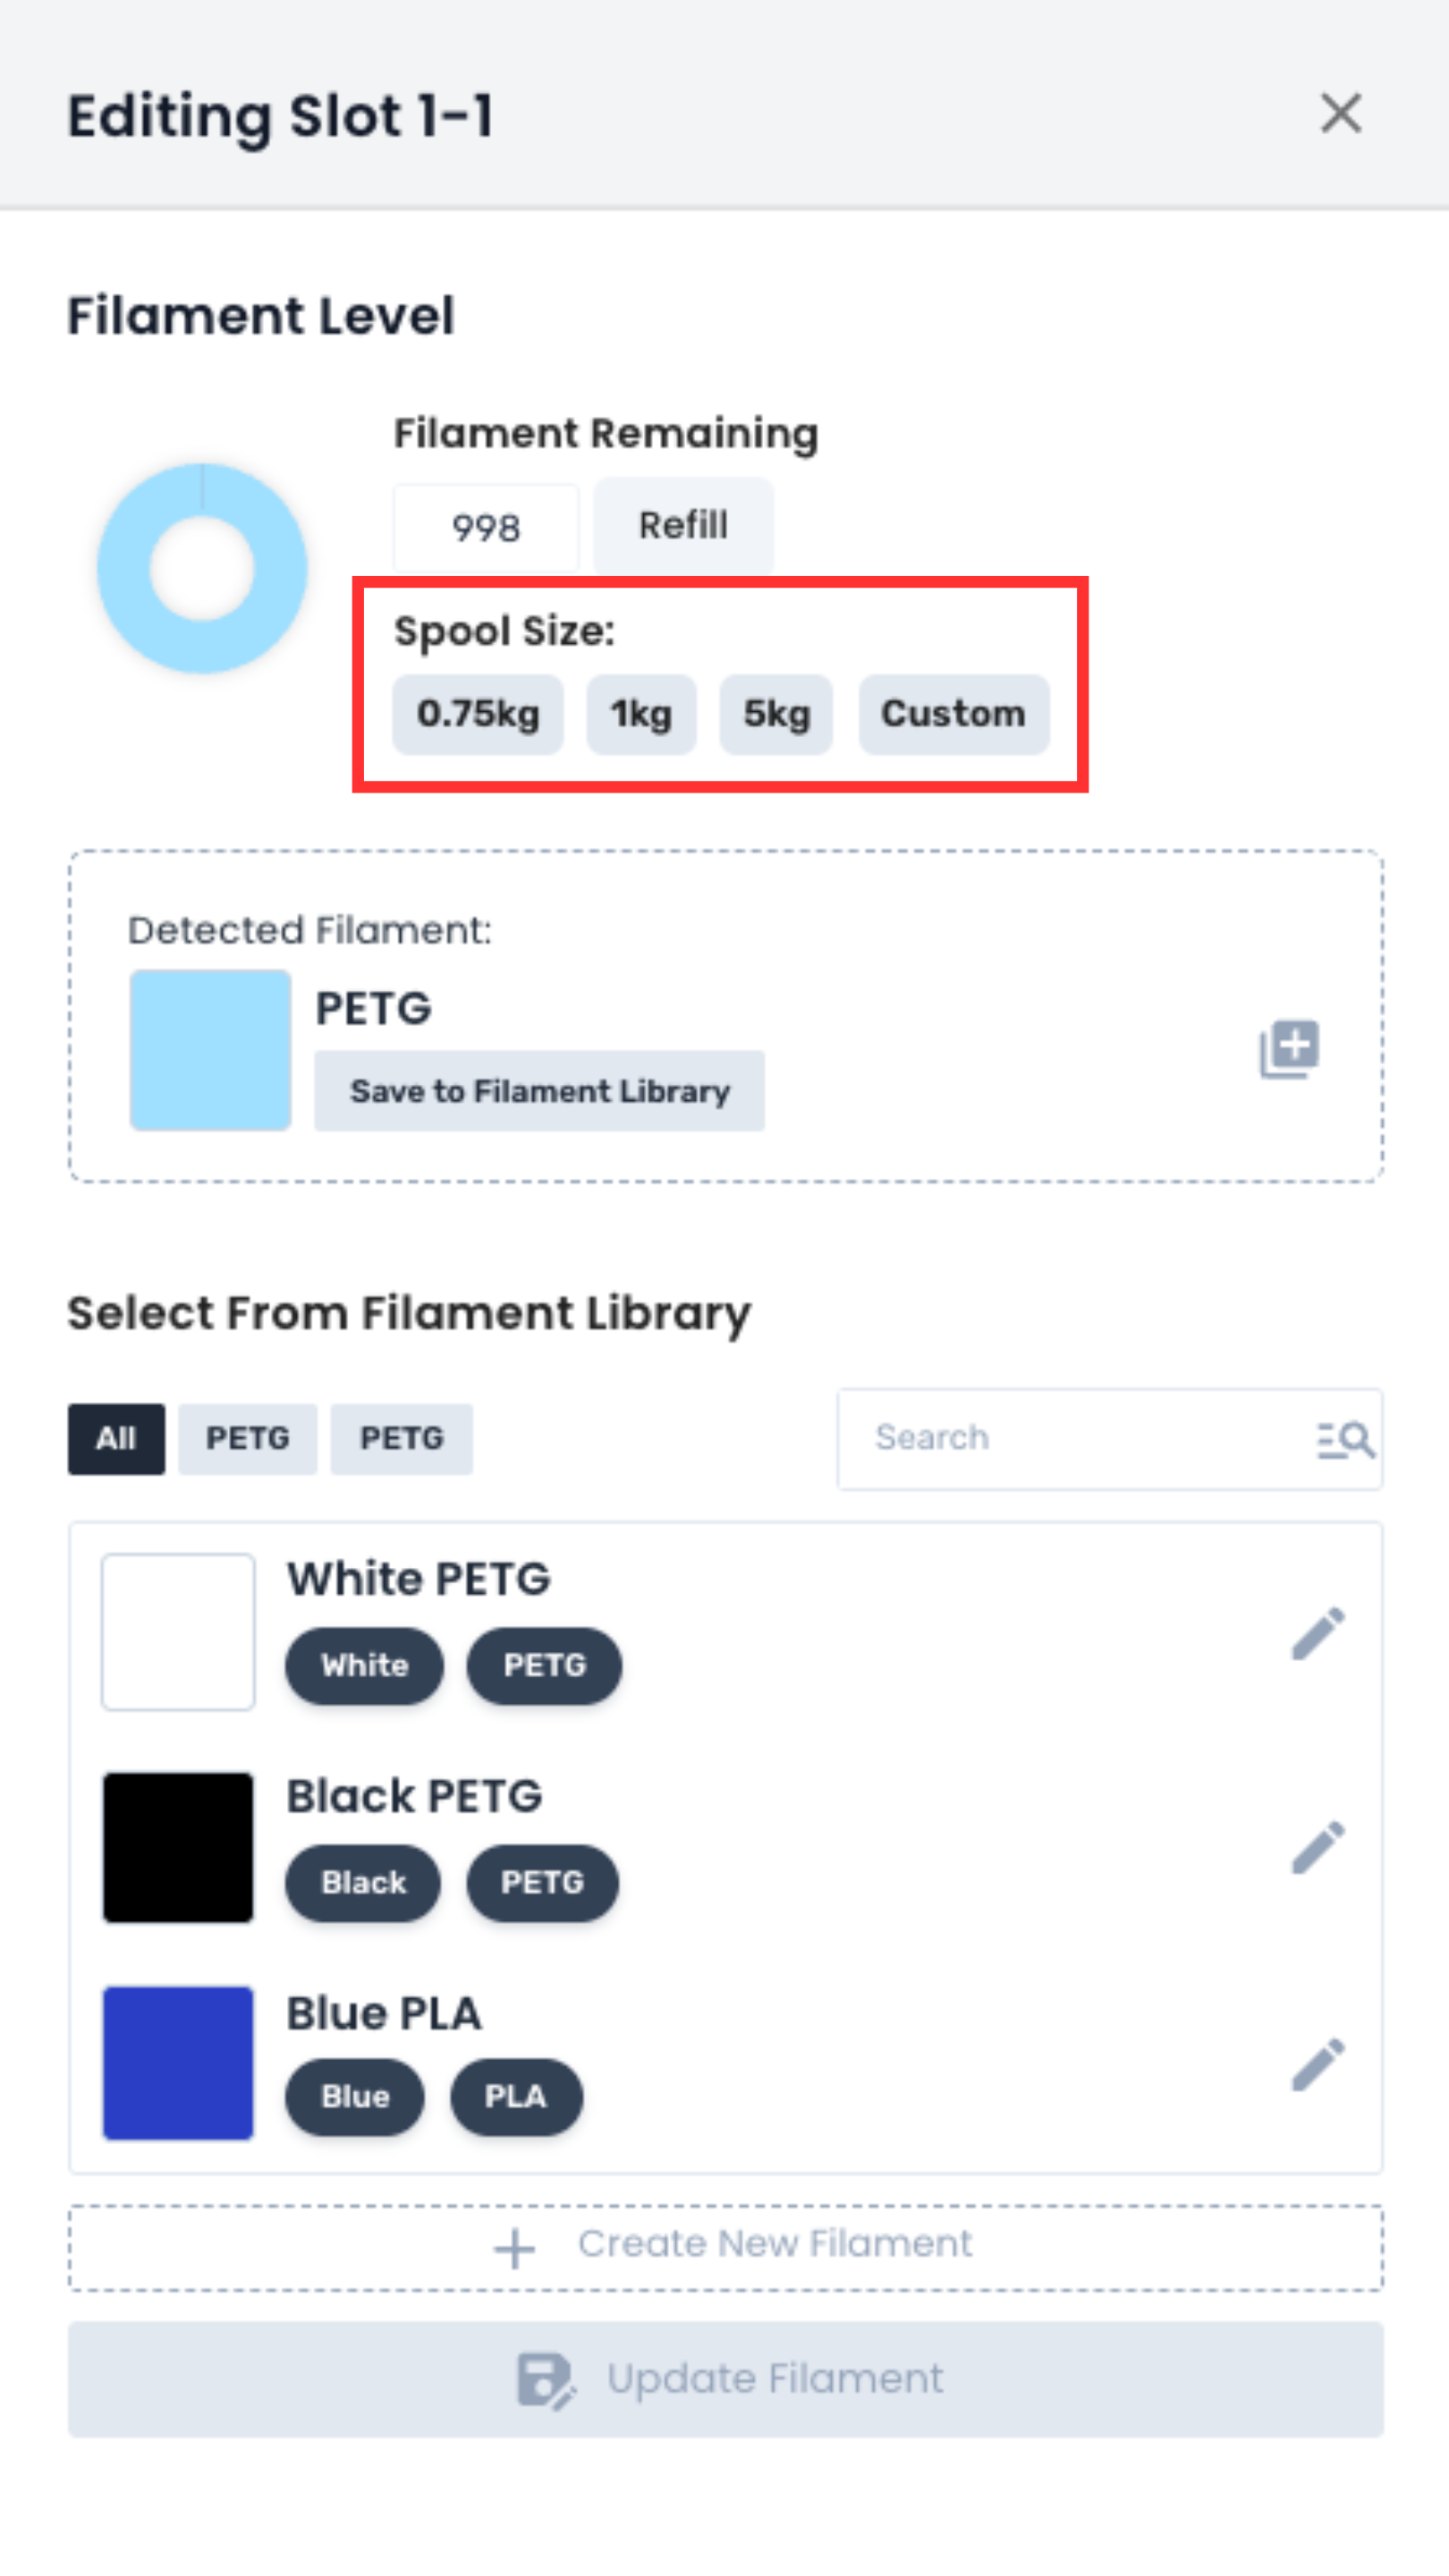
4.2 Spool Size
Here you can set the spool size so that drawdown remains accurate, regardless of what filament you use.
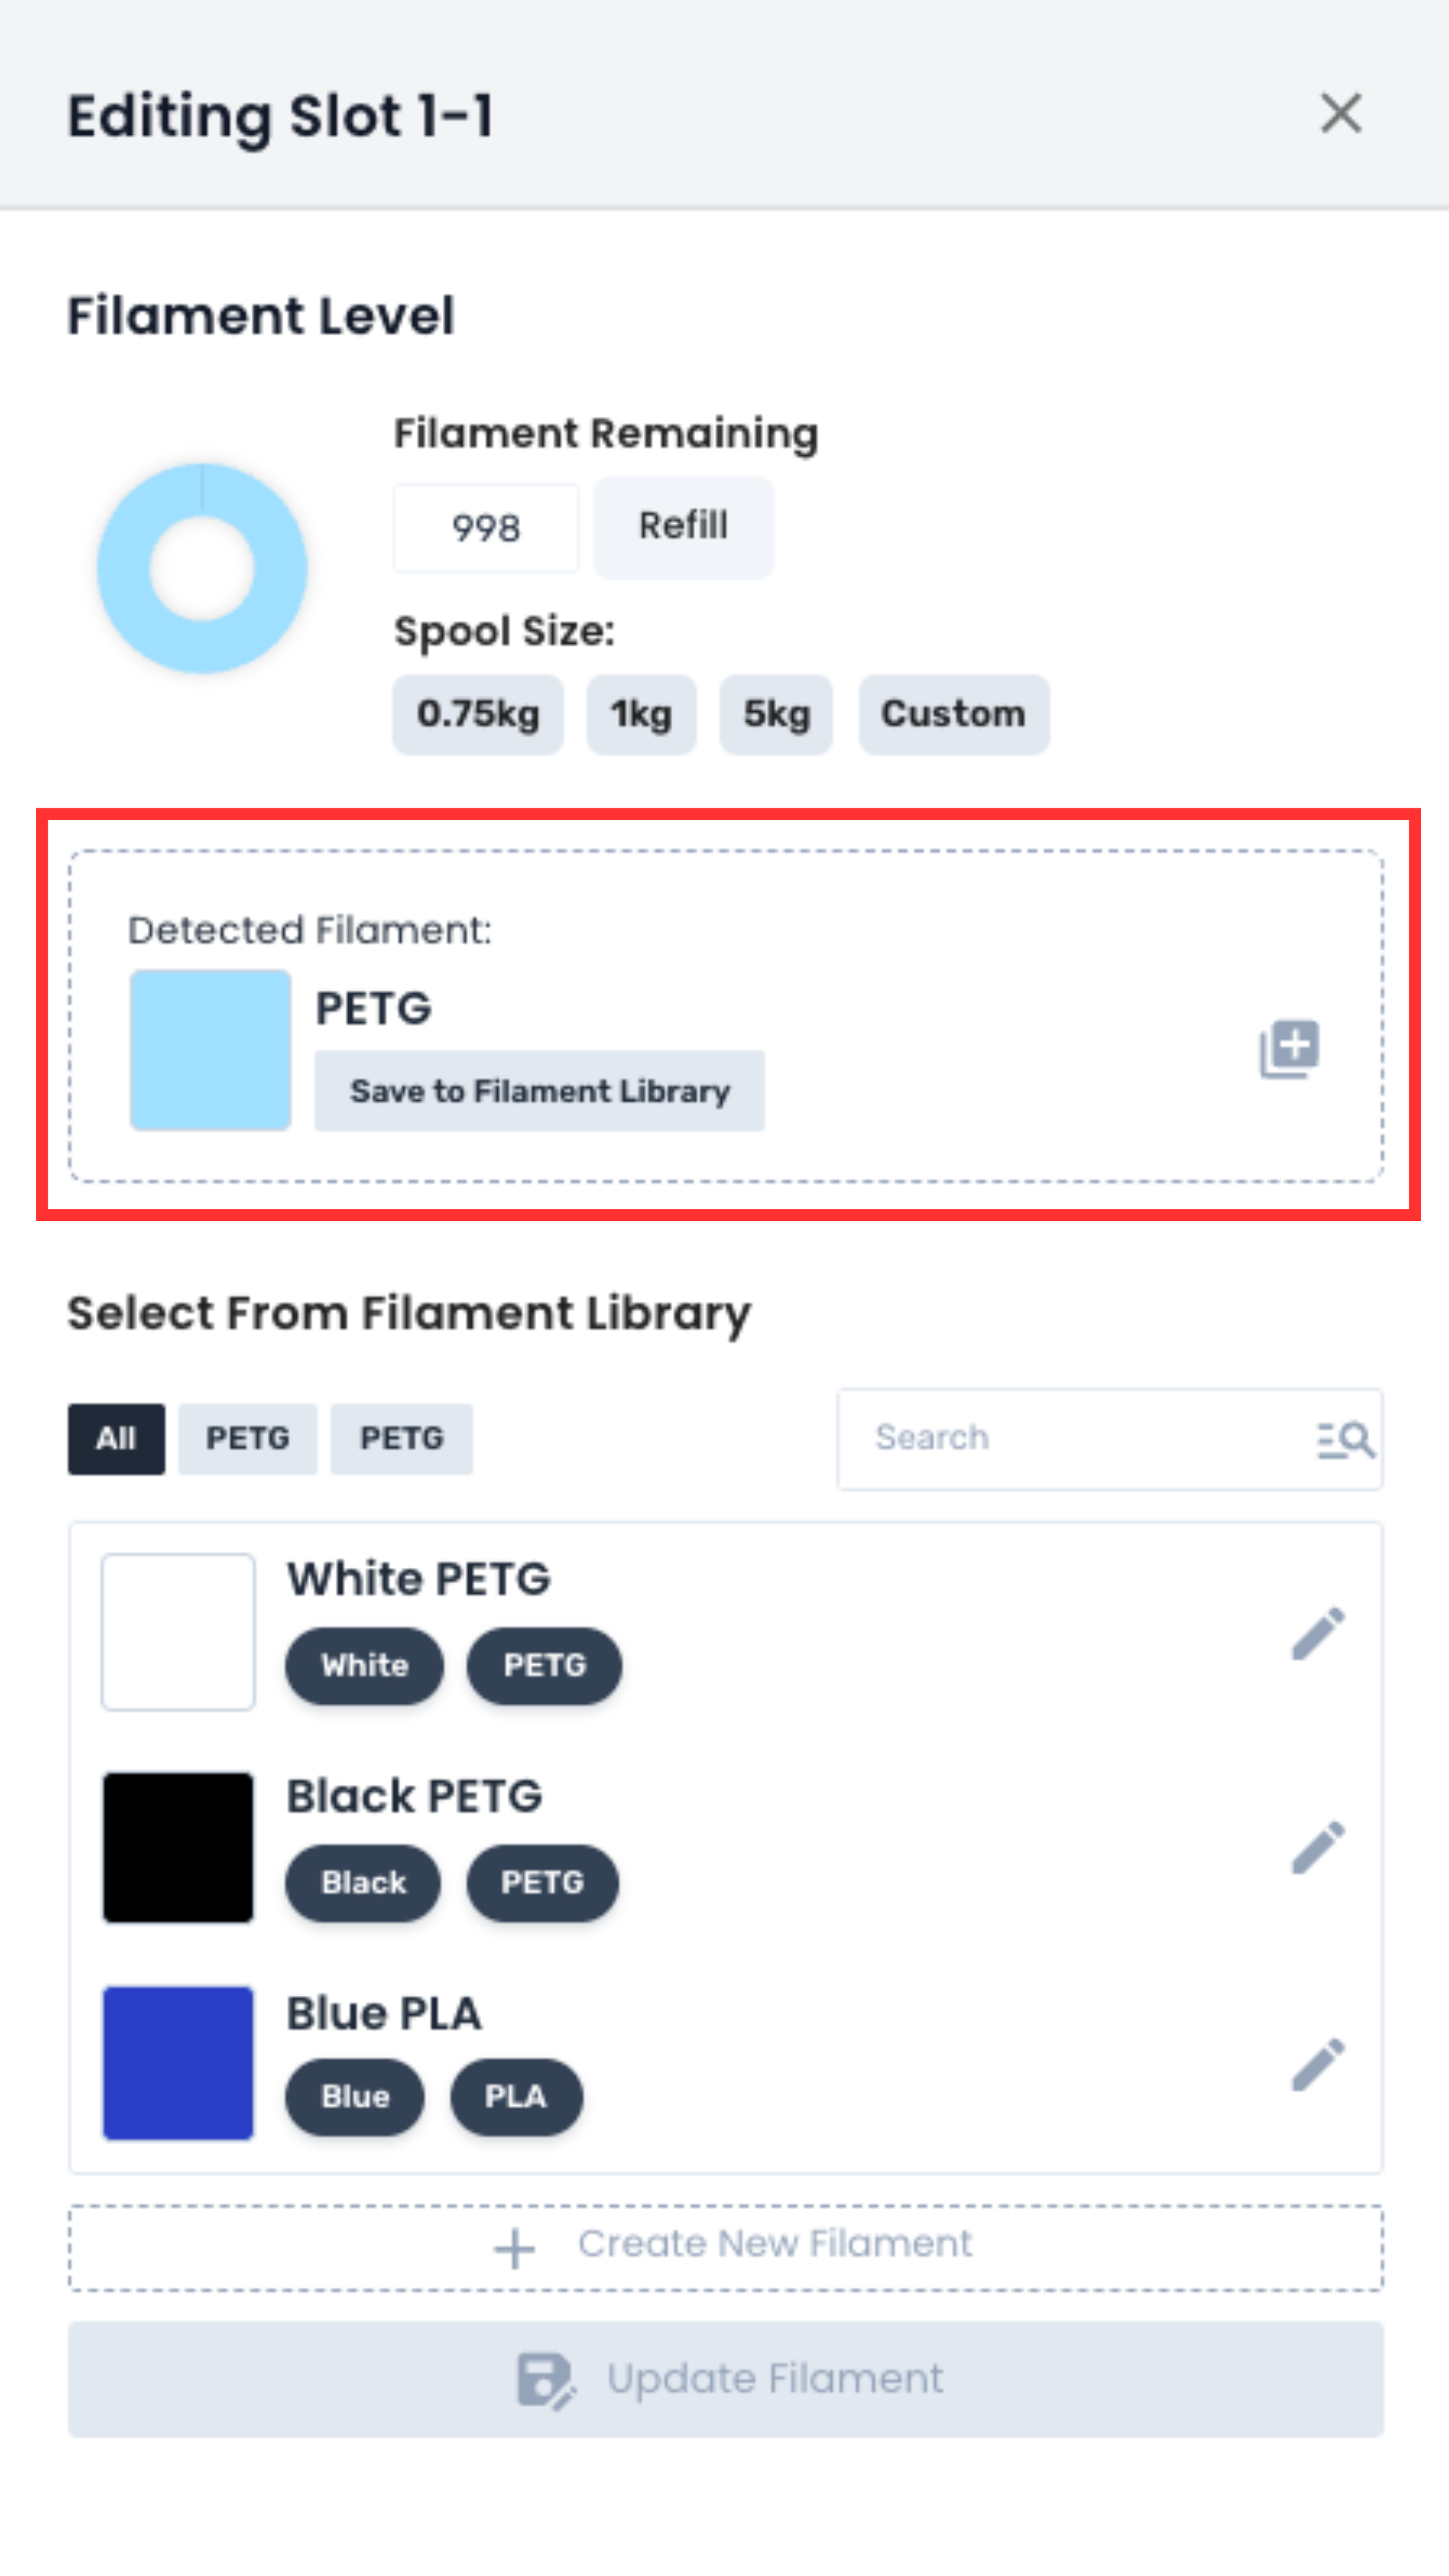
4.3 Detected Filament
AutoFarm3D auto-detects filament you have manually set on your Bambu LCD screen as well as RFID spools. The detected filament is displayed here.
4.4 Change Filament
To manually select the loaded filament, select an option from your filament library and click Update Filament or create a new filament option by clicking Create New Filament.