Starting Your First Print
- Installed AutoFarm3D
- Logged in
- Ready to print
Pre-print Checklist
- Ensure that your printer is running Marlin 2.0 or newer.
- Calibrate z-offset especially if using VAAPR print bed.
- Remove SD card from printer.
- Follow the best practices in our Slicing for automation guide
For Prusa printers:
- Configure printer (Prusa MK3S+) (Prusa Mini)
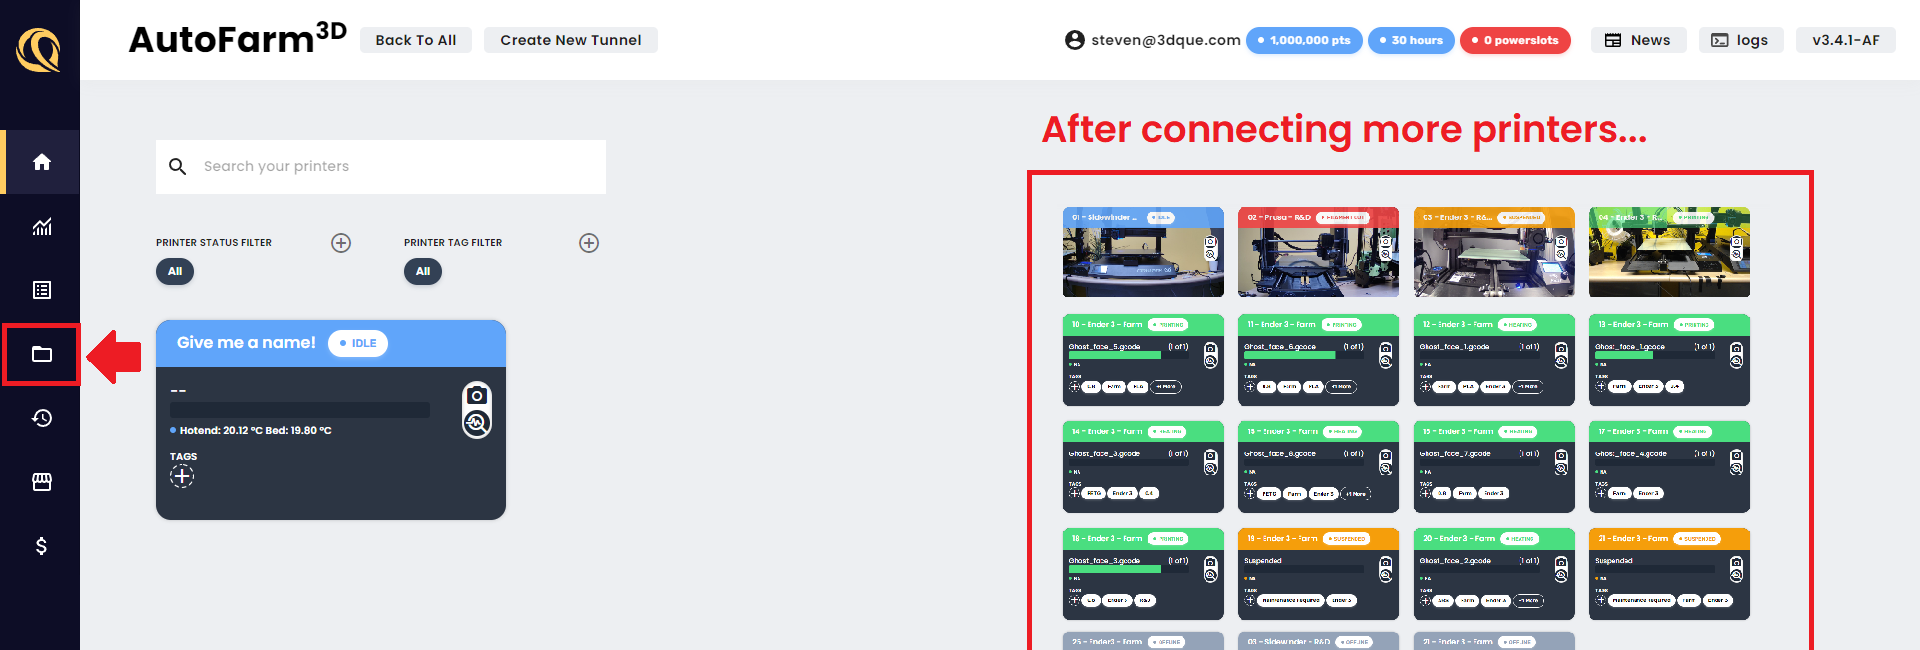
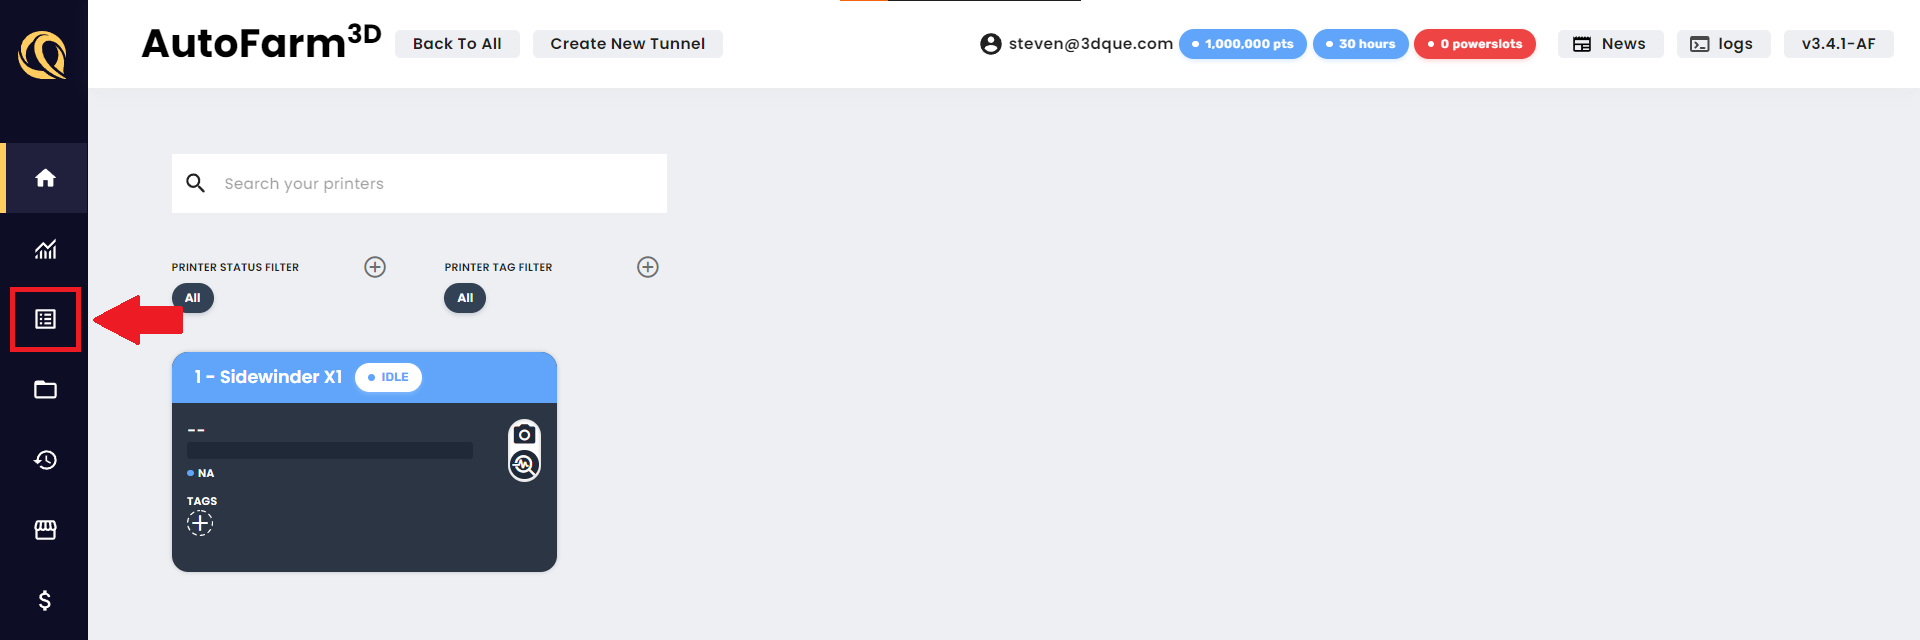
Multi-Printer Dashboard
This page is where you can view your entire 3D print farm. All your connected printers will show up here!
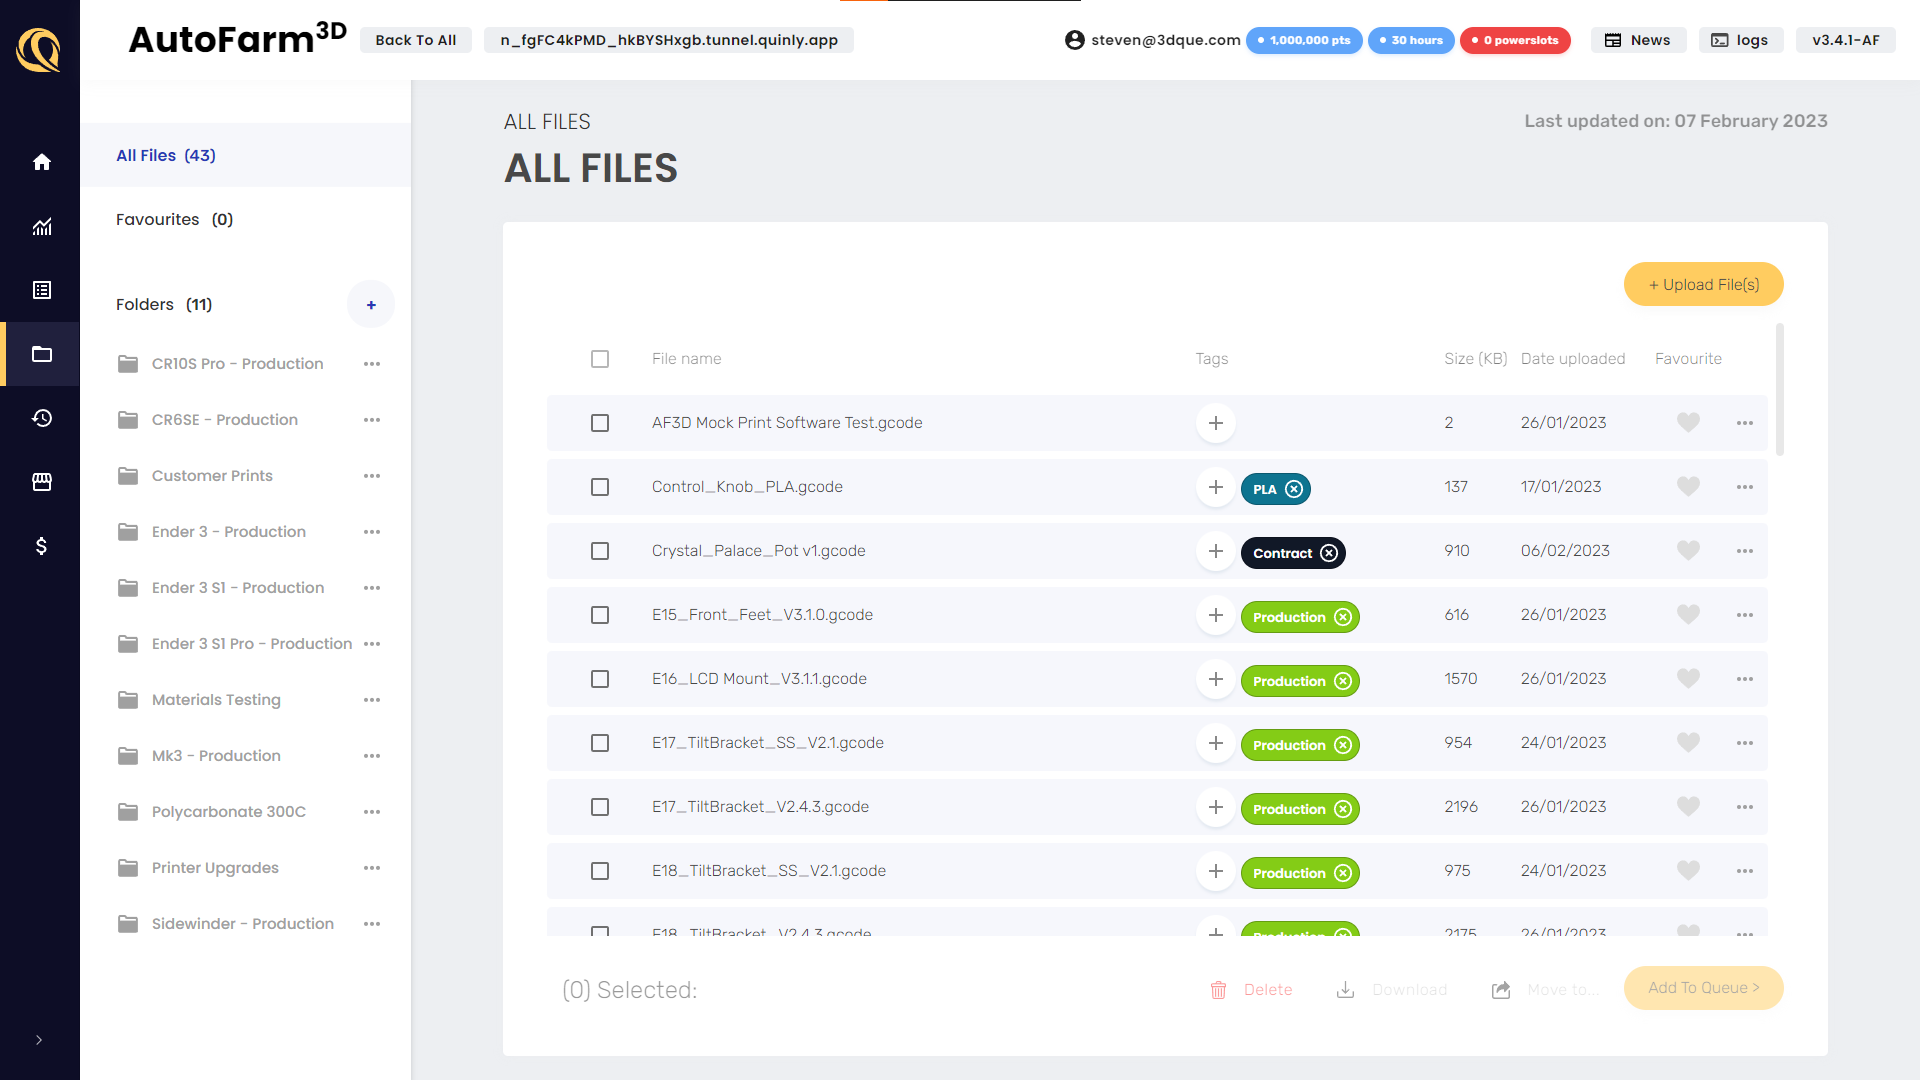
Files
This is where you can upload and organize your gcode files. You probably don't have any files yet, but this is what it will look like once you've loaded up some gcode files!
Starting a print
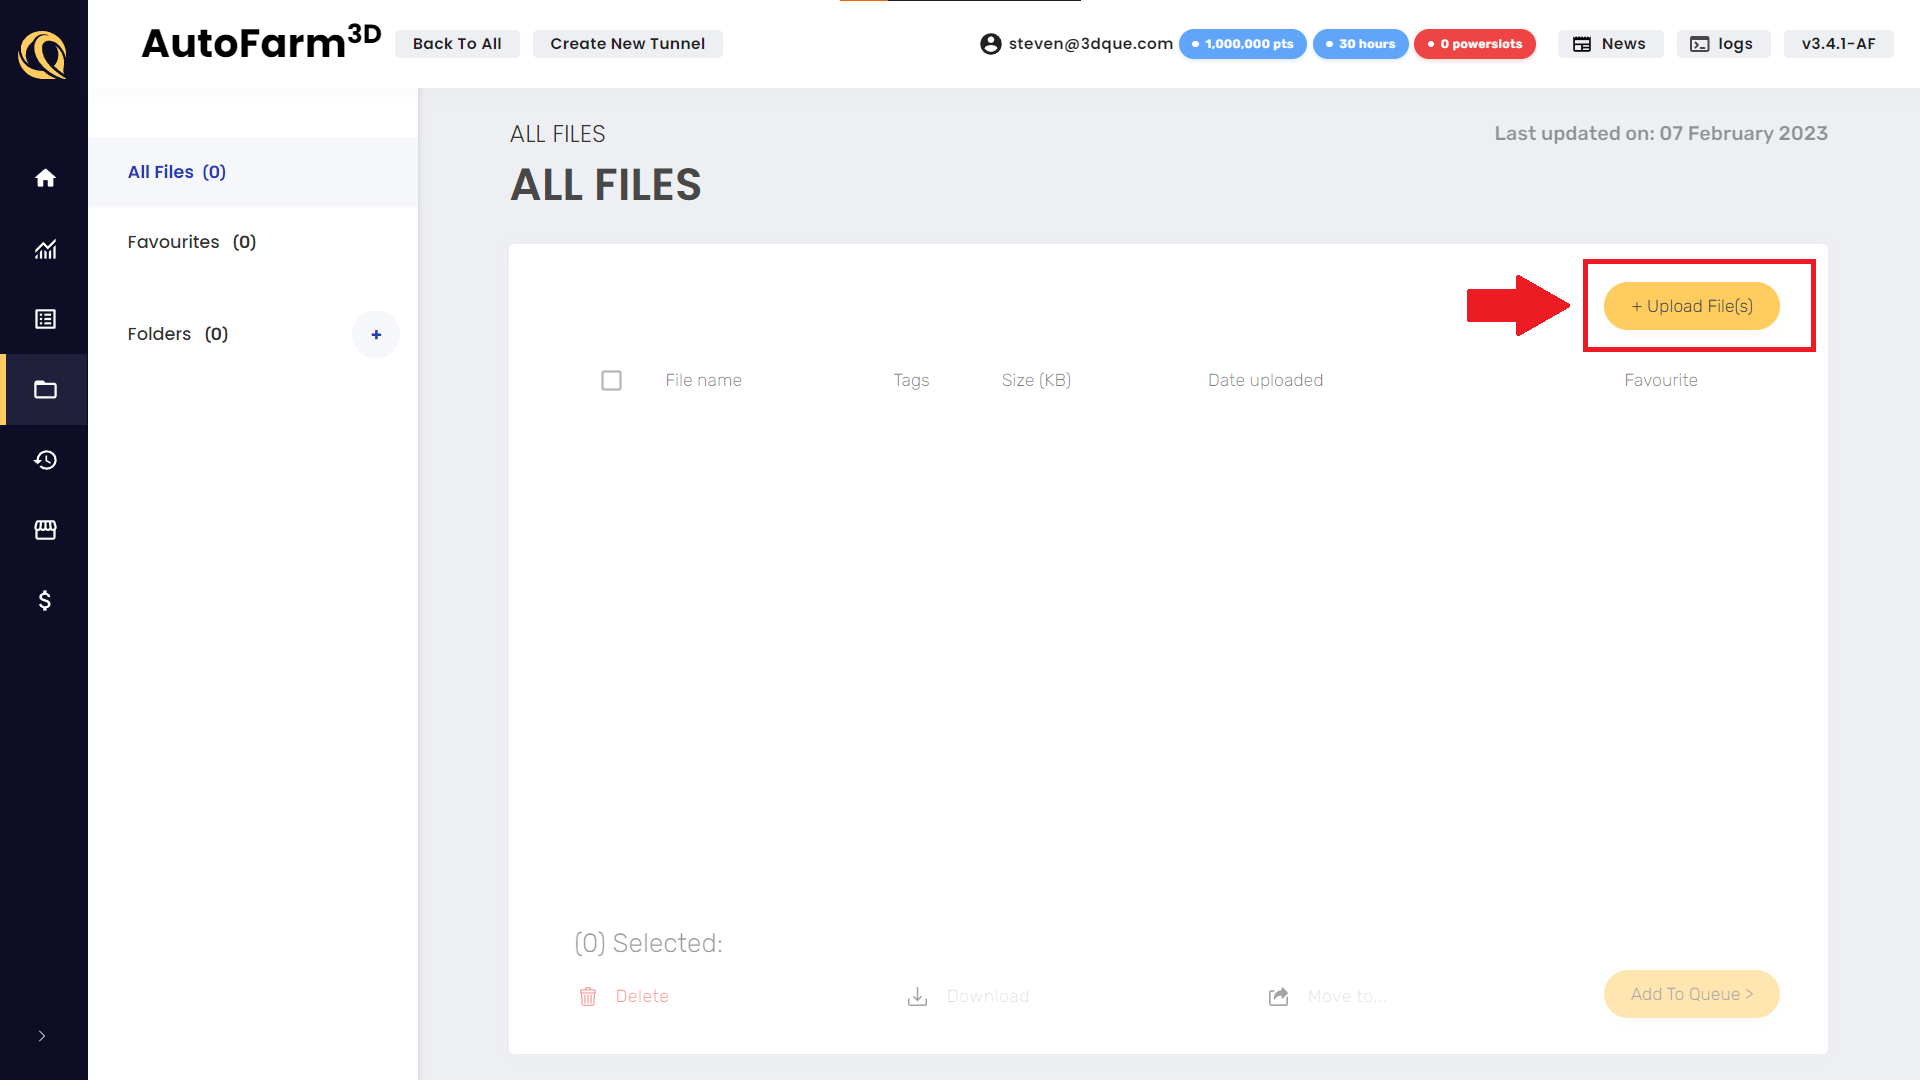
- Let's start with a test gcode file. Download the following gcode file. Download Here
This will simply trace a square 10mm above your print bed, with no extrusion. It should work on any printer with a print bed at least 186x186 mm (Prusa MINI or larger). Click Upload Files and upload the test print gcode.
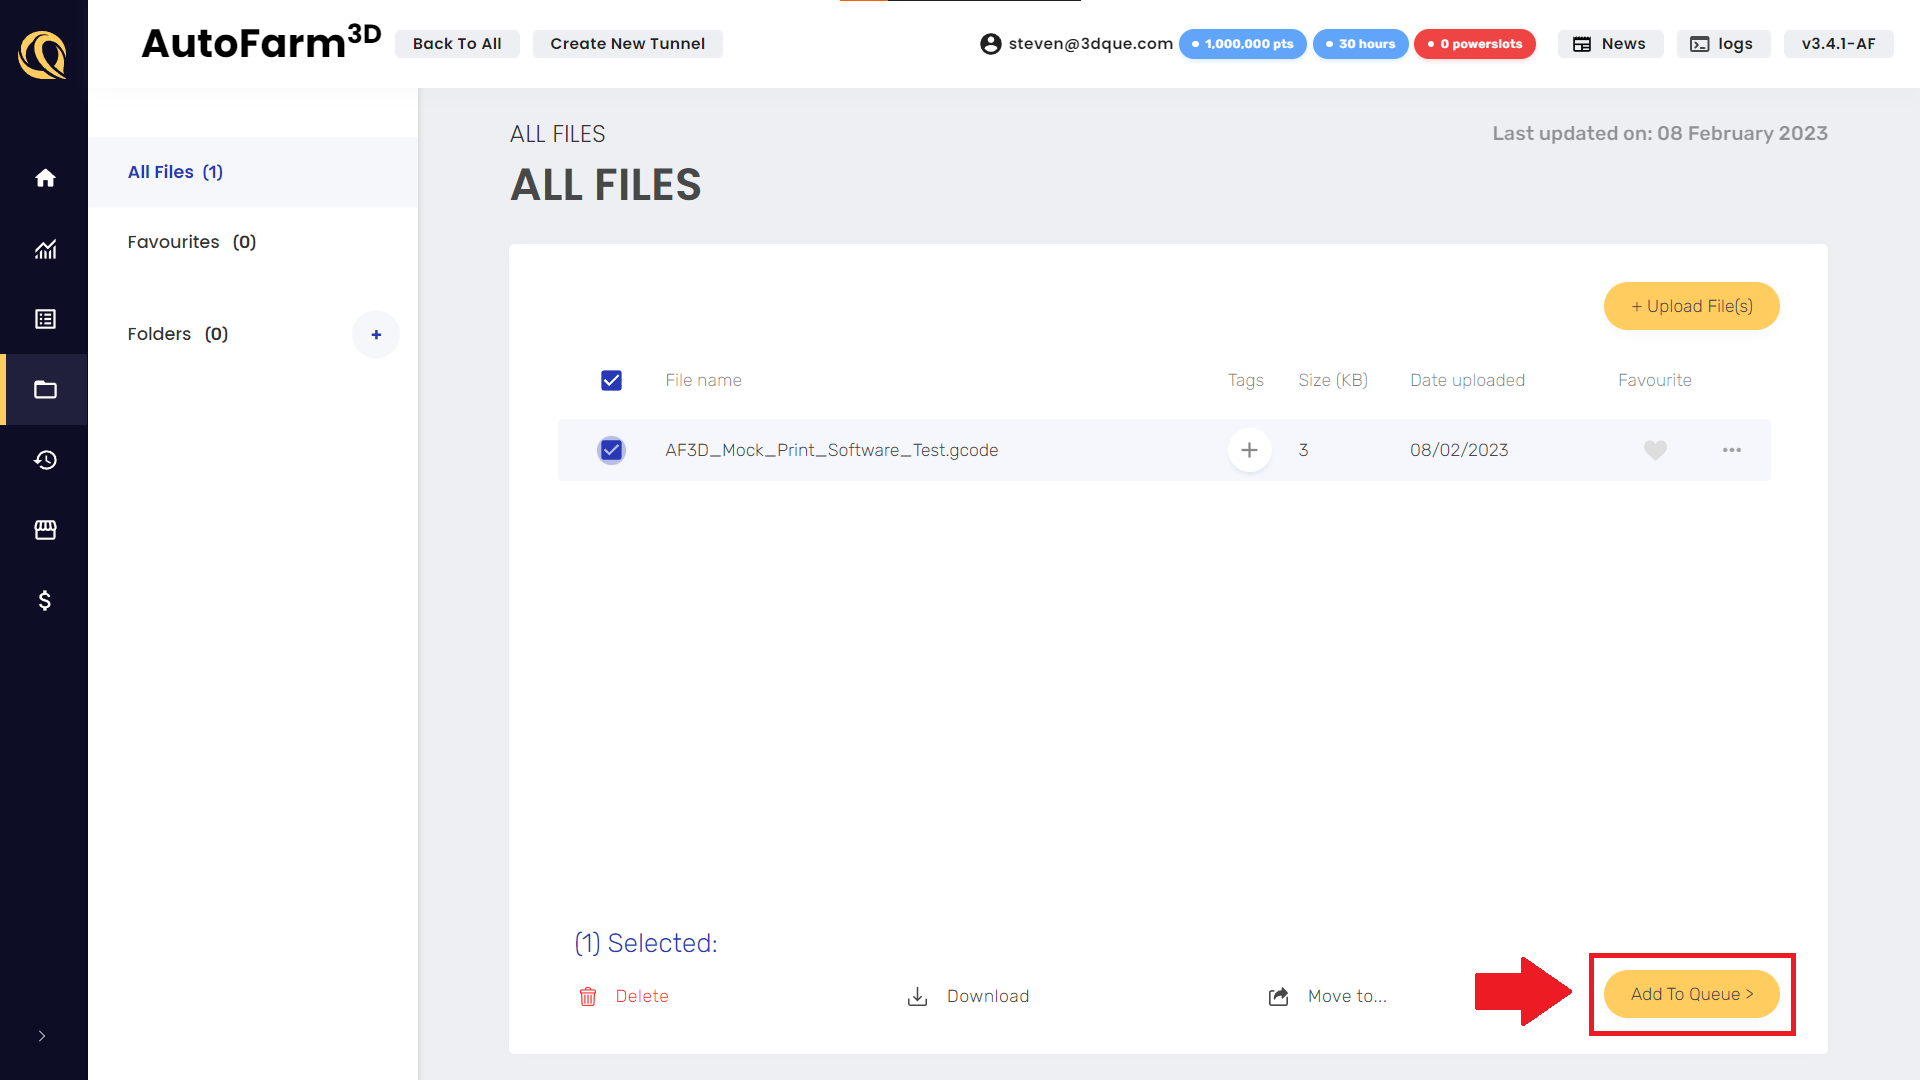
- Once you've uploaded a gcode file, select it and click "Add To Queue".
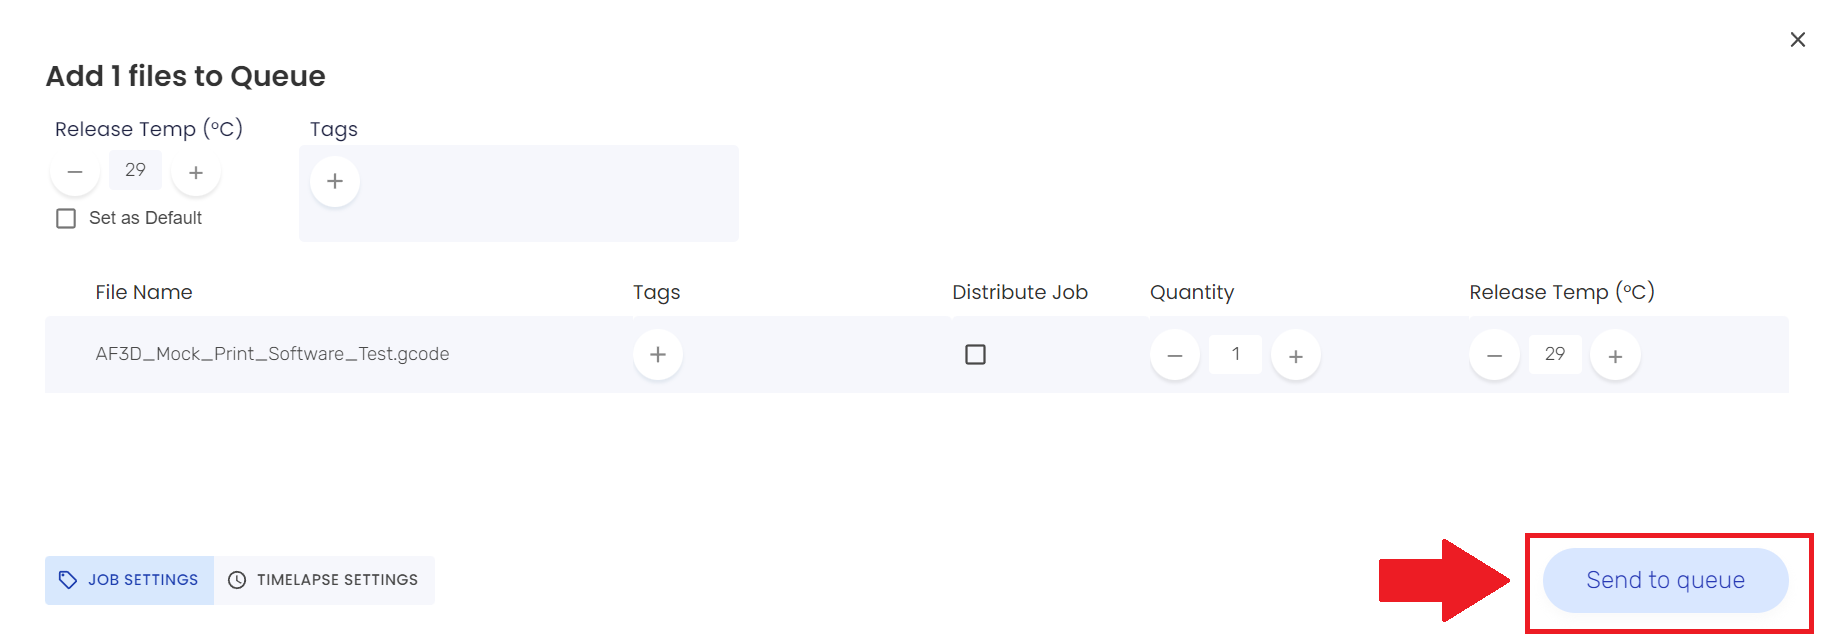
- Here you can add SmartTags, adjust the quantity of prints, and adjust the release temperature. Also notice the timelapse tab for timelapses. For now you can keep everything at the default settings, and click "Send to queue".
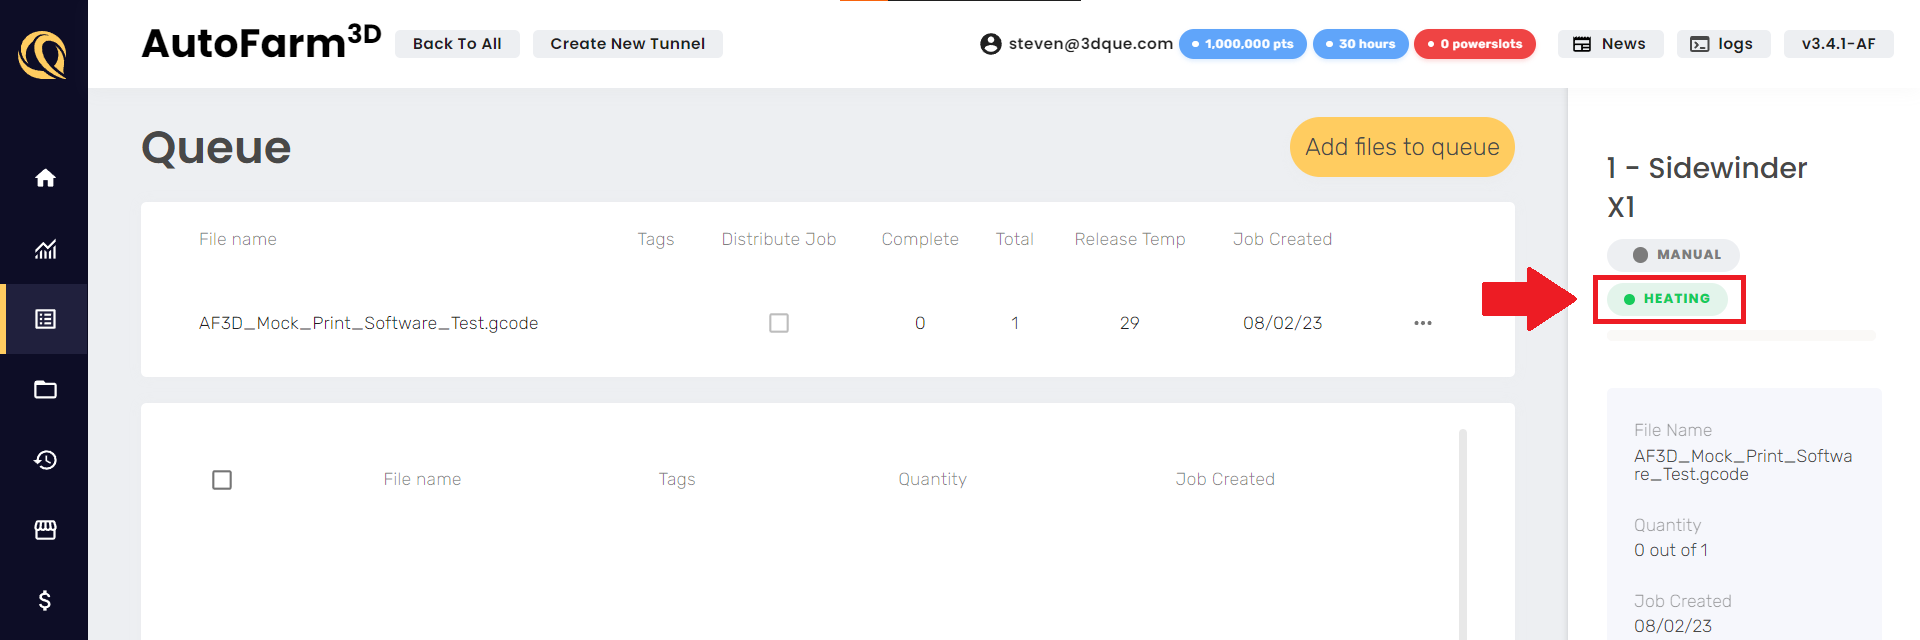
- Visit the Queue page. On the right side of the page, you should see your printer in the "heating" state. This means it has started heating up, and is going to start printing your gcode file.
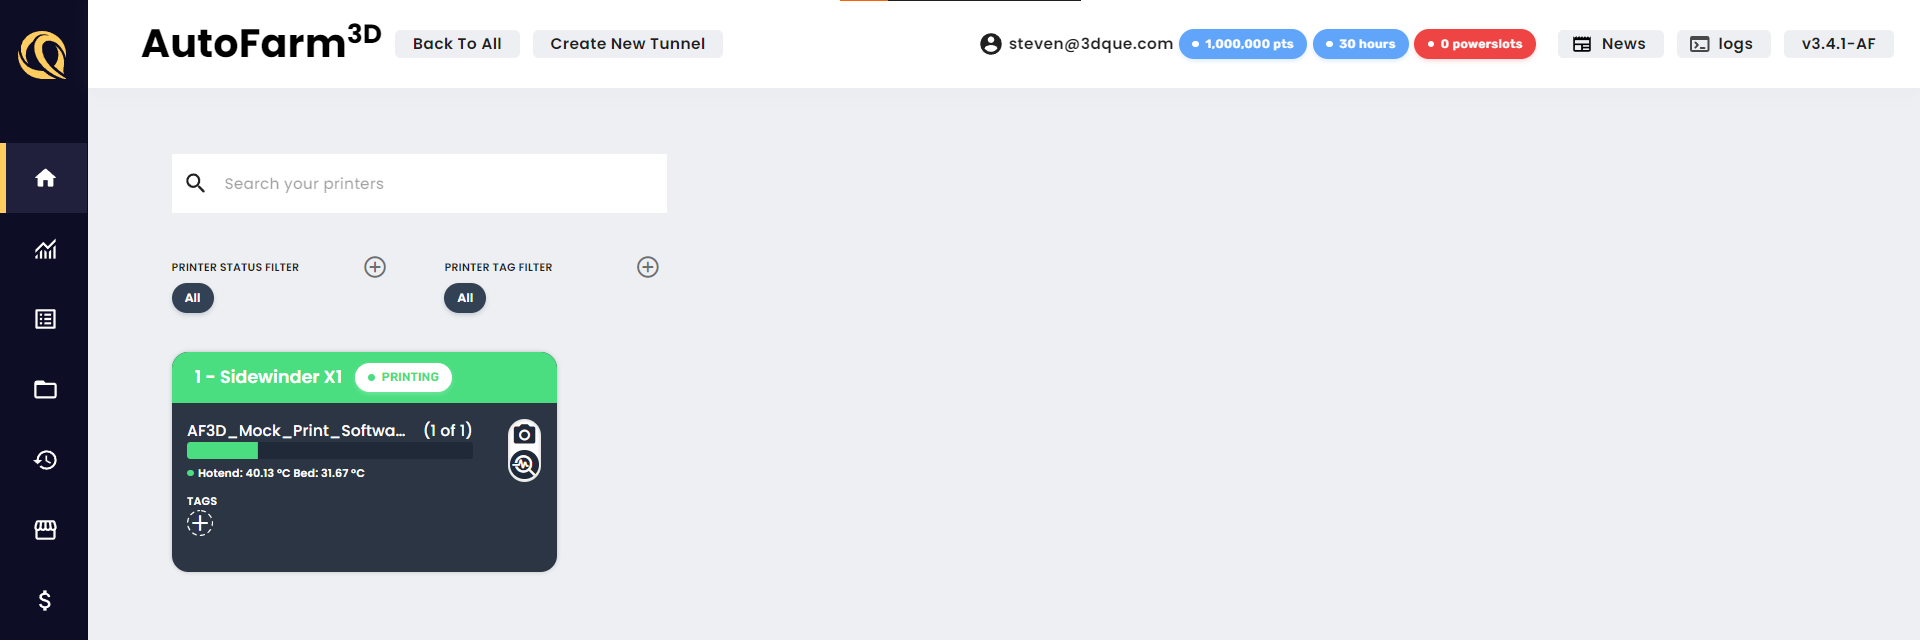
- Visit the Dashboard. You'll see the printer is now green. After it finishes heating, it'll print the test file, which will take a couple of minutes.
- When the print finishes, your printer will show "Waiting for removal". This status only appears on printers that are in "Manual" mode. Automated printers will clear the bed and move on to the next print automatically.
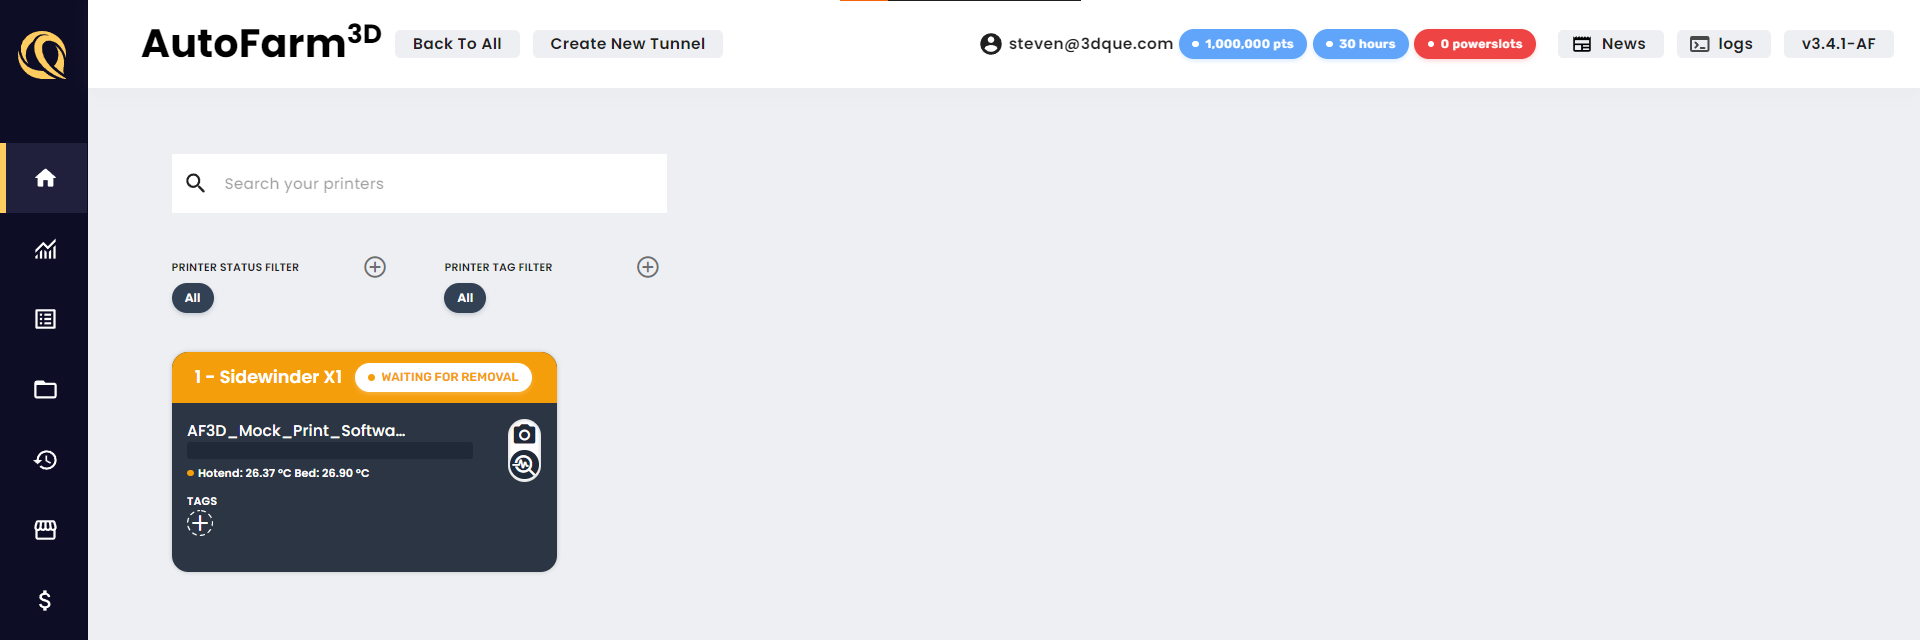
- Go into the printer settings and click "confirm removal"
Congratulations, you've completed your first print!
Next Steps
Check out the slicing for automation guide to learn how to slice for automated 3D printing.
To learn more about how AutoFarm3D auto-routes print jobs to printers, check out the Smart Tags guide!
Quick Tour
View Webcams
From this view, you can see the webcams on all your printers at the same time! Click the toggle icon to show the webcam view.
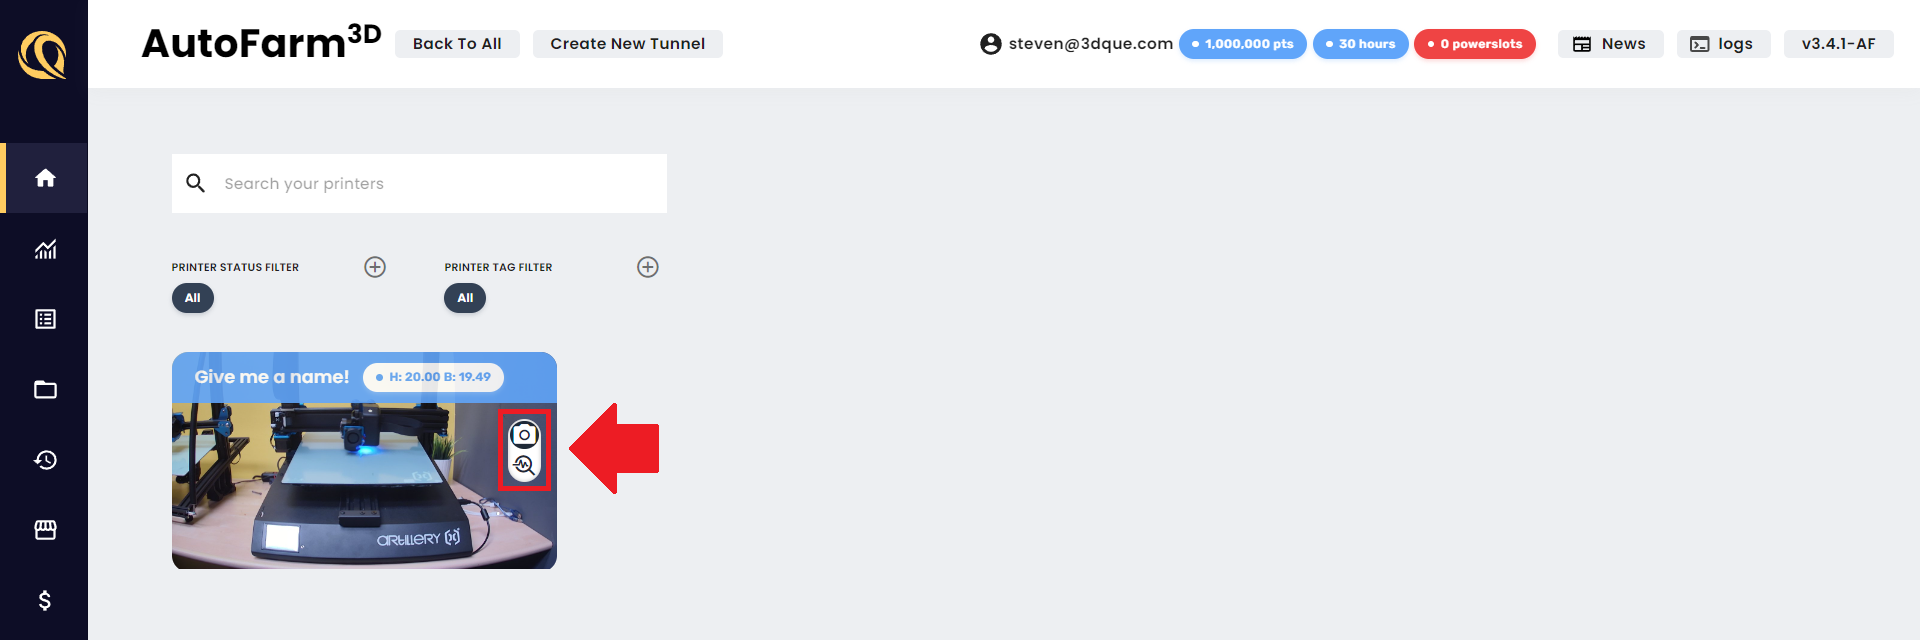
Quick Access Sidebar
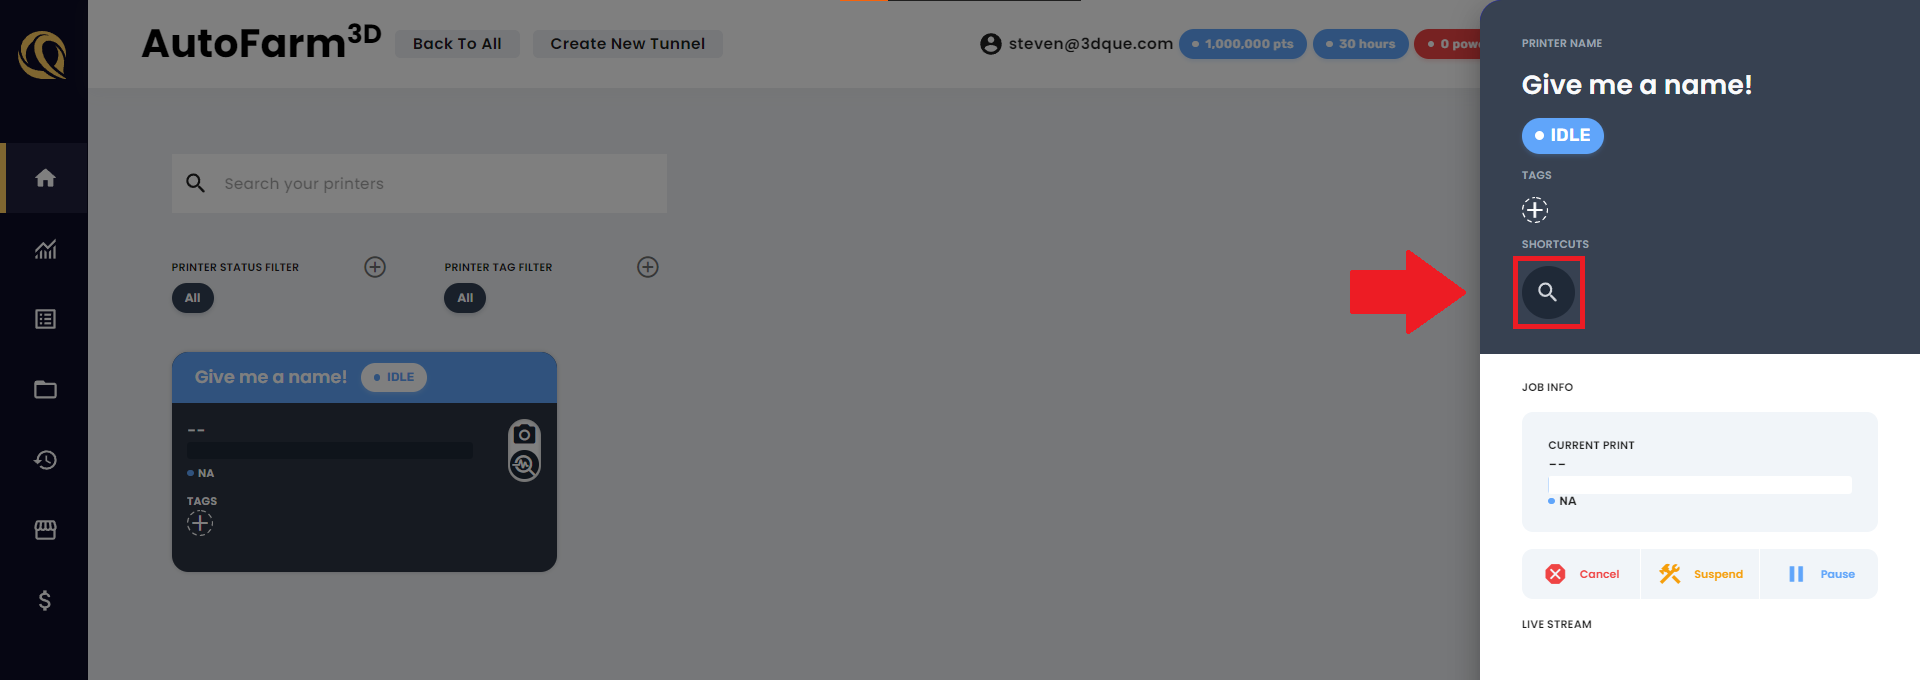
Click on the top bar of the printer card to expand the sidebar and see more information about the printer. From here you have high-level control of the printer, so you can cancel prints that are in progress. This view also shows additional details about the printer such as the print history.
Click on the magnifying glass to see the printer settings.
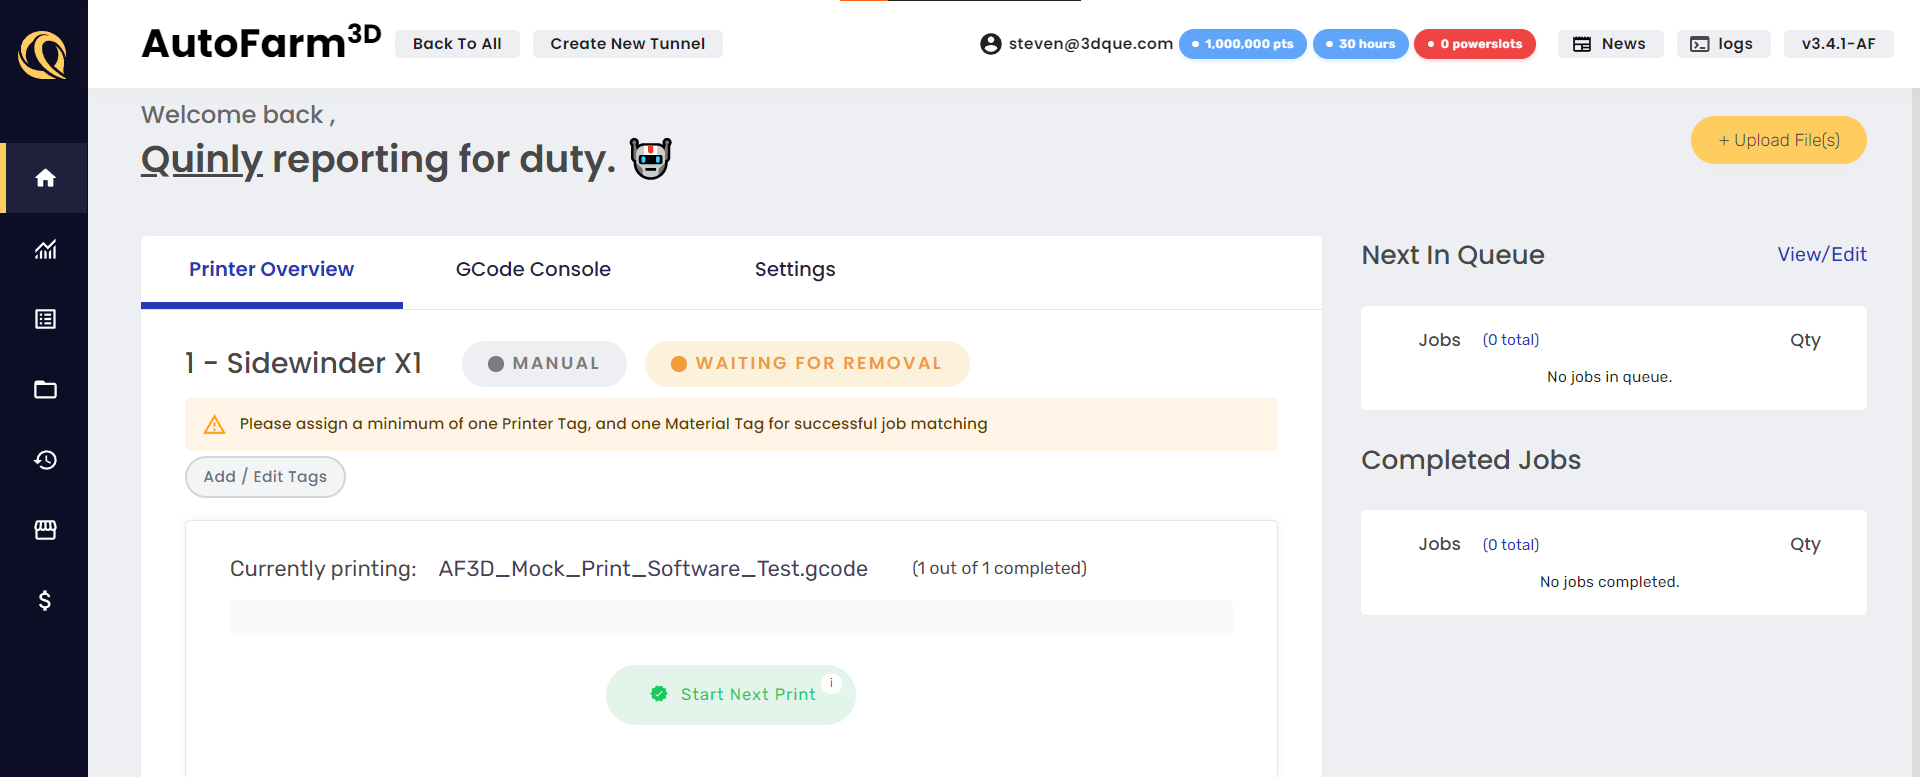
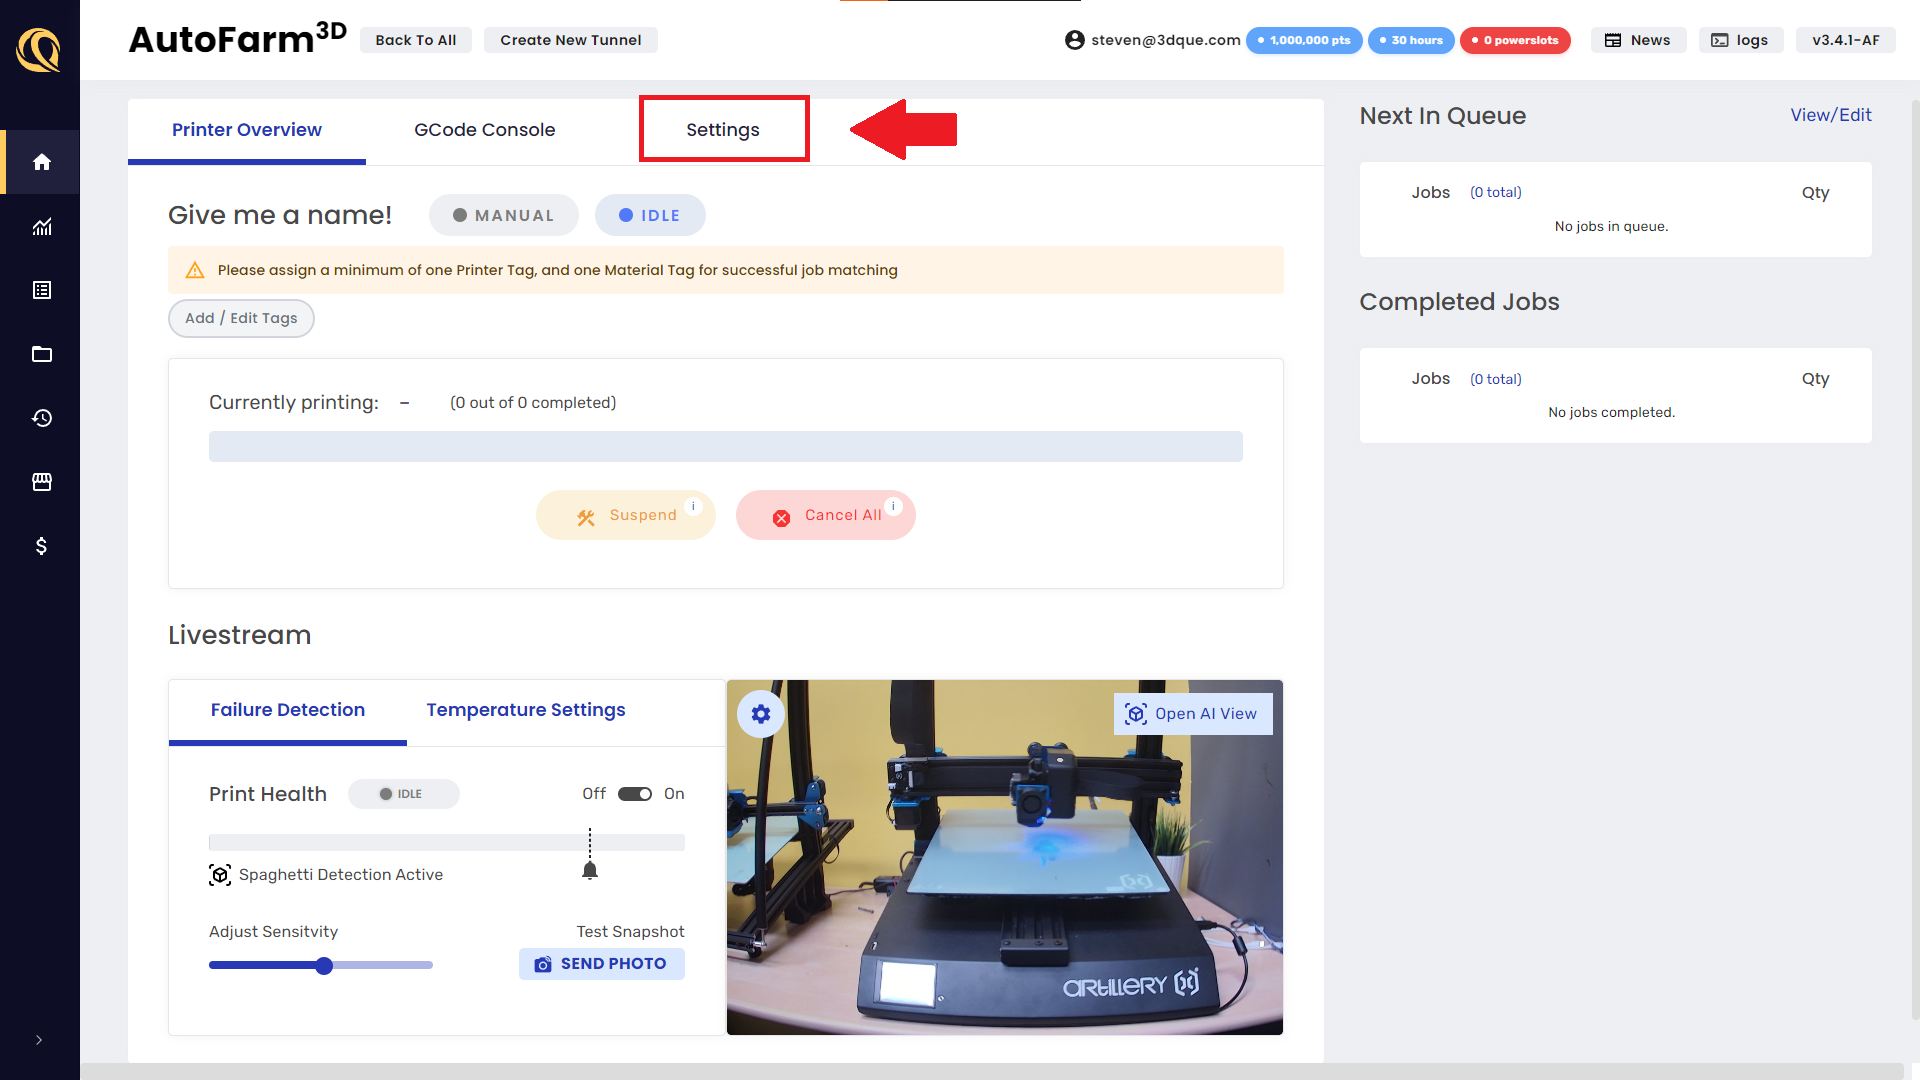
Printer Overview
Here you can see the QuinlyVision failure detection AI as well as temperature settings. There's also a gcode console available if you ever need to directly send gcodes to your 3D printer (for PID tuning, calibration, etc.).
Let's change the printer name to something more useful. Click the Settings tab to view settings.
Printer Settings
This tab contains some more advanced settings, but all you need to worry about for now is the Printer Name and Printer Mode.
Printer Name
Name your printer something useful. A good naming convention could be simply a unique printer number + the printer model.
Printer Mode
This is where you can enable Auto-Ejection! If your printer is set to "Automated" AutoFarm3D will attempt to eject the print by waiting for the bed to cool, then sweeping the part off using the X axis or hotend. Only enable this if your printer is set up for automation! More info here
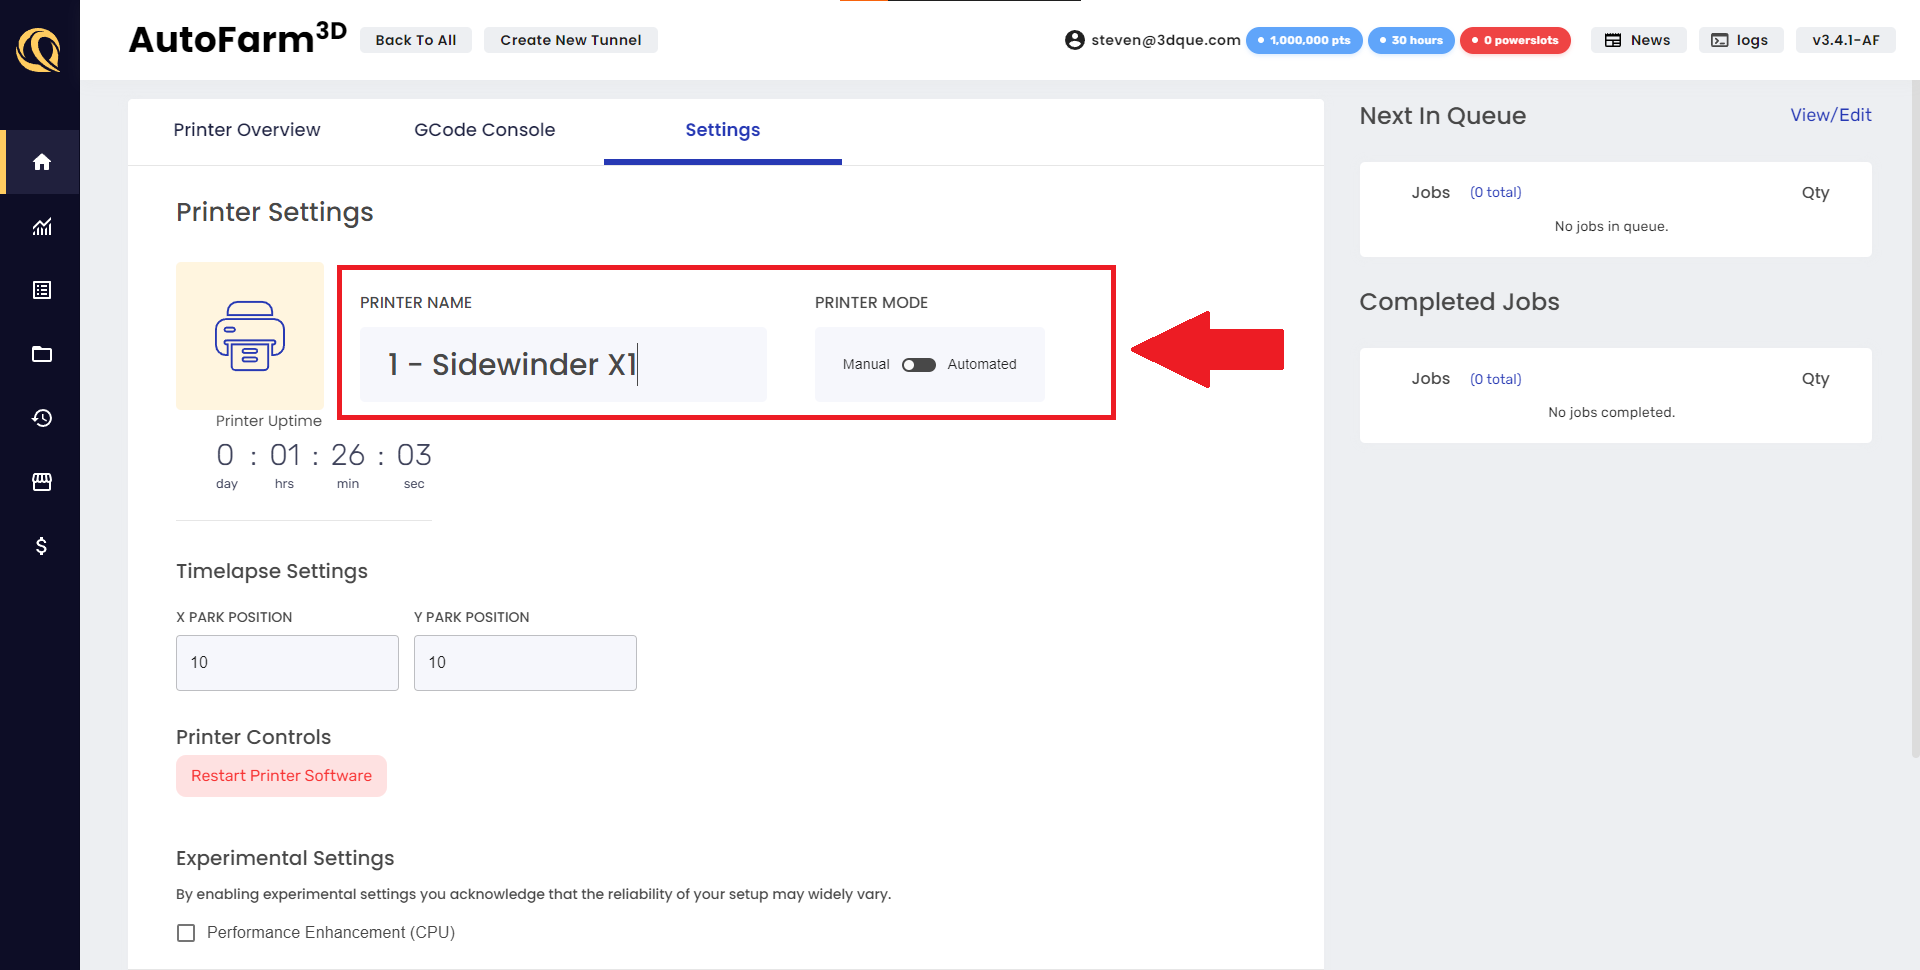
Don't forget to click "Save" at the bottom of the page!
Back to the Dashboard
Now that your printer has a fancy new name, let's start a print!
Click on the Queue page.
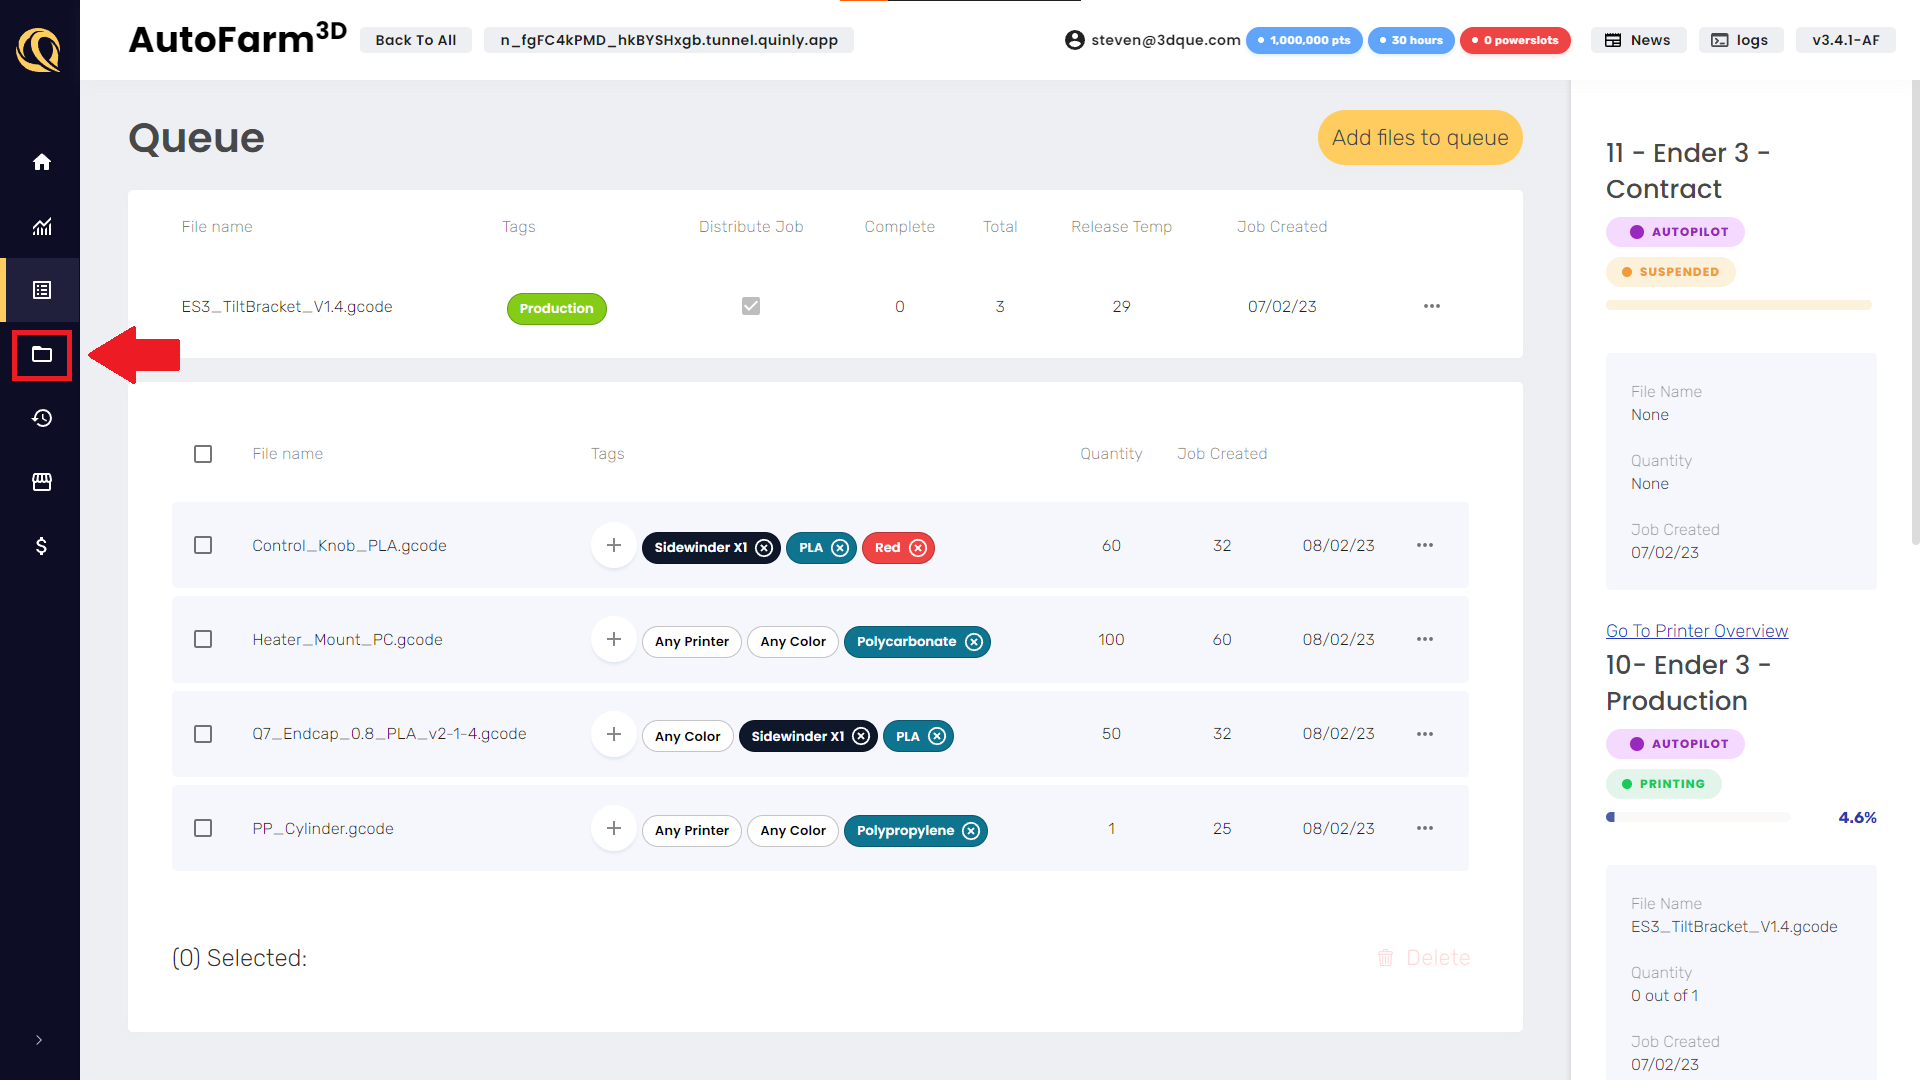
Print Queue
Right now, your queue is probably empty, but once you start adding print jobs, this is what it might look like!
There's a lot going on behind the scenes here. This is where print jobs get automatically distributed across your print farm! We'll set up Smart Tags later, so don't worry if it looks like a lot to take in at first.
Click on the Files page.