SmartTags 101
SmartTags are used to automatically route print jobs to printers. They may look simple at first, but they can revolutionize your print farm in so many useful ways.
1. Background
SmartTags make it possible to automatically deal with the overwhelming complexity that arises when your farm has multiple printers, materials, colors, nozzle sizes, etc.
In the field of computer science, there's a concept known as an abstraction layer. Abstraction layers hide complexity by providing simple rules about the inputs and outputs of a system and hiding all the complicated inner workings. This allows users to focus on the high-level management of the system, rather than getting bogged down in the details.
The SmartTag system is 3DQue's way of adding an abstraction layer on top of a 3D printer farm. SmartTags make it possible for one person to manage 10, 50 or even 100 3D printers.
Once you have SmartTags set up, you can use your print farm in the same way you would use a vending machine. Print jobs go into the queue, and printed parts come out of your printers. AutoFarm3D automatically routes jobs to compatible printers based on your SmartTags. All you need to do is tell AutoFarm3D what prints you need, and it'll handle the rest.
2. SmartTags 101
2.1 Printer Tags
SmartTags on your printers serve two purposes:
-
Farm Organization: SmartTags make it easy to see important information about your printer at a glance. It might be hard to remember if your printer has a 0.4mm or 0.6mm nozzle, but if you set it as a SmartTag, you'll never have to guess.
-
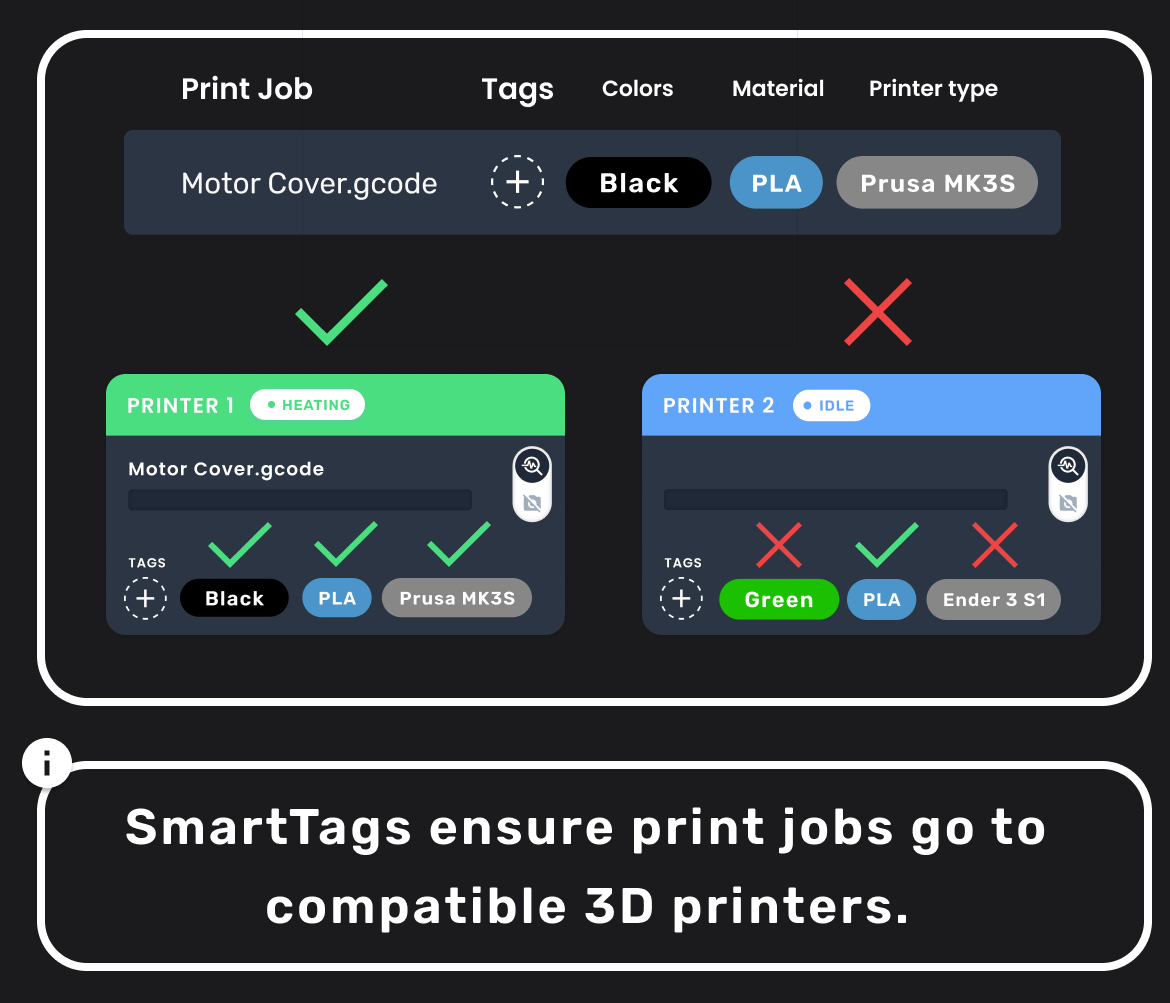
Print Job Compatibility: Your printer will only be assigned print jobs that are compatible with that printer. For a printer to start a print job, the tags on the printer must match the tags on the print job.
2.2 Gcode Tags
SmartTags on your gcode files also serve two purposes:
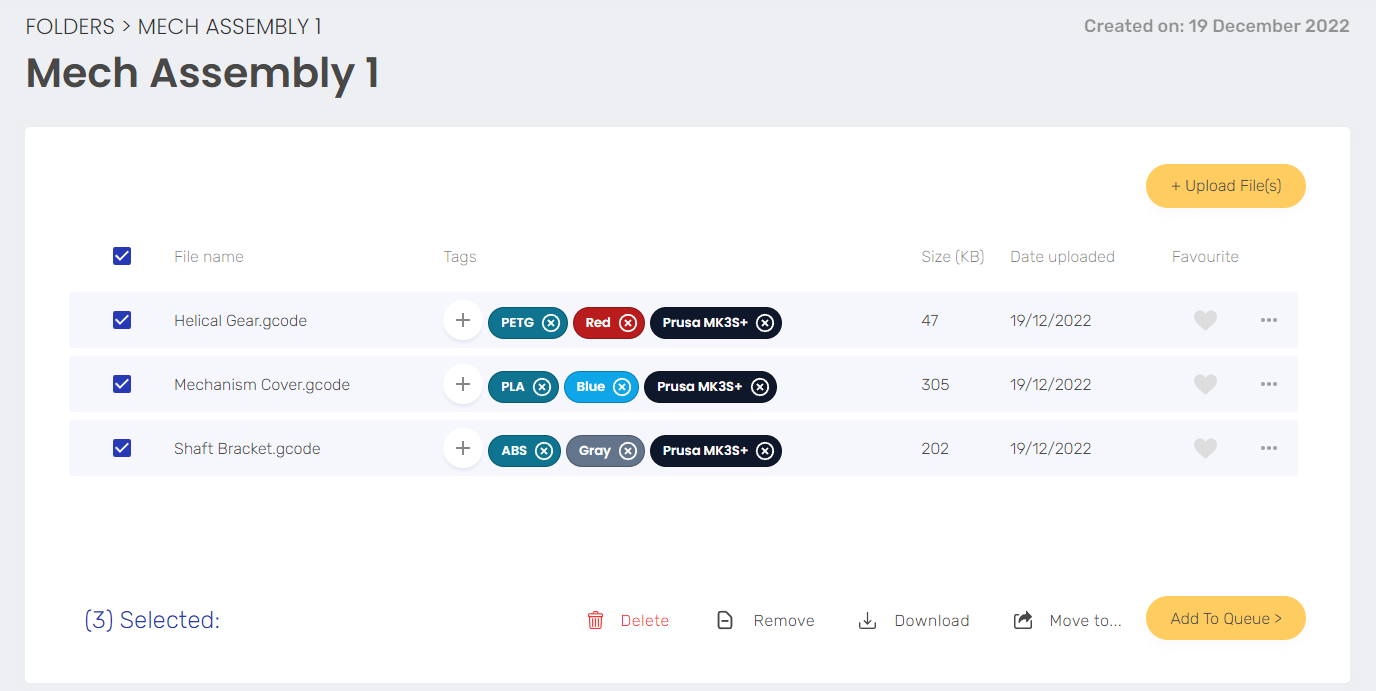
- Gcode Organization: Gcode is typically sliced for a particular printer, and for a particular material. Tagging your gcode makes it easy to stay organized and avoid mistakes. You no longer need to remember every requirement for every gcode file on your farm.
- Print Job Tracking: SmartTags follow print jobs from start to finish. This means that in the Print Job History, you can track what material a certain print was printed in, or what printer it was printed on.
2.3 Types of SmartTags
Categories are used to organize SmartTags. There are 3 pre-defined categories:
- Printer Type (E.g. Prusa MK3S, Ender 3, Ultimaker S5)
- Material Type (E.g. PLA, PETG, Diamond-filled PEEK)
- Color (Red, Silk blue, Translucent green)
You also are able to create custom categories for anything you want. Here are some examples to get you thinking:
- Nozzle Diameter (E.g. 0.4mm, 0.8mm)
- Nozzle Material (E.g. Stainless, Brass, Ruby)
- Printer Location (E.g. Basement, Lab, Florida)
- Retraction type (E.g. Bowden, Direct-drive)
There are so many ways SmartTags can be used. Every print farm is different, but SmartTags let you organize your farm in almost any way you like.
2.4 Creating SmartTags
To create a SmartTag, click the "+" button. Then type in the name of your new tag. You can use this tag as-is, or you can further edit it to change it's color and category.
2.5 Editing SmartTags
To edit a SmartTag, click the "+" button. Then search for the tag you want to edit.
Click the pencil icon or the tag to edit the tag.
Now you can change the name, color, tag category, and category logic (See next doc).
2.6 Empty SmartTags
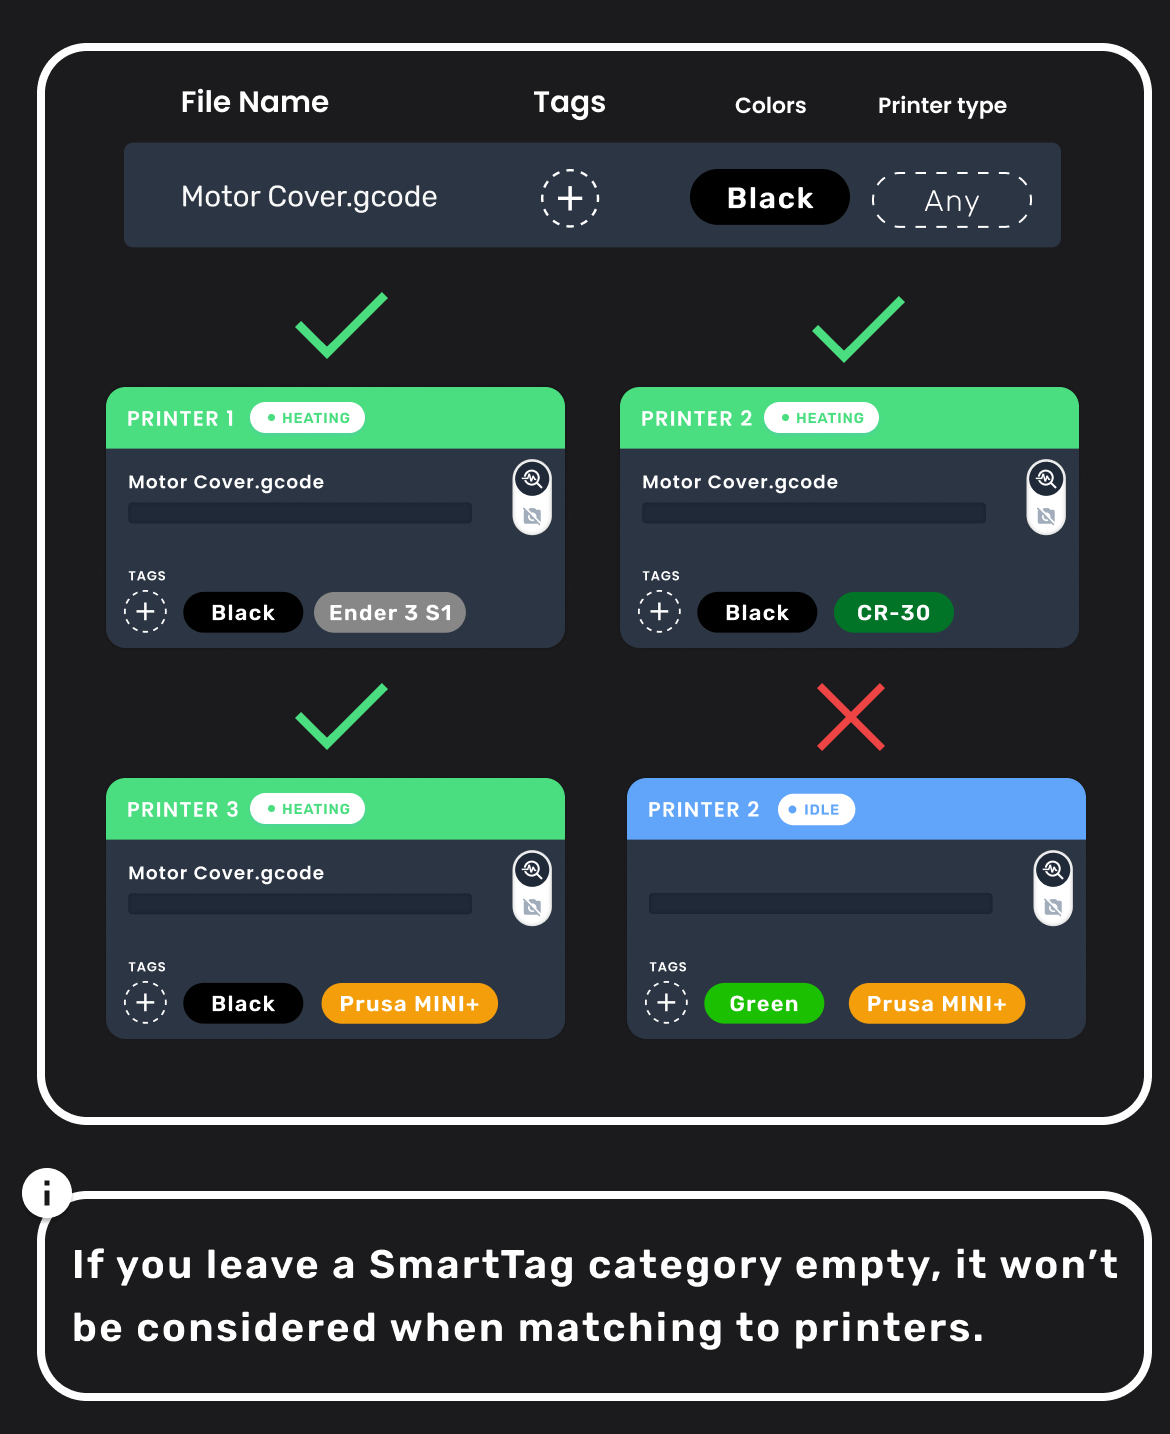
If you don't assign any SmartTags in a category, then AutoFarm3D will ignore that category entirely when assigning prints to printers.
For example, if you don't care what color your part ends up being, you can just leave the "Colors" category empty.
Be careful, if you don't apply SmartTags, then your file might get printed by the wrong type of printer, or go to a printer loaded with the wrong material.
3. Next Steps
By now, you've learned everything you need to know to get started with SmartTags. If you're ready for more advanced techniques with SmartTags, see the next article about Custom SmartTag Logic