Custom Gcode
When slicing prints for auto-ejection, delete all custom start and end gcode. AutoFarm3D will automatically send the necessary gcode commands to enable automated 3D printing.
If you're new to automated 3D printing, just delete your start gcode entirely and use a skirt (with 0.4mm skirt distance) or a brim to prime your nozzle before each print.
Only use custom start gcode if you're using auto-ejection on a 3D printer in Automated mode. If you're using your printer in Manual mode with AutoFarm3D, you should use the default start gcode included in your slicer.
Prime Lines (For Automated Printers Only)
Prime lines can be useful to clean the nozzle before starting a print, and make sure material is flowing properly. By default, most prime lines don't play nicely with auto-ejection, because they'll stay on the bed even after the nozzle wipes the bed clean.
Video demonstration: How do automated 3D printers eject skirts and purge lines?
Use custom prime lines at your own risk. Only add custom gcode if you know what you're doing! Read the comments in the gcode snippet before sending a print.
Here's what we recommend your prime lines look like:
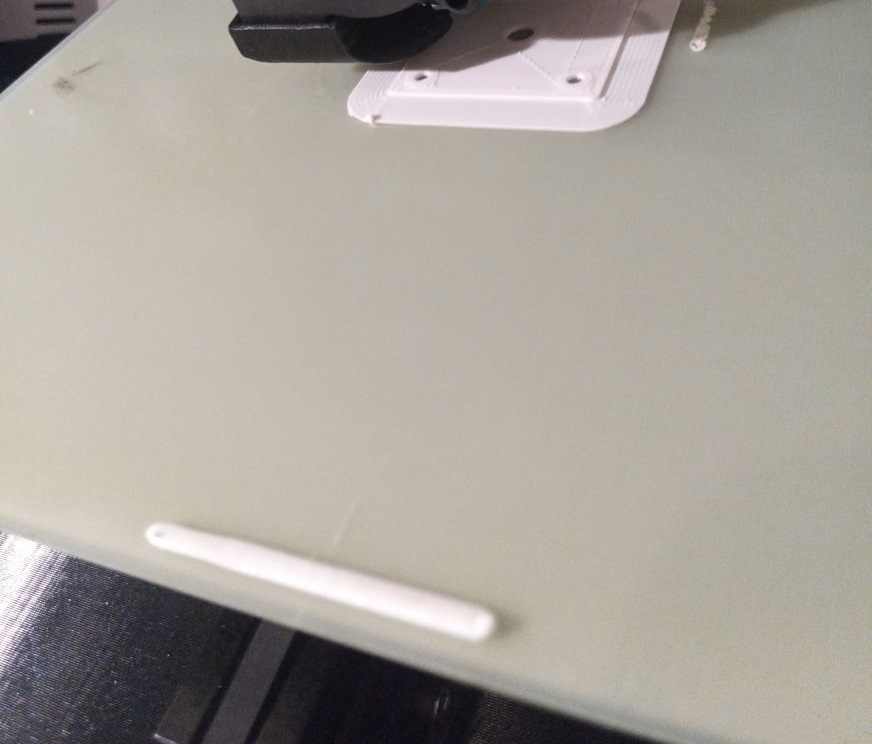
Prime line for Cura
This example gcode draws a 1.5mm tall line at the front of the bed from X100 to X150. It will get removed by the automatic wiping procedure.
Clear your entire start gcode, and paste the following gcode:
G92 E0
G92 E0
;LAYER:-1
;Type whatever prime-line gcode you want below!
G1 X100 Y5 Z1.5 F1000 ;Go to front of bed. Speed this up to F6000 once you're comfortable
G92 E0
G1 X150 E70 F300 ; Draw prime line
G1 E66 ; Retract 4mm. Adjust this as needed
G0 X160 F4000 ;Move quickly away
G1 E70.25; Unretract (cura auto-adds a retraction right after this line)
G1 X150 F4000 ; Wipe nozzle tip
Only use custom start gcode if you're using auto-ejection on a 3D printer in Automated mode. If you're using your printer in Manual mode with AutoFarm3D, you should use the default start gcode included in your slicer.
Prime line for PrusaSlicer
This example gcode draws a 1.5mm tall line at the front of the bed from X100 to X150. It should get removed by the automatic wiping procedure.
Clear your entire start gcode, and paste the following gcode:
;3DQue prime line start gcode
;Uncomment the following 3 lines if you're using a Prusa printer. (delete the first semicolon)
;M862.3 P "[printer_model]" ; Printer model check
;M862.1 P[nozzle_diameter] ; Nozzle diameter check
;M115 U3.10.1 ; Warn user to use at least firmware version 3.10.1
G90 ; Use absolute coordinates
;
;Delete the following line if you want to print with absolute extrusion
M83 ; Extruder relative mode
;
G92 E0
G1 X100 Y5 Z1.5 F4000; Go to front of bed to begin purge line
G92 E0
M104 S[first_layer_temperature] ; Set extruder temp
M140 S[first_layer_bed_temperature] ; Set bed temp
M190 S[first_layer_bed_temperature] ; Wait for bed temp
M109 S[first_layer_temperature] ; Wait for extruder temp
G1 X150 E70 F200; Draw purge line
G0 X160 F4000; Move quickly away
Only use custom start gcode if you're using auto-ejection on a 3D printer in Automated mode. If you're using your printer in Manual mode with AutoFarm3D, you should use the default start gcode included in your slicer.