Arc Overhang
The source code and full project description can be found on Steven's Github
Arc overhang is a 3D printer slicing algorithm that lets you print 90° overhangs without support material. I hope to turn this into a standard feature in 3D printing slicers.
This is what the algorithm looks like:
1. Brief Explanation
To understand how this works, you need to know 3 things:
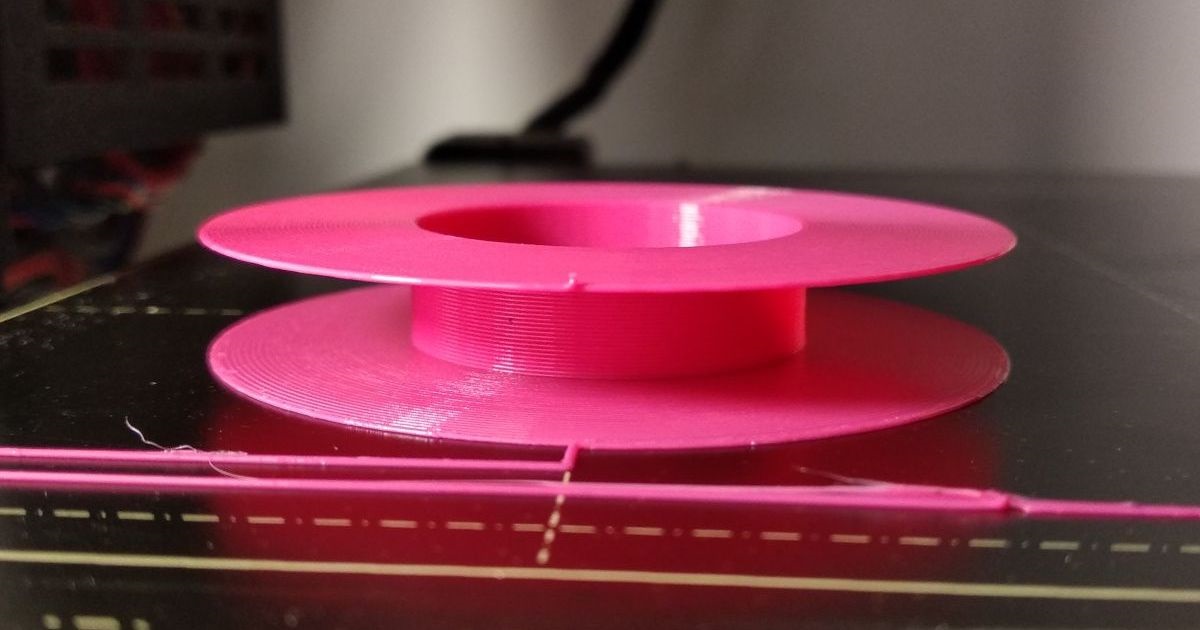
- You can print 90° overhangs by wrapping filament around itself in concentric arcs. You may have seen the fullcontrol.xyz overhang challenge. This uses the exact same principle.
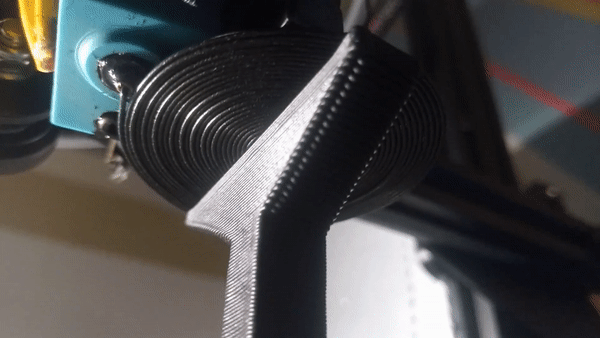
Here's what this effect looks like while printing:
- You can start an arc on an arc .
- Recursively print arcs until the space is filled. This can be used to print almost any artibtrary shape:
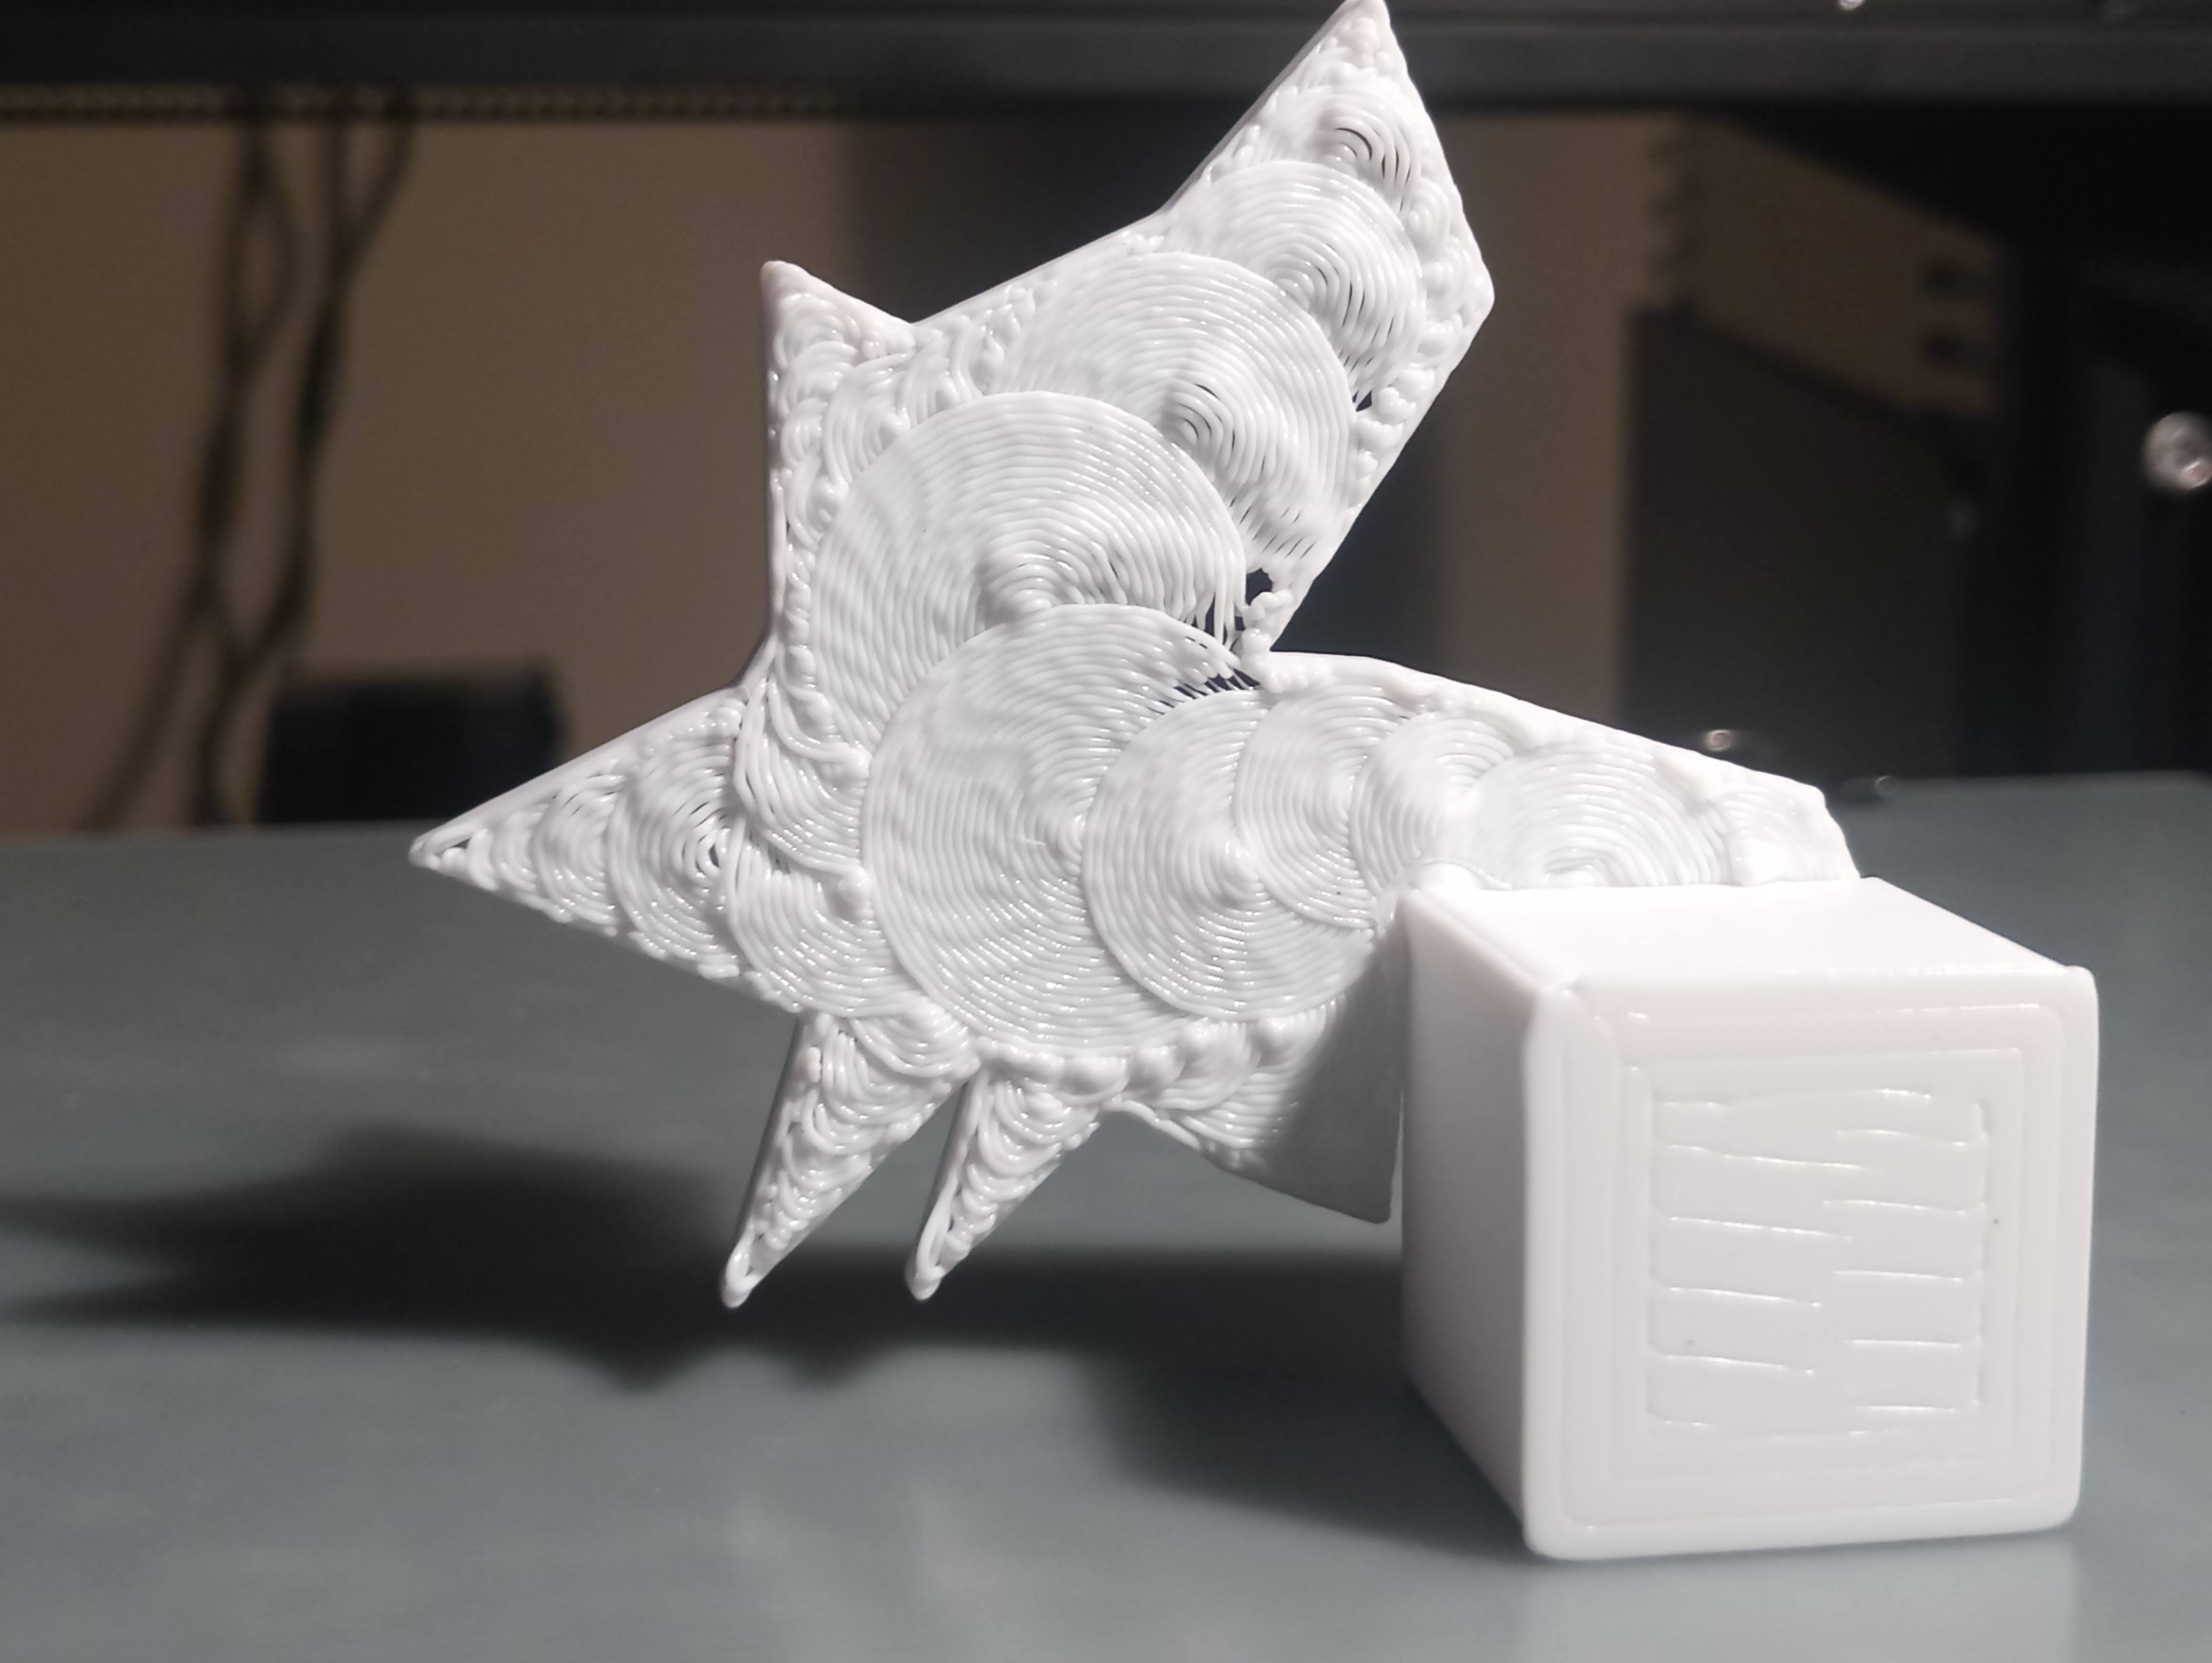
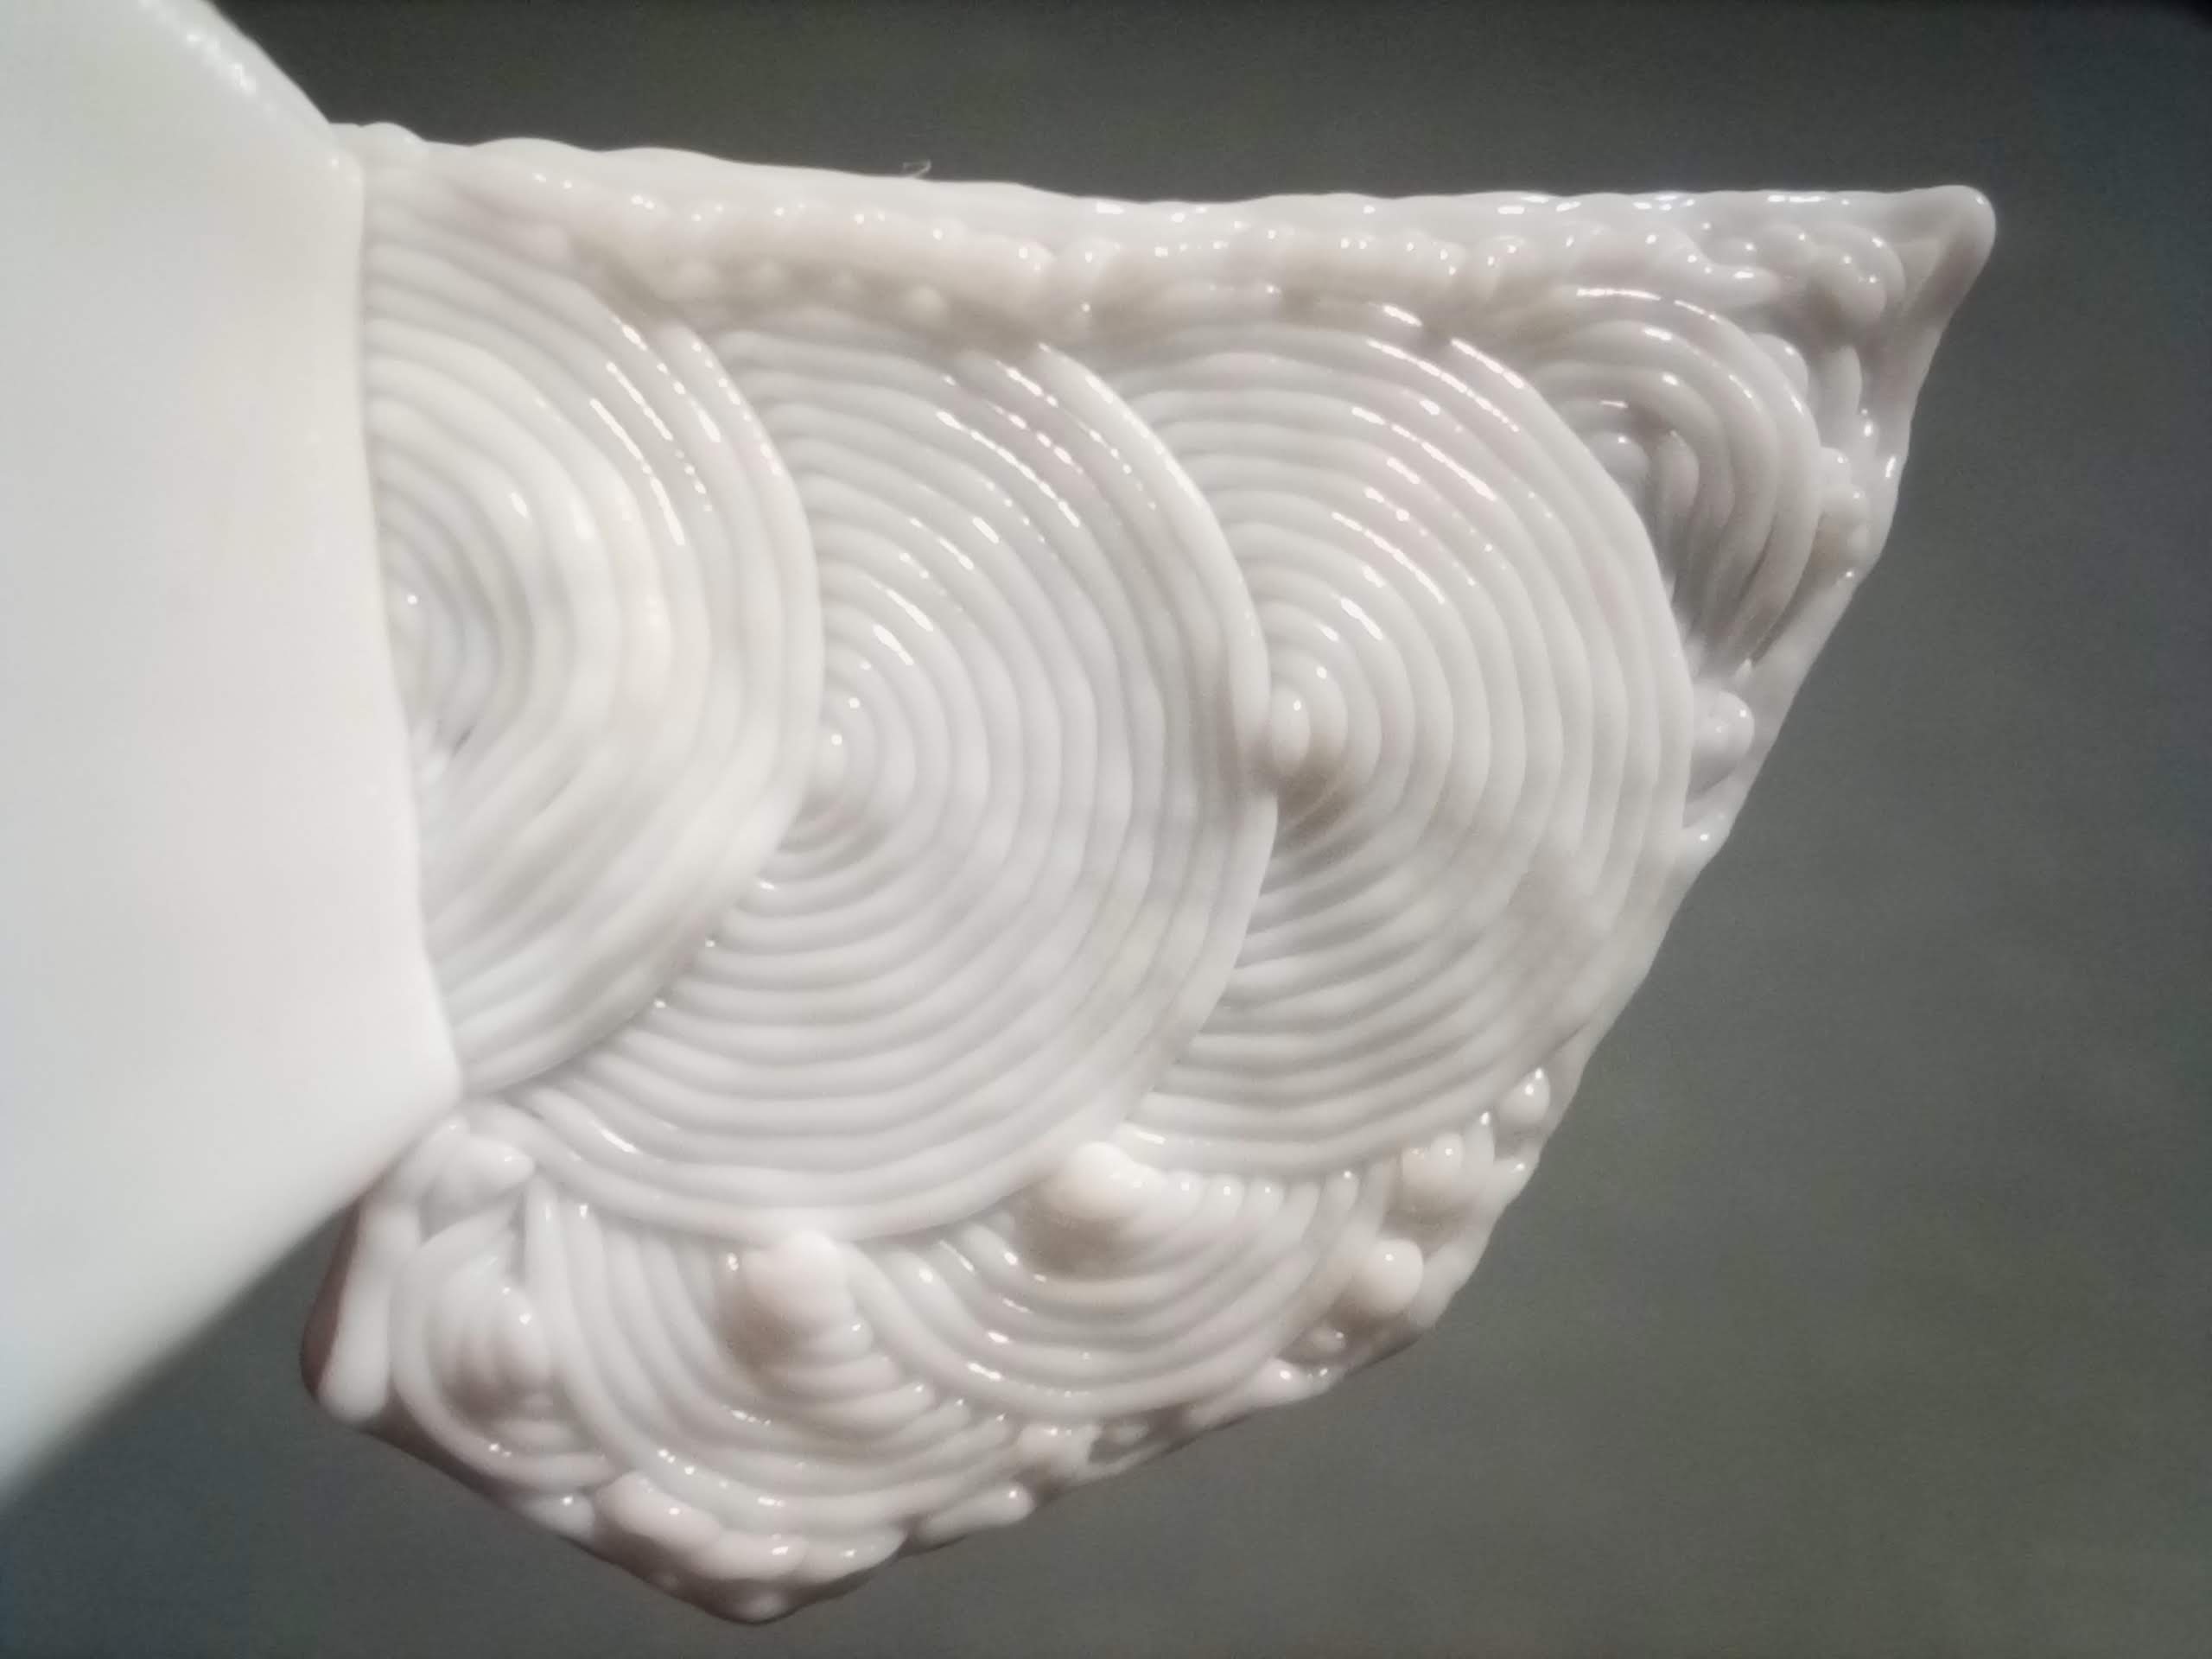
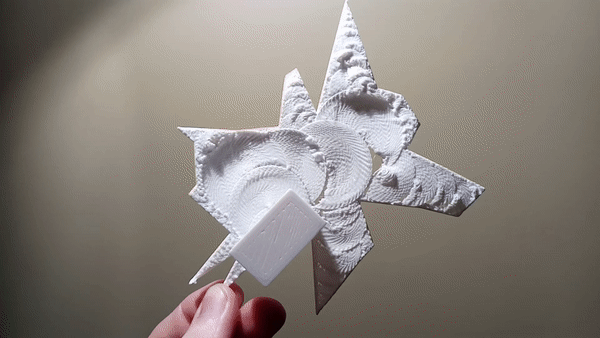
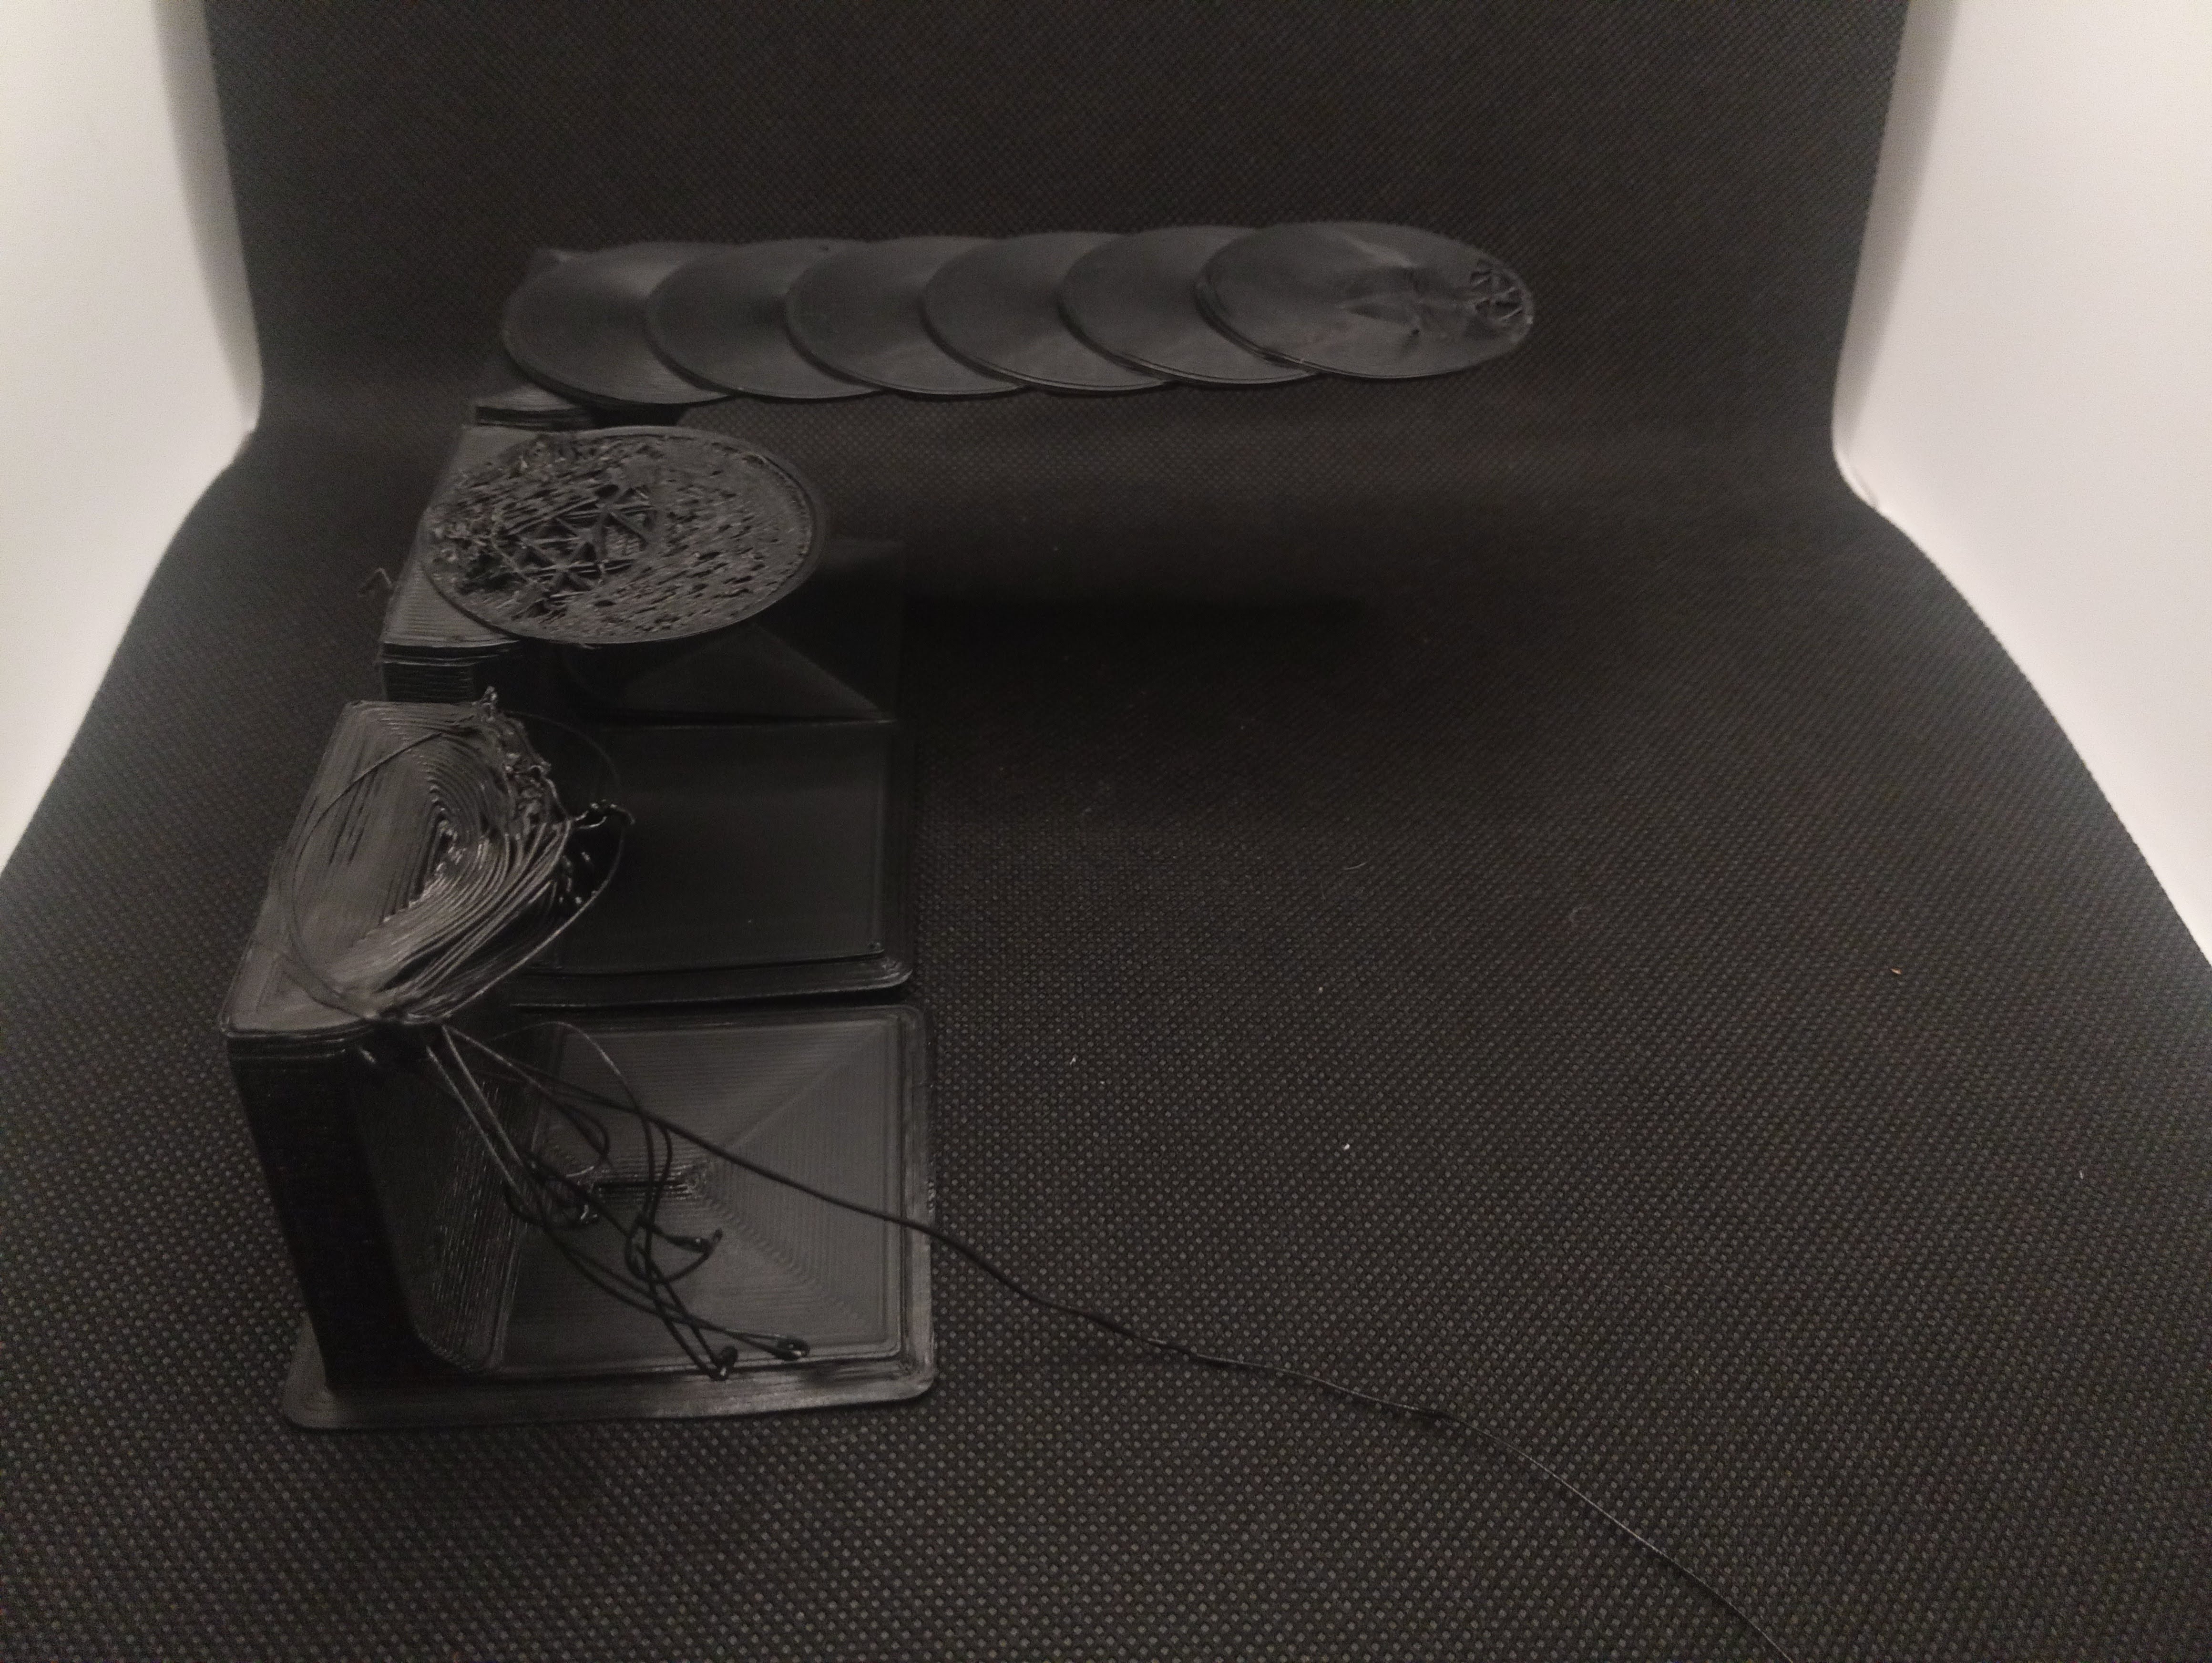
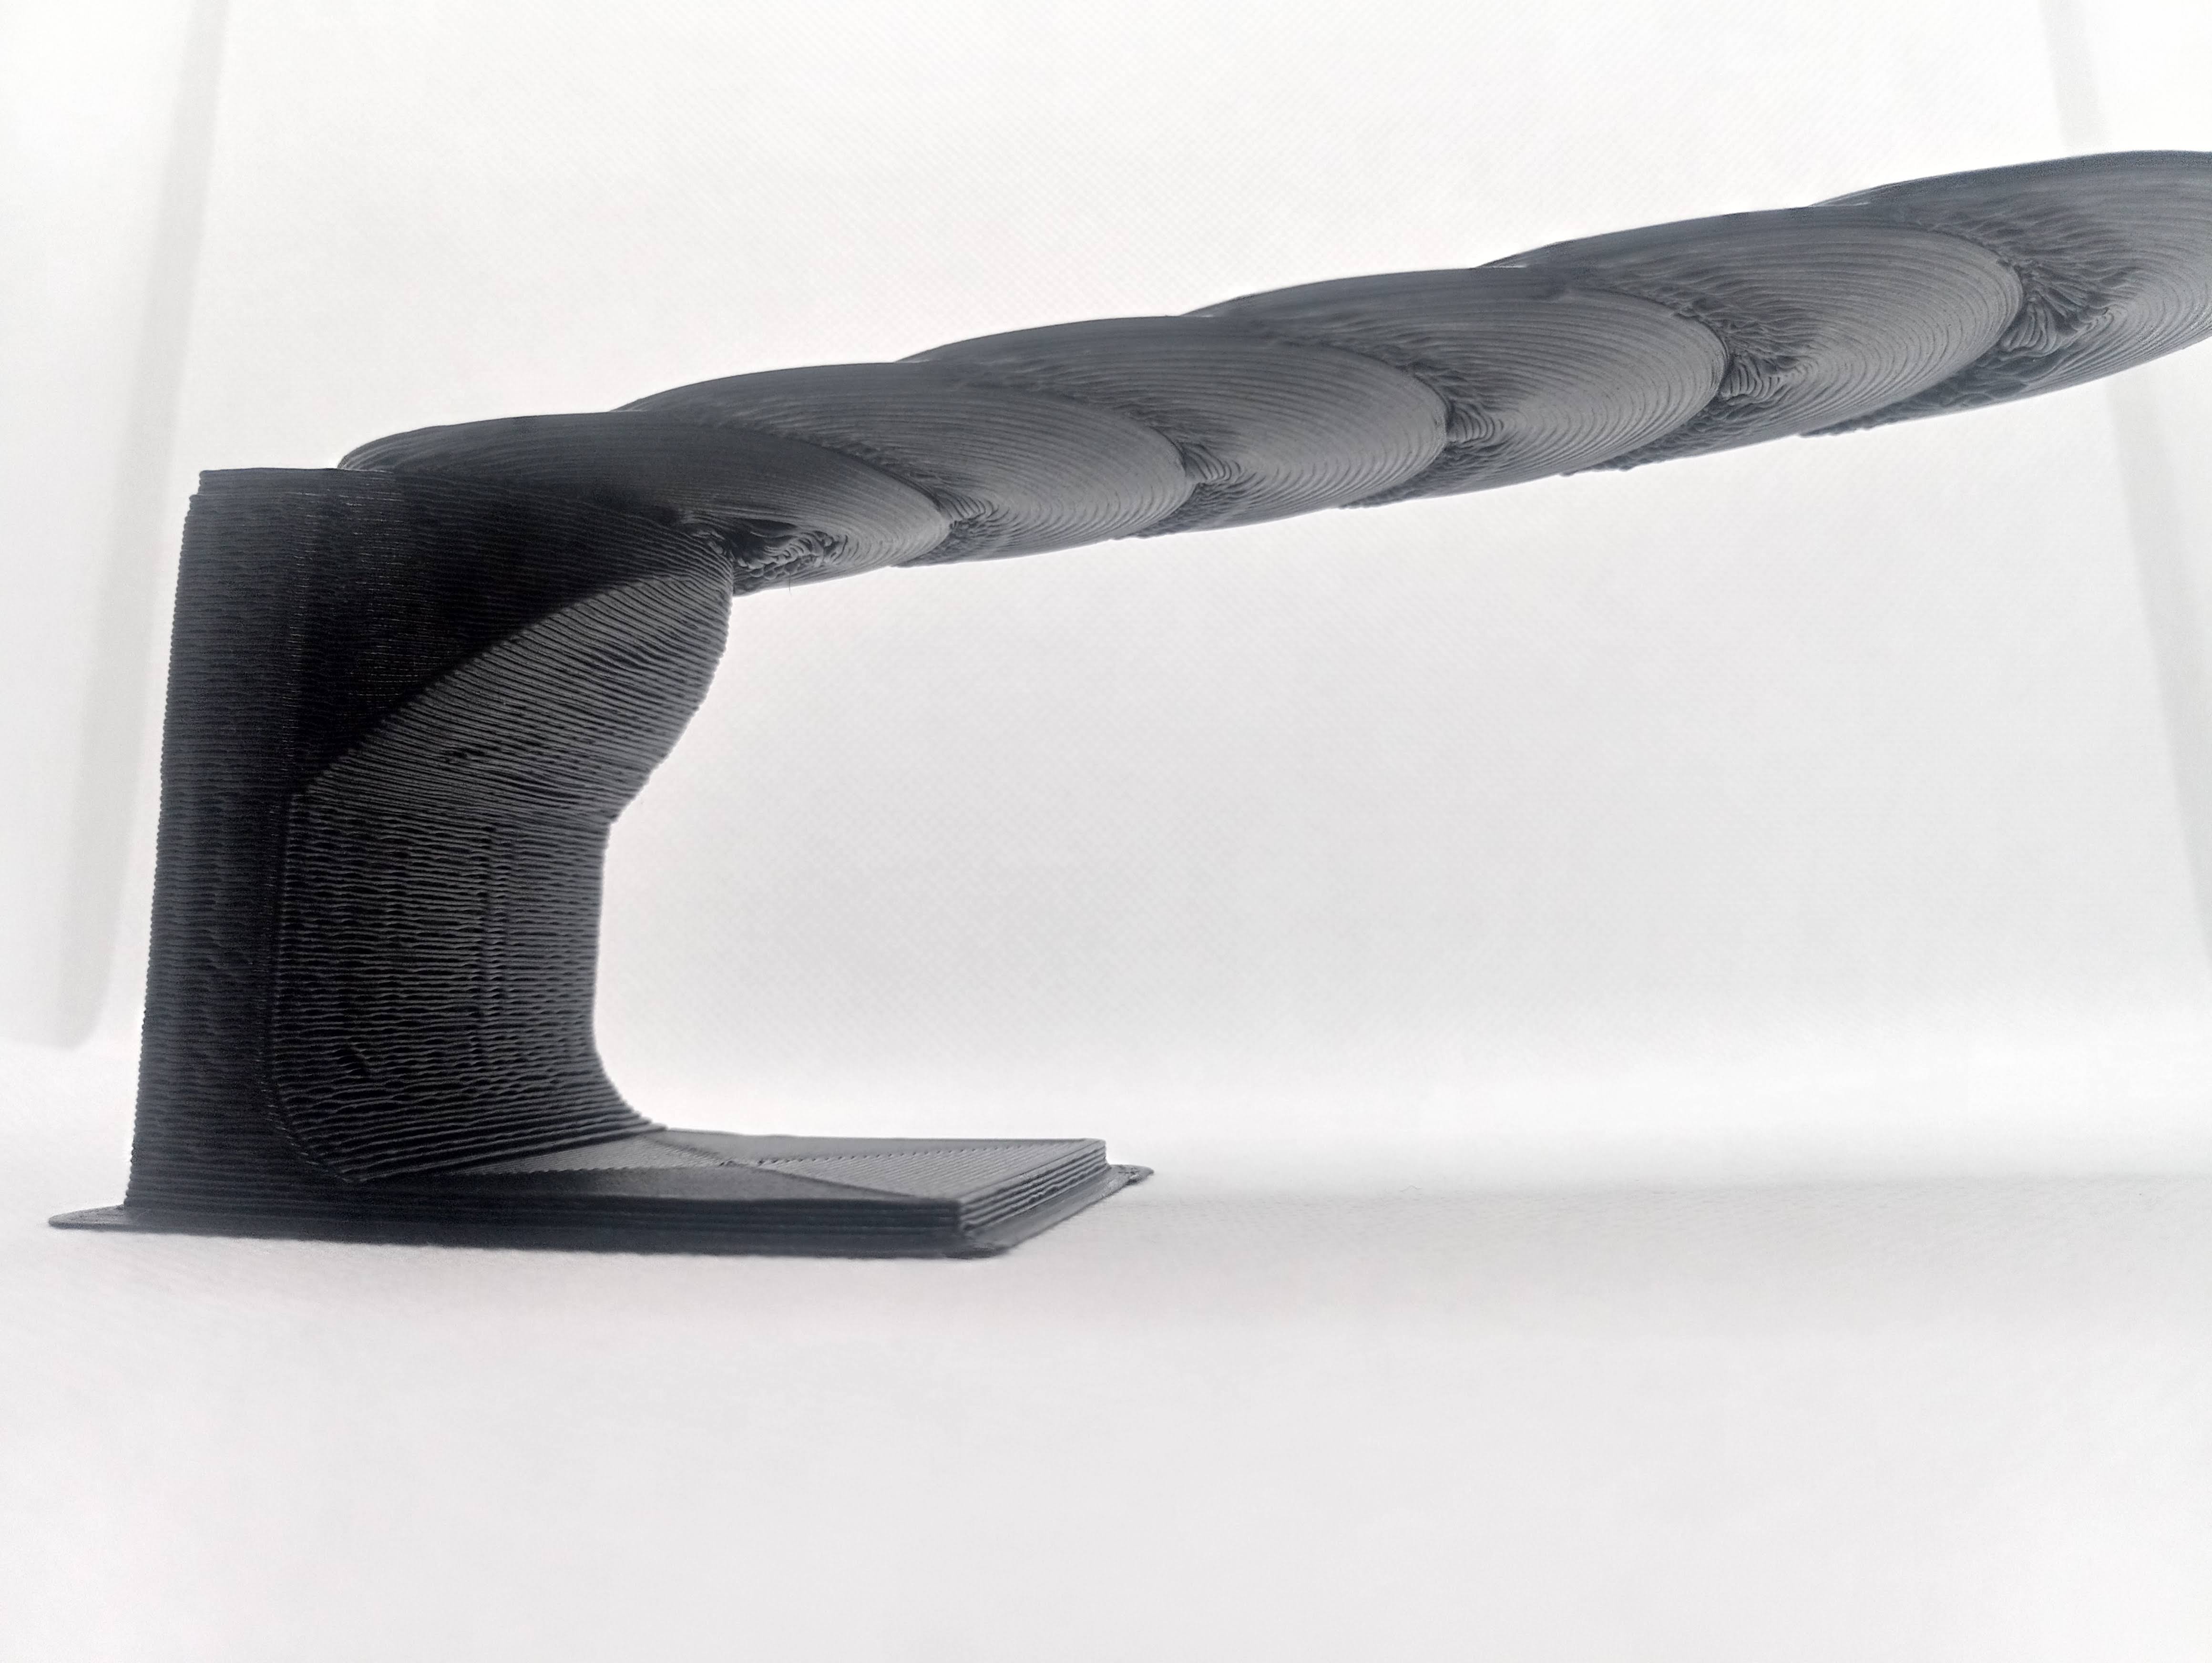
I've printed ridiculously large overhangs using this method:
2. Benefits for Automated 3D Printing
Support removal is one of the most labour-intensive parts of mass-producing 3D prints. The best way to avoid supports is by designing your prints such that supports are not required. But some designs cannot avoid overhangs entirely, so supports will have to be used.
This algorithm could eliminate labor associated with post-processing prints that require overhanging features.
The tradeoff would be a reduction in surface quality, however I believe this is just the beginning, and many improvements will be made to improve surface quality until it is acceptable for production-quality parts.
3. Background
Earlier this year, I accidentally discovered you can print an overhang that supports itself. I was just messing around with printing into thin air to see what happens. Here's the print that started it all:

Then I tried to recreate the effect on purpose
And fine tune it:
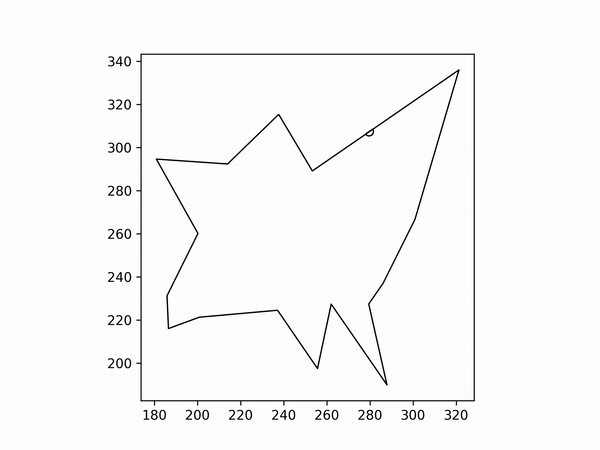
4. How it Works
-
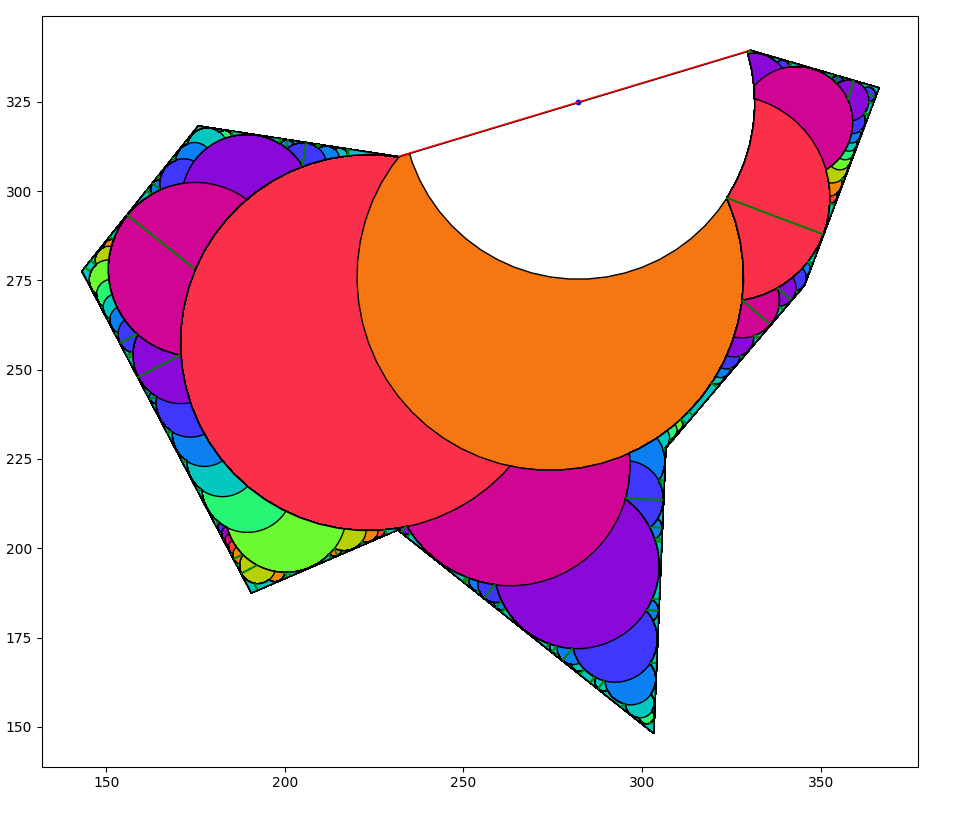
Load a polygon. This program just generates a random shape as an example. Random shapes also helped me find unusual edge-cases while testing.
-
Choose an edge to start from. I arbitrarily set the program to always choose the longest edge as the starting edge (the red line).
-
Create the largest arc possible. The center of that arc must reside on the starting line. The white arc is the first arc.
-
Recursively create arcs on arcs until the next arc would be smaller than some threshold amount. Default is half of the 3D printed line width. One arc may end up branching into two or more. The 2nd arc is the orange arc, and it branches into two red arcs. The colors in the image represent the recursion depth.
-
Turn those arcs into gcode Mainly just turning coordinates into strings using string formatting.
5. Gcode Generation
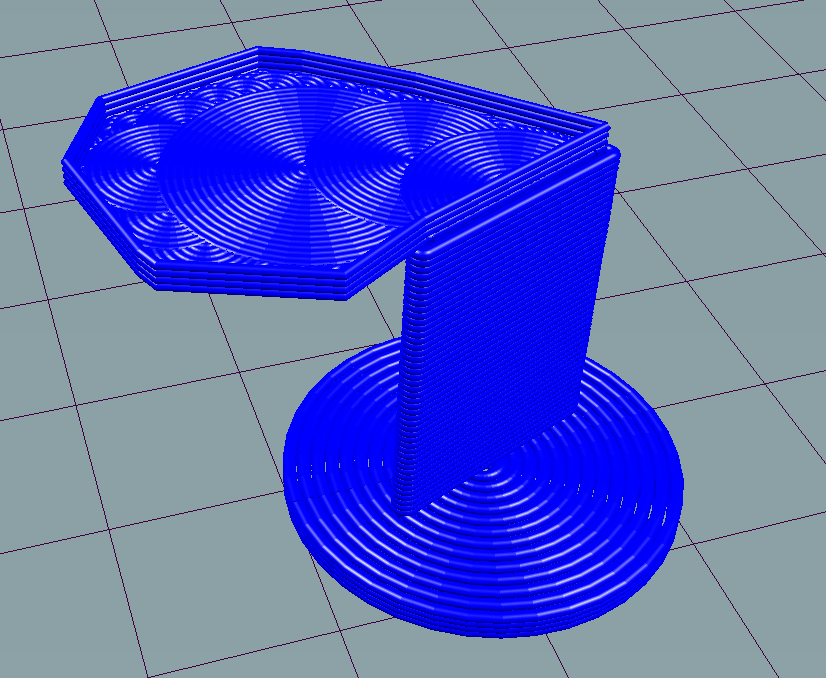
This program also generates a demonstration tower so that it is easy to print this for yourself.
6. Suggested Print Settings
There are a few rules of thumb for actually printing this stuff:
The overhang print quality is greatly improved when the material solidifies as quickly as possible. Therefore:
-
Print as cold as possible. I used 195 degrees for PLA. You can probably go even lower. If you require higher temp for the rest of the print, I'm sure slicers could insert some temp-change gcode before and after this algorithm occurs. Might waste a lot of time though.
-
Maximize cooling. Set your fans to full blast. I don't think this technique will work too well with ABS and materials that can't use cooling fans, but I haven't tested it.
-
Print slowly. I use around 5 mm/s. Even that is too fast sometimes for the really tiny arcs, since they have almost no time to cool before the next layer begins.
7. More information
The source code and full project description can be found on Steven's Github